What do the LEDs on my Orbi router and satellite mean?

A number of people I work with use the Netgear Orbing Router system.  Overall, I am very pleased with the setup and performance of these units.  Once in a while, you see colored lights coming from the router and like many things these days you just can’t find the documentation that comes with the devices to be able to determine what the lights mean.  Netgear has a great FAQ on this that gets right down to telling you what the lights mean:

Router and satellite power button LEDs

Solid green. Your Orbi router and satellite are powered on.
Solid amber. Your Orbi router and satellite are rebooting.
Pulsing amber. You must reset your Orbi router and satellite to factory default settings.
Pulsing red. Your Orbi system might need attention. Contact support.

Satellite and router ring LEDs

Pulsing white. Your Orbi router and satellite are applying a configuration or updating their firmware.
OFF. Your Orbi router and satellite are working normally.

Router ring LEDs

Solid white. Your Orbi router is powering up.
Pulsing white. Your Orbi router is in factory default mode.
Pulsing magenta. Your Orbi router ring LED might pulse magenta for the following reasons: the WAN port link is down, the router is unable to get the IP address from the modem or ISP, or the router is unable to connect to the Internet.
Pulsing blue and magenta. The Internet connection is blocked because the traffic meter is configured to block Internet traffic when it reaches the limit you configured.

Satellite ring LEDs

Solid white. Your Orbi satellite is powering up.
Pulsing magenta. When your Orbi satellite’s ring LED pulses magenta for the first time, it means that your satellite is attempting to connect to your Orbi router. If the ring LED pulses magenta for more than one minute, it could be for the following reasons: the satellite lost the connection to the router or the satellite is unable to get an IP address from the router.
Solid magenta. Your Orbi satellite ring is solid magenta for 10 seconds if it is unable to obtain the IP address from the router.
Solid blue. If your Orbi satellite ring is solid blue for 10 seconds, the connection between your Orbi router and satellite is good.
Solid amber. If your Orbi satellite ring is solid amber for 10 seconds, the connection between the router and satellite is fair.

Whats New in MacOS 10.14 – Mojave

Like each update to MacOS, there are hundreds of new features.  Here is a list of the ones I find particularly useful.

Dark Mode

One of the major changes in Mac OS Mojave is the addition of the dark mode. Personally, I find a dark mode to be beautifully stunning. It lets the colors within applications pop and provides a completely new experience in using your Mac. You can turn this on in the system preferences general panel. 

Photos from iPhone

Blink and you might miss it, but Mail hasn’t only gained a button that lets you place emojis in your message, but it gets another that lets you place an image. Click this, and you can choose to use an existing image or directly scan/capture a new one from your iPhone.  This feature is also available from the desktop by Control-clicking on the desktop and selecting Import from iPhone.  For this to work, you iPhone needs to be unlocked and on the same wifi network as your Mac.

Favicons

A favicon is small icon associated with a particular website, usually displayed before the URL in a web browser. Until this release, Safari did not provide support for these cute icons but with this release you can turn favicons. Within safari, go to preferences, tabs, and turned on Show website icons in tabs.

Dynamic Desktop

In system and preferences, desktop and screensavers, a new screen view exists for the desktop. It’s called dynamic desktops and Apple provides one related to the safari motif. The desktop picture on your screen changes over today as the sun would change in the Mojave Desert. A very nice look.


Stacks are a great addition to MacOS.  This lets you store files of the same kind such as PDF, JPG, etc in a single icon on the desktop rather than cluttering your desktop with many files.  To turn it on, Control-click on the desktop and select Use Stacks.  In the same location you can set what type of stacks it creates.  I find the Kind method to be the best for me.

Recent apps in the Dock

You’ll like this iPad feature. Icons for the three most recently used apps that you don’t already keep in your Dock will be made visible between the Settings and Downloads icons. This is enabled in System Preferences>Dock using the Show recent applications checkbox.

Automatically keep your Mac updated

Apple has moved Software Updates to its own dedicated pane in System Preferences. Open it, and you can ask your Mac to automatically check for and install software updates. You can also require it to automatically install app updates and security updates for you.

Tighter permissions

Apple has taken a step toward convincing Mac users not to cover their iSight cameras with tape when not in use by introducing new Security System Preferences that will tell you when apps request access to your Camera or microphone. Another security enhancement (available in Notifications) lets you decide if you want to always show notification previews for an app or if you want these to be made visible only when your Mac is unlocked. That’s useful if you work in a public place.

New Screenshot Tool

You have always been able to use Command-Shift-3 to capture the full screen or Command-Shift-4 to capture a section of the screen.  In MacOS Mojave you can now use Command-Shift-5 to bring up a new screen shot tool.  With it you can capture the entire screen, a portion of the screen, or a selected window.  But this tool gives you the ability to capture a video of the screen or a portion of the screen.  There are options to select where to save the file and to set a timer delay for the capture to happen.  

New Mac App Store

Apple first debuted the Mac App Store in 2011 but has given it very little love since then. With macOS Mojave, it is giving the App Store a complete redesign similar to the one it debuted with iOS 11 last year. Apart from the new design, there’s a new Discover tab which would be updated on a weekly basis by editors over at Apple to help you discover new apps.

Gallery View in Finder

The Finder gets a new Gallery View in macOS Mojave which makes it easier to skim through your photos and videos. It also has metadata support which is displayed in the Preview pane so you can quickly see important details of a photo.

With this release, apple has begun the process of making iOS applications work on the Mac.  Apple debutes 4 iOS apps in MacOS Mojave.

Apple News App

macOS finally gets a dedicated Apple News app with a new design. There’s also a sidebar in the app for easy and quick navigation.

Home App

There’s a new Home app in macOS as well that will allow macOS Mojave users to control their HomeKit-enabled accessories easily.

Voice Memo

Another iOS app that is going to be available in macOS Mojave is Voice Memo. Using the app, one can quickly and easily record personal notes, meetings, and more. Voice Memos are also synced across all your devices using iCloud.

Stocks

Finally, the Stocks app is also going coming to macOS Mojave with a brand new interface, personalized watchlist, and interactive charts.  This app is basically the same as the iPad version of the Stocks application.


Here is a feature you can put in the Not quite there yet file….

Group FaceTime

Apple is debuting Group FaceTime with iOS 12 and the feature is also a part of macOS Mojave. With Group FaceTime, you can make a group video call comprising of up to 32 people. Even better, you can use Animoji, Memoji, stickers, and more while on a FaceTime call now.

This will be added soon in a MacOS update, likely at the same time it gets added too iOS.

I am sure there are quite a few more interesting things in Mojave but those are a few I find most useful.

iPhone X: Return to the first home screen

Many of us have been using iPhones for a long time. We all know if you’re on a home screen that is not the first page you can simply double tap the home button to return to the first page of your home screens. Unfortunately, without a home button, the iPhone X doesn’t work that way.

I I have always wondered if Apple provided a shortcut on the iPhone X to do that and so I looked it up. It’s amazing I haven’t run across this simple trick before.

On the iPhone X To move from any application back to the home screen all you have to do is quickly swipe up from the bottom of the screen. But if you’re already on one of your home screens, and you again swipe up from the bottom of the screen quickly, it takes you right back to that first page of your home screen just like double tapping the button did in the past.

I probably should’ve looked at trick up sooner.

Finding Topics for your Website

Over the years, I have setup a number of websites. Once I setup a site for someone the first question I usually get is “I don’t know what to write about”. There is a site that looks like it would be useful. Check out Answer the Public.

This site aggregates bing and google search history to tell someone what people are asking about a particular topic. For instance, look at a search for ‘Apple Pages’.

These are the “long tail” questions people are asking in Bing and Google about Apple Pages.  This gives a site creator an idea of what people are looking for so they can taylor their site to give them what they want.  The more of these questions you cover in your site, the better chance you will get the hits.

This can be very helpful in giving someone ideas for what to write about and post on your website.


Cleaning your iPhone cases and Covers

For a long time I have been looking for something that would lead those rubberized covers and cases we use on our iPads and iPhones.  Over the years I’ve tried many things from different types soaps to even running them through the dishwasher.  Believe me, the dishwasher idea was not a good one. Unfortunately, most of the soaps I tries, while able to remove dirt, did a very poor job in also removing the oils from fingerprints.

Recently, I’ve run upon something that does a terrific job. The item called a Mr. Clean Magic eraser.  It is a foam sponge that is infused with some light bleach.  These items are great for removing scuffs off walls and stuck on dirt on a auto interior, but I had never considered them for cleaning the rubber coated iPad covers.  I gave it a try and found it to do a terrific job.  I simply moistened the sponge and vigorously rubbed the cover.  Then I dried it thoroughly.  I dont recommend this for the glass but it definitely Dows a great job on the covers.

The next time you need to clean one of those covers, give it a try.

Application Specific Passwords for your iCloud Account

App-specific passwords allow you to sign in to your account securely when you use apps that don’t natively support two-step verification or two-factor authentication. There has been quite a bit of conjecture on the internet that very soon, any non Apple application that access iCloud data, like Microsoft Outlook, and specifically Windows machines accessing iCloud information will be required to use an application specific password.

Before creating app-specific passwords, two-factor authentication must be enabled for your Apple ID. As of iOS 10.3 and later, two-factor authentication is automatically setup for new Apple ID accounts. iOS 10.3 also auto-prompts existing accounts to upgrade. This makes sense as apple has been pushing people to use two-factor authentication now in many ways.

To make an app-specific password, do the following:

  1. Sign in to your Apple ID account page at https://appleid.apple.com
  2. In the Security section, click Generate Password below App-Specific Passwords.

  3. Fill in a name for the password you are creating so you can remove it if you desire later
  4. A dialog will come up and show you the password that was generated

  5. After you generate your app-specific password, enter or paste it into the password field of the app as you would normally.

You can have up to 25 active app-specific passwords at any given time. If you need to, you can revoke passwords individually or all at once.

If you want to revoke one of these application specific passwords, in the security section of your applied management page, click on edit.  Then under App specific passwords, click View History.  You will be shown a list of all the application specific passwords you have used.  Click on the one you want to remove and click to remove it.

Get used to this because tighter security is coming to an iCloud account near you very soon.

Which Hard Drive do I choose for backing up my Macintosh or my PC?

Q: With all the choices, which Hard Drive do I choose for backing up my Macintosh with Time Machine or my PC?

A: I wish there was a simple answer, but unfortunately there isn’t one.  Choosing a backup drive involves a number of factors that need to be take into account.  Many of these factors depend on the type of machine you have and the size of your original harddisk.  In this article, I am going to look at a number of decision points and attempt to provide some assistance in making that selection.

Internal vs External

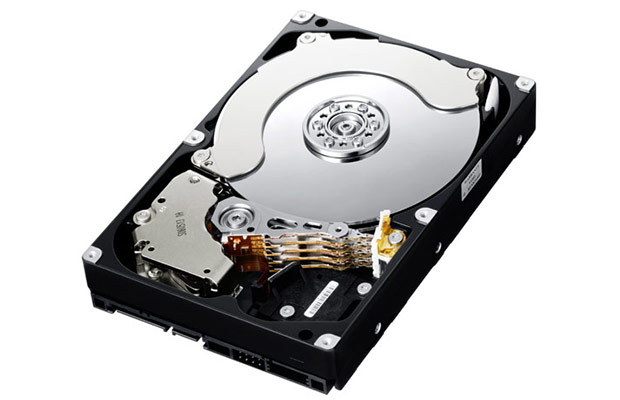
Raw drives are drive mechanisms that are sold without a case,   These drives are intended to be installed inside the computer box.  For Mac users, this decision point is simple.  None of the current or recent Macintosh machines can support adding an internal drive.  If you use a PC, and have a tower yo use an internal drive but then you have to open the case and install it.  While usually not too difficult to do, it just adds one more possibility to get things configured wrong.  There was a time where raw drives were much less expensive but that time has passed. So, in my opinion, external is the answer.

Brand

These day, there are many brands of drive available at your local Staples or Best Buy.  The brand of the drive actually has little to do with the quality of the unit.  The actual harddisk mechanism inside the box is likely made by 1 of 3 manufacturers and telling the difference between them is not really important.  It really all boils down to case design, interfaces and price.

Don’t be fooled by vendors that want you to spend more money for either a “Mac” version of a drive or for a “premium” model.  The drive mechanism is likely the same part.  Mac formatted drives are just that, pre formatted for a mac.  That is no big deal because you can easily reformat a PC formatted drive on the Mac.  In fact, time machine recognizes a new drive plugged in and asks to reformat it if it is a PC model.  Don’t pay extra for this formatting alone.

Also don’t pay extra for backup software.  Time Machine, which is a builtin feature of MacOS 10.5 Leopard or newer, is better than any of these backup solutions that ship with new drives.  Only consider backup software if you are using 10.4 or older on a Mac and in my opininon, your money is better spent upgrading a current MacOS release to do your backups if your machine will handle it.

For PC users, it depends on the operating system.  In Windows 7 or 8, backup is a control panel that you can configure.  In Windows 10, it is called File History.  Select the Start​ button, select Settings > Update & security > Backup > Add a drive, and then choose an external drive or network location for your backups.

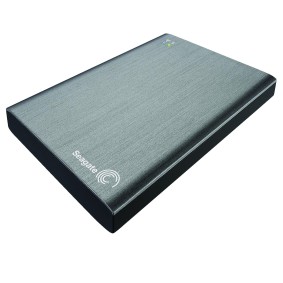
All that said, I do have a couple of favorite brands.  Both Seagate and Western Digital make fair priced external drives that work very well.  There are a number of models available and best of all, you can get them locally at the Best Buy of Staples store.  When I recommend a drive, I choose one of these two.  One of them is usually in the weekly ad from Best Buy or Staples and on sale.

Desktop vs Portable drive

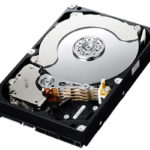
Either a desktop or portable drive will work fine.  Portable drives are usually smaller, have less capacity, and cost more.  If you are using a desktop Mac, purchase a desktop drive.  There is little reason to spend the extra for the portable one.  If however you are using a laptop, you may want to still purchase a desktop drive.

Desktop drives are usually made from a more available, more reliable and larger mechanism.  These drives usually use a 3 ½” drive mechanism.  These drives are available in larger sizes and at less cost.  Portable drives use a 2 ½” mechanism just like those used in laptops.  These are smaller, have less capacity, use less power, but cost more.

One important consideration is that a Desktop drive will need to be plugged into electricity while a portable drive usually is self powered from the USB or the Firewire bus.  This is nice for travel since you don’t have to plug it in to power, just the computer.

If you own a laptop, but use it quite a bit in one place, a desktop drive is likely a better solution.  If you want a backup drive that can travel with you, choose a portable drive for that application.

Size

My recommendation is to think of the future and purchase a drive as large as you can afford.  You will be amazed at how data accumulates and how fast you fill the drive you have.  Raw drive mechanisms are available as large as 6Tb today.  External desktop drives are available that large also but the real sweet spot here today is the 2Tb or 3Tb drive.  Portable drives are available as large as 4Tb with their sweet spot being at the 1TB to 2TB level.

On a Mac Time machine is very smart.  It will use all the space you give it and continue to keep copies of data from the past.  The general thing to remember is always select a drive twice the size of the internal drive you want to backup if you can.  This way you have plenty of space for multiple backups in time machine.  This gives you the most flexibility.

On a PC, you may need to ‘prune’ you backup when it fills the drive,  You can manage the backup space in the same location that you setup the backup in Windows.

Interface (ports)

Drive makers, including Western Digital and Seagate make many models.  One of the many considerations for drive pricing is the type of interface ports the drive has.  Some of the common interfaces you’ll see are:

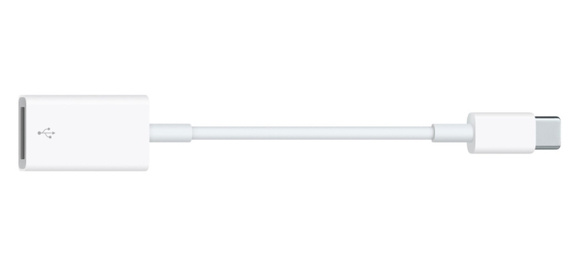
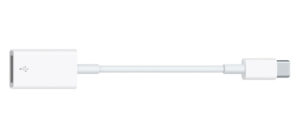
USB – all drives these days include USB 3.0.  USB 3 drives are backward compatible with USB 2 so no matter if your machine supports only USB 2, get a USB 3 or 3.1 drive.  Newer machines may have a USB-C style connecter so be sure to check that out before bringing a drive home.  If your machine supports USB-C, use that connection because it will provide the fastest throughput.  If the drive you chose still uses a USB 3 port, a cheep USB-C to female USB 3 adapter can be had for less than $10.

Firewire – In past years, I would have always recommended that you use Firewire.  But these days, Firewire is a dead technology.  If you have a Firewire port on your computer and you want to use it, be sure to select a drive that has both a Firewire and a USB interface to future proof your purchase.  Firewire drives may be hard to find since the technology is being phased out..  Some Macs like the new Macbooks and Macbook Air do not have Firewire at all.

eSATA – External SATA.  SATA is the native interface od all of todays drives.  The External version of this is called eSATA.  This connection is only available on some tower PC’s and is problematic so I recommend considering it.

Ethernet – This port allows a drive to work connected directly to an Ethernet network.  It is technically called Network Accessible Storage or NAS.  This is what Apple did in the time capsule (a great but more expensive backup unit).  Having this port allows a drive to hang on a network rather than be connected to a machine.  But, it is important to note, these drives are not compatible with Time Machine unless you use the Apple Time Capsule.  If you need some extra traditional storage that you may want to share, this is a good option but for Time Machine, it is is only a consideration if the drive is advertised to support it.  One such drive is the Western Digital My Cloud.  It supports time machine and a lot more. I use one as a secondary backup and while not as fast as directly attached storage, it works great.

So what do you get?  My recommendation here is to get a drive uses USB 3.  Some newer drives may have USB-C connections, and I suspect we will see this a lot more in the future but for now, converting to USB-C if that is the only port your machine has (2015, 2016 MacBook or 2016 MacBook Pro) is simple and inexpensive.

Price

Drive prices have dropped a lot lately.  Price should be one of the last things to think about.  My recommendation is to purchase drives near the sweet pricing spots I described above.  These are the ones in the Sunday circulars. Again, I recommend you purchase a drive as large as you can afford.  Larger drives above the sweet spot size will cost a little more and are usually fine choices if you have a great deal to backup.  These larger drives will become tomorrow’s sweet spot and cost will go down.

What will it cost?  Today, in February 2017, an 1 Tb USB external drive costs between $59 and $79 depending on features and sales.  A desktop 5Tb drive runs about $129 to $149.  With prices this low, more is always better.

Conclusions

All this is probably much more than you want to know about backup drives.  These conclusions will be my opinions of what you should get in a nutshell:

•    Consider as a first choice a Western Digital or Seagate drive
•    Get a desktop Model unless you need to backup your laptop on the road
•    Size the drive a minimum of twice the size of your internal drive
•    Get a drive with a USB 3 port even if you don’t have a computer with USB 3. Someday you will and USB 3 is much faster than USB 2.
•    Watch the weekly circulars.  Drives are always on sale

Q: How do I print labels from Apples Pages Program?

A:  I am making the assumption that you have labels purchased that go into your printer.  If that is not the case, let me know.

First you need to get a template for the label material you have.

Here is a page with lots of these templates.
Screen Shot 2016-04-27 at 8.09.23 AM
If your labels are Avery, the ones at the bottom correspond to Avery label numbers

After you download the template go to the top of the Safari window and click the downloads button.

Screen Shot 2016-04-27 at 7.56.54 AM
Once you click on it, double click on the document template you download.

Screen Shot 2016-04-27 at 7.57.15 AM
This brings up this dialog:

Screen Shot 2016-04-27 at 7.58.31 AM
Select Add to Template Browser.

Now the template is loaded in Pages and you can start your new labels.

Now pages should start and put you in the new document mode.  On the left is the My Templates dialog.  Select the template you just downloaded.

Screen Shot 2016-04-27 at 8.01.06 AM
Double click the templet to get started. This will open a new label sheet in pages and have all the labels created.

Now you can type the label into the document and when done print the page.

Screen Shot 2016-04-27 at 8.08.00 AM

How to Backup your Critical iCloud Information

icloud-experiencing-issuesIn the early days of iCloud, it was very common for something to go drastically wrong and iCloud and delete or scramble your data. After seeing this happen many times, I had gotten into a routine where I would back up my critical information by hand from iCloud.  For the last few years I haven’t seen this problem and have become quite complacent about it. Unfortunately, complacency generally feeds disaster, and in my case that almost happened.

The great thing about iCloud is that you can change something one time and it synchronizes around to all of your devices keeping them all up-to-date. Unfortunately that’s also the Achilles’ heel. If something goes wrong on anyone device or if you accidentally delete something from one device it synchronizes to all your devices and the information that you had before may be permanently lost. Such was my recent case with iCloud.

Somewhere along the line in updating to iOS 9.0 or 9.1, and updating my Mac to El Capitan, I came to notice that my Safari bookmarks or not the same as they used to be. Looking at them closely I saw that many of my bookmark categories had been duplicated, others had been rearranged, and if you were missing entirely. It seems that one of those upgrades did something nasty to my bookmarks. And since I had gotten out of the habit of backing up my critical information by hand, my only choice was to go back and fix them all by hand and let them sync again. So that’s exactly what I had to do. I set down at my Mac and made all my changes to get my bookmarks back as nearly as they had looked before the problem.

While investing a couple hours and cleaning up my bookmarks was probably not devastating, it did point out to me that continuing the routine of backing up your critical iCloud information makes good sense.

So what information do you consider critical? For me, that would be my contacts, calendars, Safari bookmarks, and my notes. Apple provides a method to back up by hand the first three but unfortunately the new notes application lacks that ability. So here’s how to handle a back up of the first three pieces of critical information that iCloud stores:

Contacts
Open the contacts application on a mac and go to the file menu and select export. Next select export archive from the menu. Pick a location to store your back up, and name it something that has the date included. This way you’ll be able to tell the newest one if you need to recover.

Calendars
Again on a Mac, open your calendars application go to the file menu, select export, and export a calendar archive. If you’ve been keeping track of calendars for a long time this may take a few minutes. It will again ask a location and I typically use the same naming convention I did with my contacts.

Safari bookmarks
Open Safari on your Mac, and select File and then Export Bookmarks. Pick the same location to store your back up, and name it something that has the date included.

Notes
When it comes to notes that’s another story. You can export individual notes as a PDF file but backing up hundreds of notes that way would be difficult.  If you want to dig down into the bowels of your computer, your notes file is actually stored in…

~/Users/<username>/Library/Group Containers/group.com.apple.notes

Once you selected that folder, you can simply go to the edit menu and say copy. Then paste that file into your backup location. If you can’t find it from the path you probably don’t need to be down in these folders in the first place.

Next I set a calendar alarm to remind me to do this once a month. By doing this monthly I am sure myself but for some reason iCloud has a hiccup, my information will be easily recoverable and reloadable.