I have been testing out a little Samsung Gear 360 camera to create 360 degree panoramas. Here is a sample of what it shoots.
(click on the image then move around in the photo)
I don’t quite have the workflow down but I was able to make it work.
I have been testing out a little Samsung Gear 360 camera to create 360 degree panoramas. Here is a sample of what it shoots.
(click on the image then move around in the photo)
I don’t quite have the workflow down but I was able to make it work.
With Apple already in beta testing iOS 11, it’s always good to go back through the list of things that you need to do to prepare before updating your phone with a major operating system update. If you follow these simple steps, the odds of your update going well are greatly increased. Over the years Apple has made installing new updates pretty simple. When the update is ready it will show you on the device by showing you a small red number on top of General icon in the Settings application. But many times if you go into system updates and check for an update it will show you it’s available before the icon shows. If you’re in a hurry to update, you might give this a try.
1.) Check to see if your device is iOS 11 capable
The iOS 11 update is officially coming to the iPhone 5s and later, all iPad Air and iPad Pro models, iPad 5th generation, iPad mini 2 and later and iPod touch 6th generation. This means popular devices like the iPhone 5 and iPad 4 are staying put on iOS 10. If Apple releases any new devices, iOS 11 will be standard on them.
2.) Make sure you have enough space for the update
iOS 10 required as much as 2GB of space and while its unknown how much its successor will require, you can be sure its going to be similarly large amount. Apple will prompt you before downloading if you do not have enough space, so either way you will either have to get rid of some unnecessary apps, photos, music/TV shows/movies or other data you might not need right on your device . One place that I see space often used on iOS device is in the camera roll. If you sync your photos over to your computer and delete them from your phone that will free up that space. You can always put photos back on the phone using iTunes at the time of sync. In previous releases, Apple has offloaded applications to automatically free up space but it is always a good idea to do the cleanup yourself, just to be sure.
You can check how much space you have by going into settings and then general. Select about and then it will tell you in the list how much free space you have on your device. iOS updates often have additional applications updated too. Apple generally updates many of their apps at the time of the system update so you’ll need additional space for those. Don’t cut your space to close.
3.) Is your device running iOS 10.x.x?
You’ll likely be able to update from any version of iOS 10 version and quite likely any version of iOS 9. If your device is running a version older than iOS 9, you may have to update that far first and then move to iOS 11. We will have to wait and see to be sure.
4.) Do you have the latest version of your apps?
If you don’t want to lose your app or its data, make sure they are up to date. This will also ensure you get the most out your apps in iOS 11, as they will have been tinkered with for iOS 11 integration. Just check for updates, and apply all updated applications that you find prior to the operating system install. Apple usually announces the release date of a new iOS version about a week before it is available. That is a great time to update your apps.
5.) Back up your device!
This is the most important step you need to take before updating. While everything is done to ensure the transition to iOS 11 goes smoothly, major updates can go awry. To back up, simply follow these steps:
I also recommend encrypt in your back up. If you encrypt your back up, and give it a password that you have to enter when you restore it, all of your passwords that you stored on your device will remain. This keeps you from having to go back in and reenter passwords in applications, or mail, before you can use the new OS.
So here is my final bit of advise…..
For most general users, it is often good to wait a about a week after the new OS is available to make sure there are no issues with it.
That’s about it. You’re ready to go. Enjoy the new OS. All the new features will be great fun to play with.
App-specific passwords allow you to sign in to your account securely when you use apps that don’t natively support two-step verification or two-factor authentication. There has been quite a bit of conjecture on the internet that very soon, any non Apple application that access iCloud data, like Microsoft Outlook, and specifically Windows machines accessing iCloud information will be required to use an application specific password.
Before creating app-specific passwords, two-factor authentication must be enabled for your Apple ID. As of iOS 10.3 and later, two-factor authentication is automatically setup for new Apple ID accounts. iOS 10.3 also auto-prompts existing accounts to upgrade. This makes sense as apple has been pushing people to use two-factor authentication now in many ways.
To make an app-specific password, do the following:
You can have up to 25 active app-specific passwords at any given time. If you need to, you can revoke passwords individually or all at once.
If you want to revoke one of these application specific passwords, in the security section of your applied management page, click on edit. Then under App specific passwords, click View History. You will be shown a list of all the application specific passwords you have used. Click on the one you want to remove and click to remove it.
Get used to this because tighter security is coming to an iCloud account near you very soon.
Windows 7 was a terrific operating system. In fact for many things you do today Windows 7 is still preferred over windows 10. Many people continue to use Windows 7 machines very efficiently and insist that they’ll never move to windows 10. To be quite honest, I completely understand that feeling and in many ways think they areright on the money. But there comes a point of time when you need to face a few facts and I believe the recent ransomware hacking that were seeing may be one of those first early facts that you might want to make note of.
Microsoft says it still supports Windows 7, and in fact Windows 7 is still the promenade operating system being used in business today. If you have a Windows machine running Windows 7 and are happy with it I think continuing to use it is the right thing to do. The real issue becomes when it’s time to purchase a new computer and have to decide what to purchase. Do you buy a windows 10 machine and move forward, or do you drag your feet in the dirt, insist on Windows 7, and join the window 7 forever crowd? This is a decision many people will be faced with and I want to tell you a few things that I’ve seen in the past that make that decision pretty clear.
Of course, I use a Mac much of the time and I’ve seen the same thing on the Mac side. People don’t want to move to the new operating system because it’s different, because it may slow their machine down, or for many other seemingly valid reasons. But Apple does a good job of forcing you forward. It provides the new versions of operating systems for free, it provides updates for most of its apps for free, and it tries to ensure the new releases of the operating system make your machine run at least as fast as it did prior to installing the new release. But there still are a few machines that I run across still running old Mac operating system like snow leopard, an operating system that’s at least seven years old. It’s many of the same people that then wonder why they can’t update their applications, or why new printers don’t provide drivers for them, or things just don’t quite work when connected to their brand-new iPhone.
Well people I’m here to tell you windows is going that same path. Windows 7 today may still be very viable, but a new machine you purchase today needs to be usable for at least five years, and I think that may be a problem. The recent ransomware attack, targeted Windows XP users. These people also believed the Windows XP was going to be the operating system they used forever. It was fast, and it was thin, so it didn’t require a lot of resources on older computers. But Microsoft ended support for Windows XP. So the XP operating systems quit being updated leaving holes open for attackers to go after. Sure, Microsoft did issue an emergency patch for Windows XP related to this outbreak, but we can’t depend on that and in fact in my opinion it provided a disservice to all computer users. It’s just encourages people to stick with the old and not move to the new. Now Windows 7 today is not in that same situation, but it’s time must be coming.
I remember one time that OS2 was the operating system used by most banks. Many of those banks held onto that operating system as long as they possibly could until it got them to a point that there systems were in serious trouble. At that point they were forced to make an upgrade rather than making an upgrade in a timed and planned fashion. In fact many believe it was that decision, that kept many banks from providing electronic banking and Internet-based technologies to their customers for a long time. In hindsight, they made a very poor decision.
Last week I set up a new machine for user that purchased Windows 7 on that machine. They didn’t want to go through the learning process to learn windows 10 so, they bought a brand-new Dell computer with a six-year-old operating system. Well that certainly works well for them today, I don’t believe we can depend on that continuing to be the case.
So what’s the point of my anecdotes this morning? The point is, when you buy new hardware get an operating system that is new also. Resist the thought of trying to run on the old release. Bite the bullet and pay for those software updates that you’ll need for the new operating system. Move forward, don’t drag your feet in the dirt.
Just remember, a week ago many businesses were still running Windows XP thinking, “it’ll be fine “or “we don’t want to have to upgrade our operating systems yet “. But today, in the midst of these hacking attacks, I believe there are many government agencies, many hospitals, and many businesses, that may be rethinking their thought of staying on the old operating system.
Don’t make that same mistake. If your in the market to purchase a new Windows machine, go with windows 10. Microsoft has declared it’s their future, so it needs to be yours too.
Many people use the same hard disk to backup multiple Macs. This is great particularly when the disk is network attached such as a time capsule. But over time as you replace machines, sometimes your old backup gets left behind and your drive fills up. It is easy to remove old machines from the time capsule backup done with time machine.
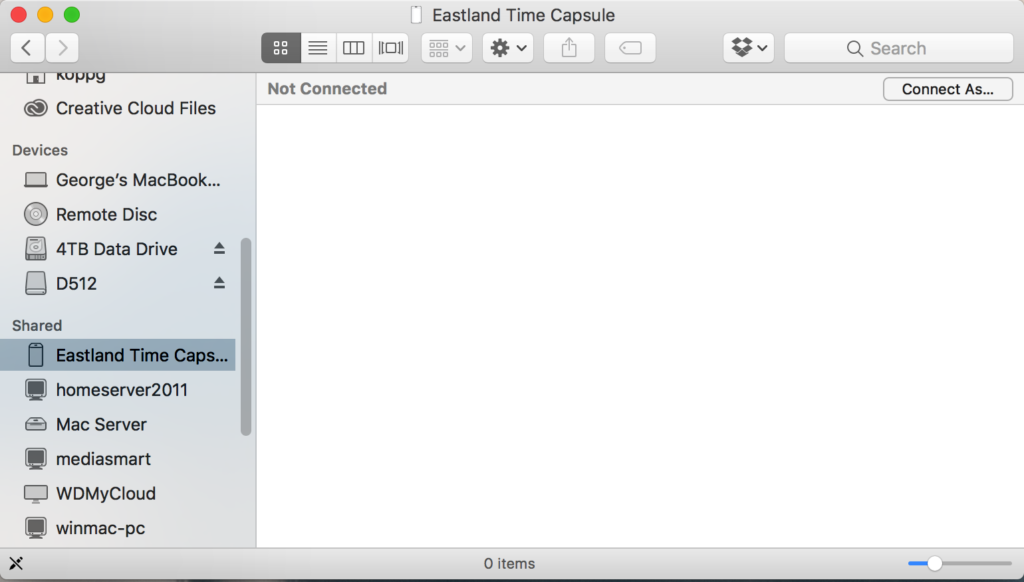
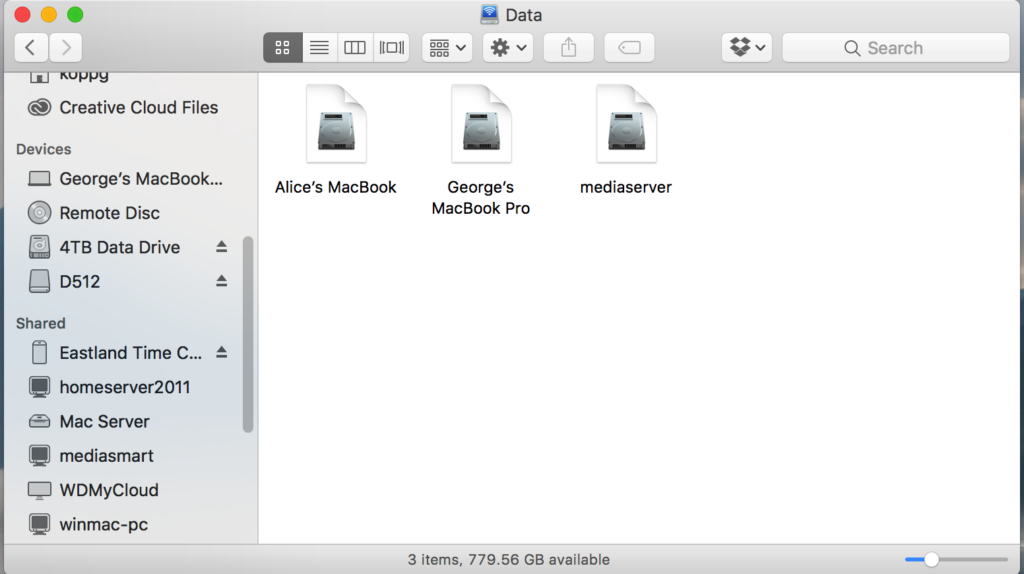
First you need to mount the drive from your time capsule to your computer. In the finder sidebar, scroll down to Shared Devices and select the time capsule.
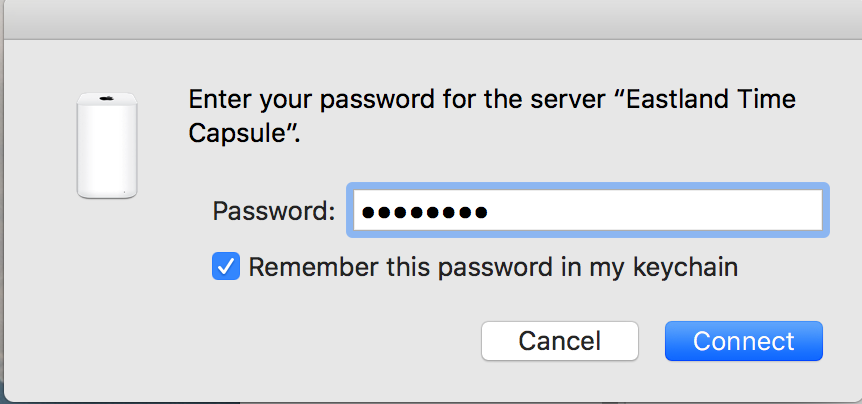
If you have never connected this way to the time capsule, it may ask for a password.
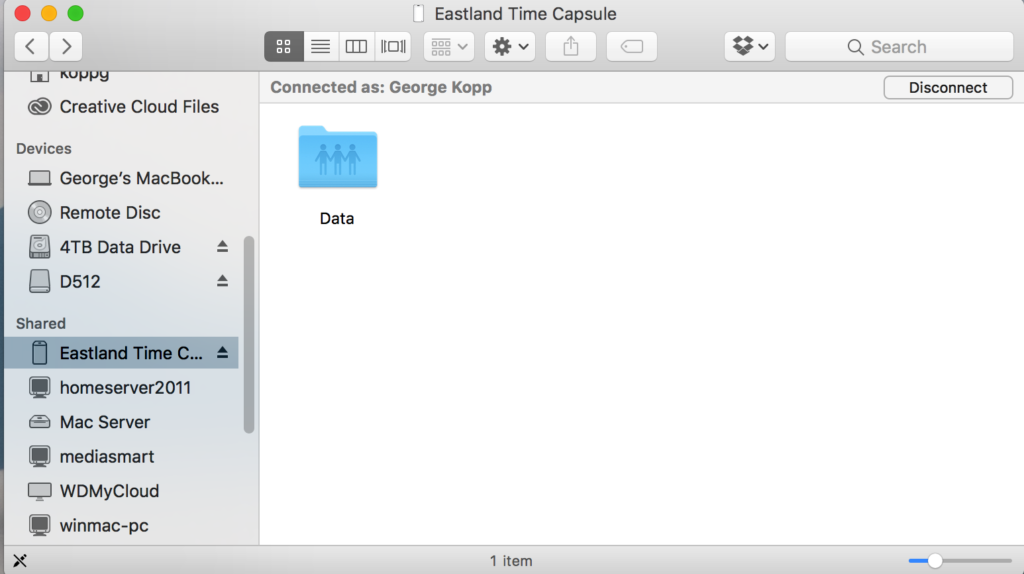
Once connected you should see the Time capsule drive.
Open the folder you see and you will see individual machine icons listed as drive container (Disk) icons.
Now, you can drag any of these containers to the trash and empty the trash. This might be a good time to go get a cup of coffee because it often takes quite a while to delete.
You may need to unplug the time capsule and plug it back in to get it to recognize the additional space has been cleaned up,
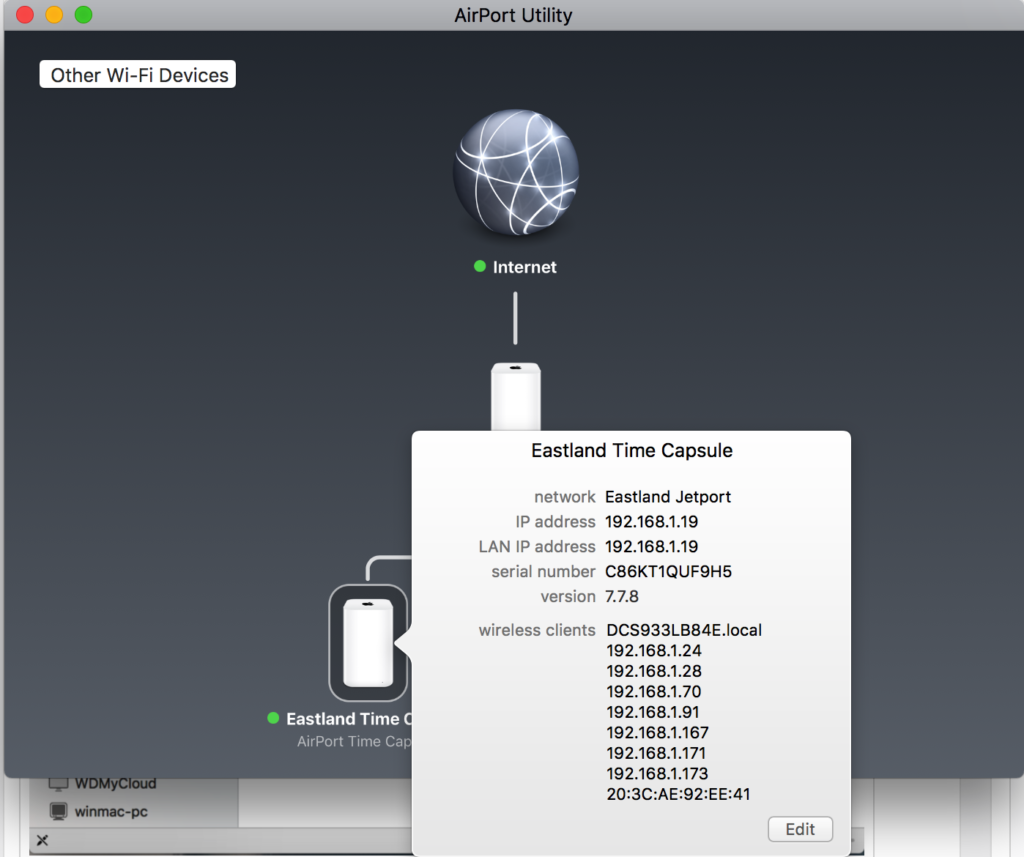
If all else fails you may need to completely erase the time capsule drive. This will of course delete the backups from all the machines using it and require you to reconfigure the backup for those machines. Start by opening Airport Utility and selecting the Time Capsule.
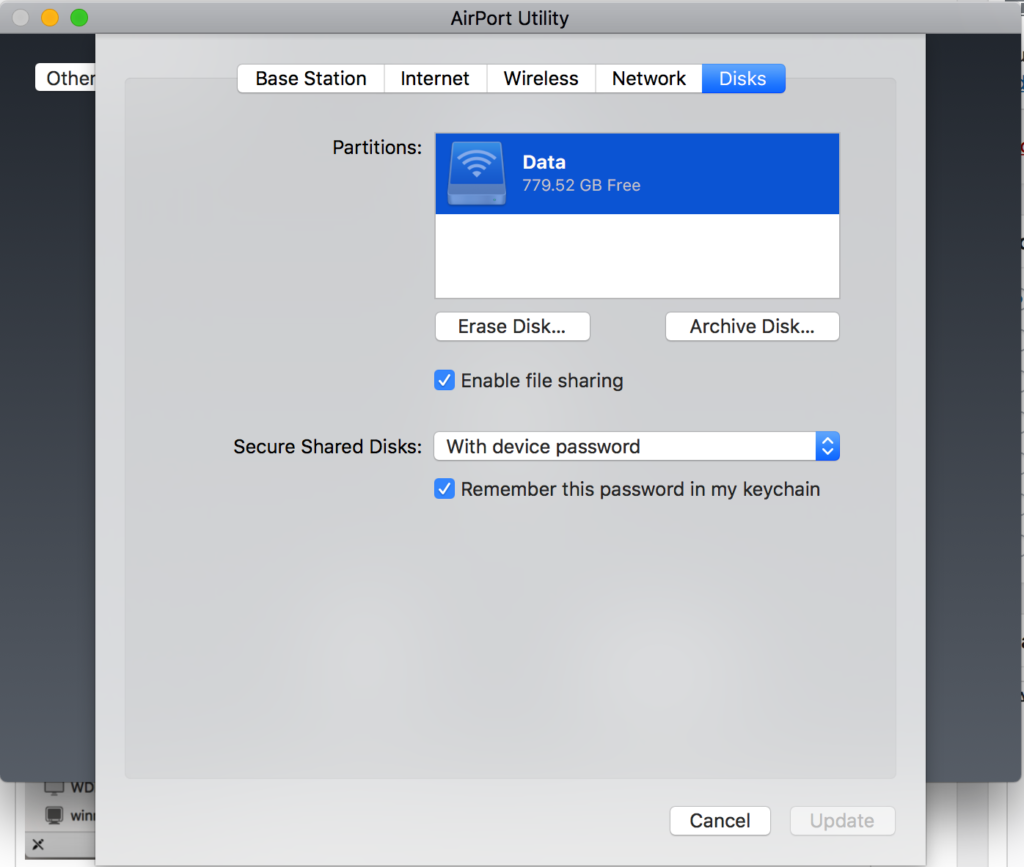
Click Edit and select the Disks tab.
Press Erase and confirm you want to erase the disk. Now take that coffee break as the disk is being erased. You can close Airport utility and the Time Capsule will finish on it’s own but will still take some time.
If you want to delete olde backup files from your Time machine drive, take a look at this article. The first portion tells how to do it with the time machine interface. The second part might not be advised since it requires using terminal commands.
Q: With all the choices, which Hard Drive do I choose for backing up my Macintosh with Time Machine or my PC?
A: I wish there was a simple answer, but unfortunately there isn’t one. Choosing a backup drive involves a number of factors that need to be take into account. Many of these factors depend on the type of machine you have and the size of your original harddisk. In this article, I am going to look at a number of decision points and attempt to provide some assistance in making that selection.
Internal vs External
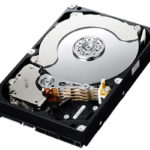
Raw drives are drive mechanisms that are sold without a case, These drives are intended to be installed inside the computer box. For Mac users, this decision point is simple. None of the current or recent Macintosh machines can support adding an internal drive. If you use a PC, and have a tower yo use an internal drive but then you have to open the case and install it. While usually not too difficult to do, it just adds one more possibility to get things configured wrong. There was a time where raw drives were much less expensive but that time has passed. So, in my opinion, external is the answer.
Brand
These day, there are many brands of drive available at your local Staples or Best Buy. The brand of the drive actually has little to do with the quality of the unit. The actual harddisk mechanism inside the box is likely made by 1 of 3 manufacturers and telling the difference between them is not really important. It really all boils down to case design, interfaces and price.
Don’t be fooled by vendors that want you to spend more money for either a “Mac” version of a drive or for a “premium” model. The drive mechanism is likely the same part. Mac formatted drives are just that, pre formatted for a mac. That is no big deal because you can easily reformat a PC formatted drive on the Mac. In fact, time machine recognizes a new drive plugged in and asks to reformat it if it is a PC model. Don’t pay extra for this formatting alone.
Also don’t pay extra for backup software. Time Machine, which is a builtin feature of MacOS 10.5 Leopard or newer, is better than any of these backup solutions that ship with new drives. Only consider backup software if you are using 10.4 or older on a Mac and in my opininon, your money is better spent upgrading a current MacOS release to do your backups if your machine will handle it.
For PC users, it depends on the operating system. In Windows 7 or 8, backup is a control panel that you can configure. In Windows 10, it is called File History. Select the Start button, select Settings > Update & security > Backup > Add a drive, and then choose an external drive or network location for your backups.
All that said, I do have a couple of favorite brands. Both Seagate and Western Digital make fair priced external drives that work very well. There are a number of models available and best of all, you can get them locally at the Best Buy of Staples store. When I recommend a drive, I choose one of these two. One of them is usually in the weekly ad from Best Buy or Staples and on sale.
Desktop vs Portable drive
Either a desktop or portable drive will work fine. Portable drives are usually smaller, have less capacity, and cost more. If you are using a desktop Mac, purchase a desktop drive. There is little reason to spend the extra for the portable one. If however you are using a laptop, you may want to still purchase a desktop drive.
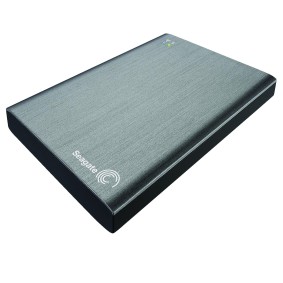
Desktop drives are usually made from a more available, more reliable and larger mechanism. These drives usually use a 3 ½” drive mechanism. These drives are available in larger sizes and at less cost. Portable drives use a 2 ½” mechanism just like those used in laptops. These are smaller, have less capacity, use less power, but cost more.
One important consideration is that a Desktop drive will need to be plugged into electricity while a portable drive usually is self powered from the USB or the Firewire bus. This is nice for travel since you don’t have to plug it in to power, just the computer.
If you own a laptop, but use it quite a bit in one place, a desktop drive is likely a better solution. If you want a backup drive that can travel with you, choose a portable drive for that application.
Size
My recommendation is to think of the future and purchase a drive as large as you can afford. You will be amazed at how data accumulates and how fast you fill the drive you have. Raw drive mechanisms are available as large as 6Tb today. External desktop drives are available that large also but the real sweet spot here today is the 2Tb or 3Tb drive. Portable drives are available as large as 4Tb with their sweet spot being at the 1TB to 2TB level.
On a Mac Time machine is very smart. It will use all the space you give it and continue to keep copies of data from the past. The general thing to remember is always select a drive twice the size of the internal drive you want to backup if you can. This way you have plenty of space for multiple backups in time machine. This gives you the most flexibility.
On a PC, you may need to ‘prune’ you backup when it fills the drive, You can manage the backup space in the same location that you setup the backup in Windows.
Interface (ports)
Drive makers, including Western Digital and Seagate make many models. One of the many considerations for drive pricing is the type of interface ports the drive has. Some of the common interfaces you’ll see are:
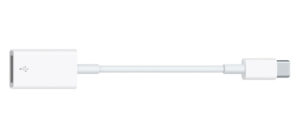
USB – all drives these days include USB 3.0. USB 3 drives are backward compatible with USB 2 so no matter if your machine supports only USB 2, get a USB 3 or 3.1 drive. Newer machines may have a USB-C style connecter so be sure to check that out before bringing a drive home. If your machine supports USB-C, use that connection because it will provide the fastest throughput. If the drive you chose still uses a USB 3 port, a cheep USB-C to female USB 3 adapter can be had for less than $10.
Firewire – In past years, I would have always recommended that you use Firewire. But these days, Firewire is a dead technology. If you have a Firewire port on your computer and you want to use it, be sure to select a drive that has both a Firewire and a USB interface to future proof your purchase. Firewire drives may be hard to find since the technology is being phased out.. Some Macs like the new Macbooks and Macbook Air do not have Firewire at all.
eSATA – External SATA. SATA is the native interface od all of todays drives. The External version of this is called eSATA. This connection is only available on some tower PC’s and is problematic so I recommend considering it.
Ethernet – This port allows a drive to work connected directly to an Ethernet network. It is technically called Network Accessible Storage or NAS. This is what Apple did in the time capsule (a great but more expensive backup unit). Having this port allows a drive to hang on a network rather than be connected to a machine. But, it is important to note, these drives are not compatible with Time Machine unless you use the Apple Time Capsule. If you need some extra traditional storage that you may want to share, this is a good option but for Time Machine, it is is only a consideration if the drive is advertised to support it. One such drive is the Western Digital My Cloud. It supports time machine and a lot more. I use one as a secondary backup and while not as fast as directly attached storage, it works great.
So what do you get? My recommendation here is to get a drive uses USB 3. Some newer drives may have USB-C connections, and I suspect we will see this a lot more in the future but for now, converting to USB-C if that is the only port your machine has (2015, 2016 MacBook or 2016 MacBook Pro) is simple and inexpensive.
Price
Drive prices have dropped a lot lately. Price should be one of the last things to think about. My recommendation is to purchase drives near the sweet pricing spots I described above. These are the ones in the Sunday circulars. Again, I recommend you purchase a drive as large as you can afford. Larger drives above the sweet spot size will cost a little more and are usually fine choices if you have a great deal to backup. These larger drives will become tomorrow’s sweet spot and cost will go down.
What will it cost? Today, in February 2017, an 1 Tb USB external drive costs between $59 and $79 depending on features and sales. A desktop 5Tb drive runs about $129 to $149. With prices this low, more is always better.
Conclusions
All this is probably much more than you want to know about backup drives. These conclusions will be my opinions of what you should get in a nutshell:
• Consider as a first choice a Western Digital or Seagate drive
• Get a desktop Model unless you need to backup your laptop on the road
• Size the drive a minimum of twice the size of your internal drive
• Get a drive with a USB 3 port even if you don’t have a computer with USB 3. Someday you will and USB 3 is much faster than USB 2.
• Watch the weekly circulars. Drives are always on sale

In the current release of iOS it’s easy to print to an airprint enabled printer by simply selecting the print command, choosing your printer, and telling it to print. But what if you don’t have an airprint enabled printer or you just would rather save the file to a PDF?
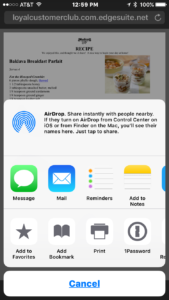
It’s actually pretty simple to create the PDF from the print routine in iOS want you know the secret. First deal with your document the way you would if you were going to print it. Bring it up on the screen and select the print command, Once the print command is running, simply use two fingers to pinch outwardly from the center of the print preview that showing on the screen. This will launch preview and bring the document you had selected into it.
From there you can select the share command, the little square with the up arrow, and save it to iCloud Drive, Dropbox, or even Google Drive. The file gets saved as a PDF of the document you started with. This gives you the ability to create and store to your cloud-based storage, a PDF from any document you can bring onto the iOS screen of your iPhone or iPad .
Give it a try. Actually might come in handy one day.
When Apple announced the 2015 Macbook with a single USB-C port, Many potential users were put off by the fact that if you plug the machine again to charge it, you had no other connections that you could use on that MacBook. This made a machine problematic for many things including plugging in an external hard drive for backup. Fortunately the battery life of the new MacBook was quite good so that you didn’t need to charge very often but it was difficult to imagine not having the need to plug something in, anything in, while you’re charging the machine.
A number of new port extension devices were immediately announced to add additional ports back that Apple removed. One of the first that actually saw the light of day, was from Other World Computing, OWC. OWC’s USB-C Doc was announced right after the new MacBook but didn’t ship for a number of months. When it did ship, users of the new MacBook finally had a port extension device that would allow them to make full use of their new computers.
While it was introduced shortly after the 2015 Macbook, the OWC USB-C Dock is compatible with both the 2015 and 2016 Apple MacBook and 13″ 2016 MacBook Pro models. The 2016 15” MacBook Pro is not compatible as per the MacSales website. I suspect this is due to the higher charging wattage required for the larger screen device. With a 80w power supply, the dock does not have enough power to charge apples new 15” flagship model.
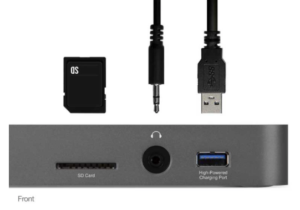
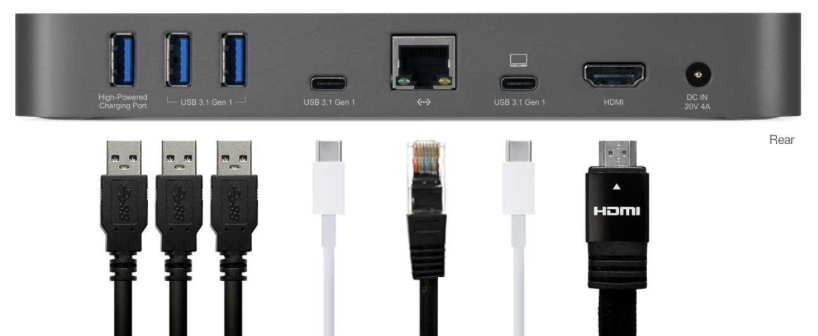
When paired with one of the compatible machines, the dock adds a plethora of ports for the user to make use of. These ports include:
The dock is available in all 3 of the colors that the Macbook is available including Silver, Space Gray, Gold, and Rose Gold for a perfect match with your new laptop. If you have a 13” Macbook Pro, the Silver and Space Gray colors match your unit too.
Ascetics of the Dock
The dock is made of plastic and metal and weighs enough to keep the unit firmly placed on your desk. A blue LED light shows from the bottom of the device indicating it is powered up and ready. A green LED is also on the bottom that shows data connection with the laptop has been made. The front of the doc has the SD card reader, audio port and a USB 3.1 port that remains powered even when the laptop is disconnected. This port is high power enough to charge an iPhone or iPad.
The back of the dock contains the majority of the ports including the port to connect it to your laptop. It is important to note that of the 2 USB-C ports on the back, the one with the small computer above it is the port that must be used with the included cable to connect to the computer. The other USB-C port is an active port for plugging in other USB-C devices.
Also on the back of the dock are 3 USB 3.1 ports, with the left most port also being of the higher power type, an 10/100/1000 Ethernet port, a HDMI port capable of driving a 4K display, and a place for the included power adapter to be connected. One item of note is that the use of the Ethernet port required the installation of a driver from OWC that was available on their website but with the release of MacOS Sierra, the driver is no longer necessary.
How Well Does it Work?
In my experience in using the dock with a 2015 Macbook, the dock worked flawlessly. All of the ports connected fine to the laptop and worked with expected speed. In fact, I was encouraged by the fact that USB-C seems speedy enough to handle multiple streams of data being copied to devices. While this was likely not something necessary in the real world where for the most part a single device at a time will be used, it is good to see that for me it worked very well. I did find that if I did not eject some older drives from the Mac before allowing the Mac to sleep, they sometimes did not come back without unplugging them and plugging them back in. For my use, my laptop is set not to sleep while the power adapter is connected so I do not feel this is a major issue.
From talking with other owners of the dock there may be a problem with some older USB devices plugged into the dock not being recognized. This may be related to the sleep issue I experienced. I was unable to reproduce that problem when I did not allow the Macbook to sleep.
I was quite happy with the fact that the dock remained sturdy on my desk and did not move around when the cables were tugged slightly. Some competing units that are much lighter exhibit this problem.
Even a bonus…
I also used a USB-C to USB 3.1 cable to connect the dock to my 2013 Macbook Pro. To my suprize I was able to confirm that the USB ports, card reader, audio port, and Ethernet port worked fine. I did have some difficulty getting a TV connected by HDMI to connect but for a completely unsupported use of the device, it was very impressive.
Conclusions
OWC has a winner in their USB-C dock for users of Apples smaller laptops. It works easily and performs very well. For a Macbook user with only one USB-C port, or a 2016 13” Macbook Pro without touchbar with only 2 Thunderbolt 3 ports, this device adds the expansion that Apple believes users no longer need. The only recommendations I have are that the USB-C cable proved short for many applications. In long term use a longer USB-C cable will likely be necessary unless you ar going to position the dock right behind on next to your laptop
OWC provides a 2 year warranty with the dock.
I spent many years in government working for what I considered to be a very well run and productive agency. About 10 years before I retired, the organization when through a transformation that it never recovered from. They called it Quality improvement, participatory management, and a number of other things. They sold it at the time as the way private sector works in highly productive companies. But what it really was consisted of a way for those not in power to gain power and become important. It was a disaster. Lots of improvement meeting, teams formed, consensus building, and touchy freely crap that made people feel better but improved nothing and always caused decisions to drag out. We hired many consultants to help us down this path and they made millions while productivity was sucked out of us in meetings.
We went from an organization that always tried to quickly react and do the right thing to an organization that tried to not make a decision until everyone agreed. So many times the consensus decision was really the wrong decision but after beating us down we just wanted the process to end.
One of the hallmarks of this was a months long effort to develop a mission statement and values that everyone ‘bough into’.
The reason I recount this story is that I continue to see our beloved Apple going this direction under its current leadership.
I saw this article and now am convinced that this is the case.
http://appleinsider.com/articles/16/12/16/apple-gives-retail-employees-t-shirt-keepsake-credo-for-holidays
I guess ‘credo’ is todays word for mission statement and values.
So what is Apples ‘credo’?
All this, at the same time I learn that Apple’s new policy on Applecare when work is done outside an Apple Store replaces the parts but does not load operating systems. Huh?
A client called Apple on an iMac hard disk failure under AppleCare. He was directed to take the machine to a company called Gravity in Columbia. He took the machine in and they were to replace the hard disk but wanted to charge $75 to load an operating system on the new drive and $75 to restore his time machine backup. I had him call Apple support and complain but he was told that they were free to charge whatever they wanted because the store was not a corporate Apple Store. So disappointing. He is now still waiting for the machine to be completed after 11 days. Had he called me first, I would have sent him to Joe Mertzlufft in Columbia but he didn’t.
This experience with Apple definitely did not “enrich lives”.
In my opinion, Apple needs to quit concentrating itself on saving the planet and work a little more on saving its customers.
…. and yes, in case your wondering how this ties together, we all got Mission statement TShirts too.
George
Sent from my iPad
Creating sheets of mailing labels from a Numbers spreadsheet is easy using Avery.com.