MacOS Sierra: Optimize Disk Storage

Do you ever run out of this space on your computer? This is a very common thing to happen particularly in these days with many of us are using laptops with smaller solid-state hard drive. Whenever you run out of space, you have to search your hard drive for things that you can delete. Sometimes it’s pretty obvious to look in places like your downloads folder but other times some of the large files to get put on your hard drive are stored in on hidden locations.

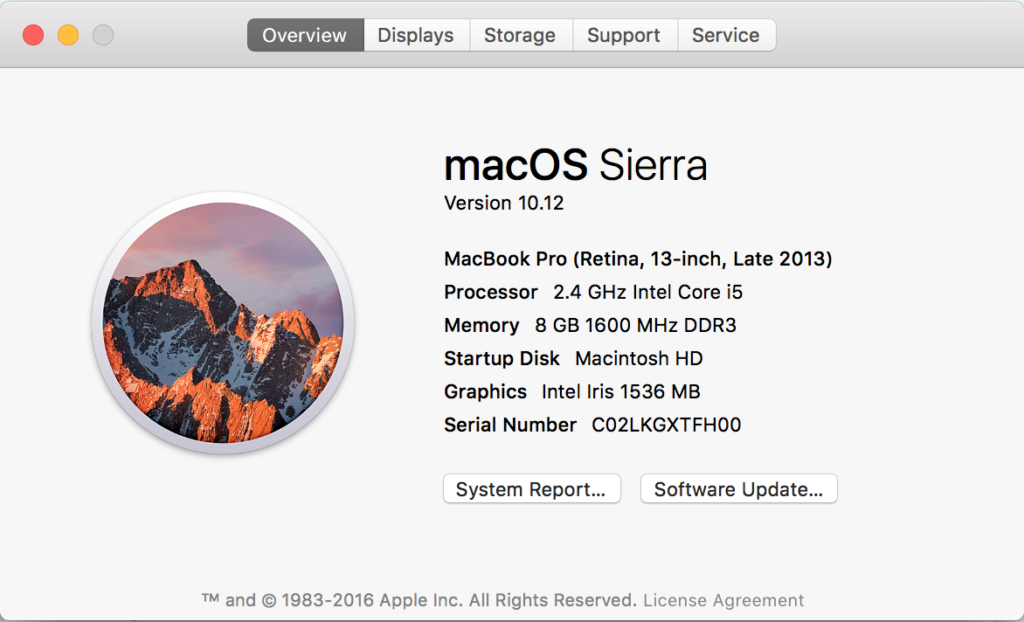
In MacOS Sierra Apple thought of this problem and provided us some tools to help her move some of these extraneous files. Define these tools you should start by going to the apple menu and selecting about this Macintosh.

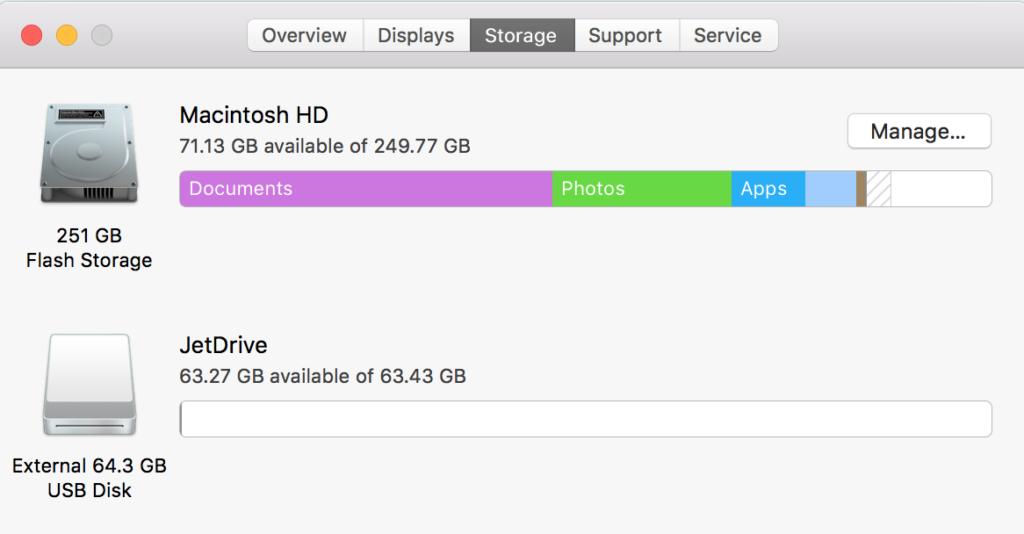
screen-shot-2016-09-21-at-1-45-46-pmAcross the top of the dialogue there are a number of taps. Select storage. Your Mac will now study the files on your hard drive and organize them in the bar graph shown for the disk.

screen-shot-2016-09-21-at-1-46-00-pm

New in this version of the operating system is the button that says manage. Click manage and you’ll see the screen below.

screen-shot-2016-09-21-at-1-47-18-pm

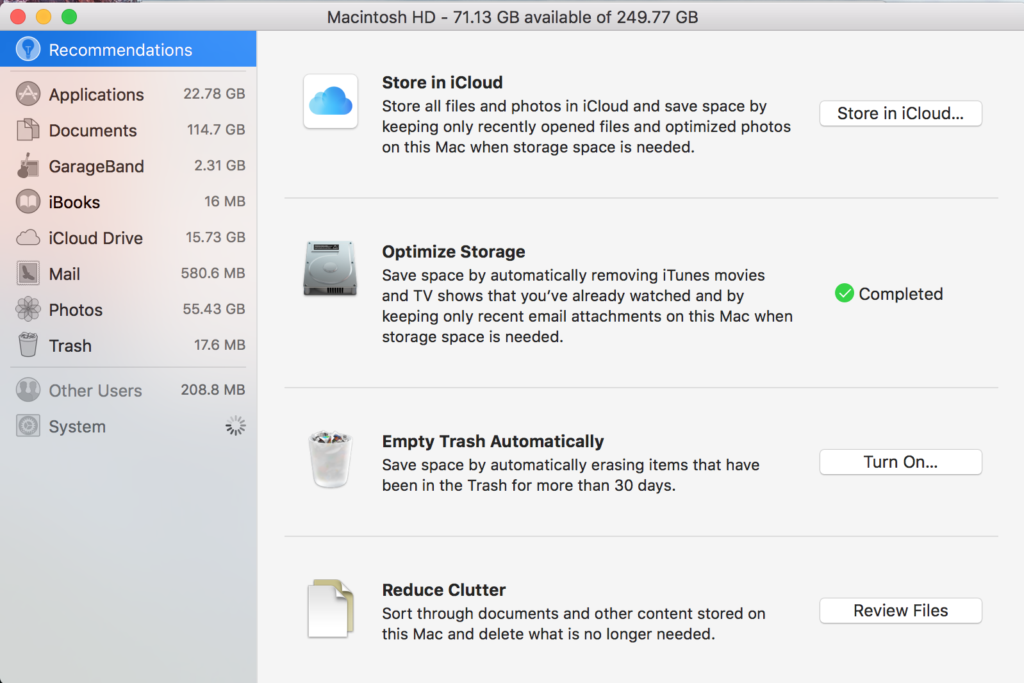
You want to wait until the spinning wheel finishes counting all of the different types of files on your computer. This utility provides for ways that you can optimize storage. First off you could store files in iCloud. That may be a good solution for you but you’ll need to make sure you have purchased enough iCloud storage space to allow this to happen.

The second item called optimize storage will delete iTunes movies and TV shows that you’ve already watched and also delete older email attachments that are stored on your computer whenever storage space is needed.

The third item is a new toggle that allows you to automatically empty the trash. This way you know longer have to purposely empty the trash because the Mac to do it for you. Keep in mind if you’ve ever had to recover a file from the trash this may not be something you want to turn on.

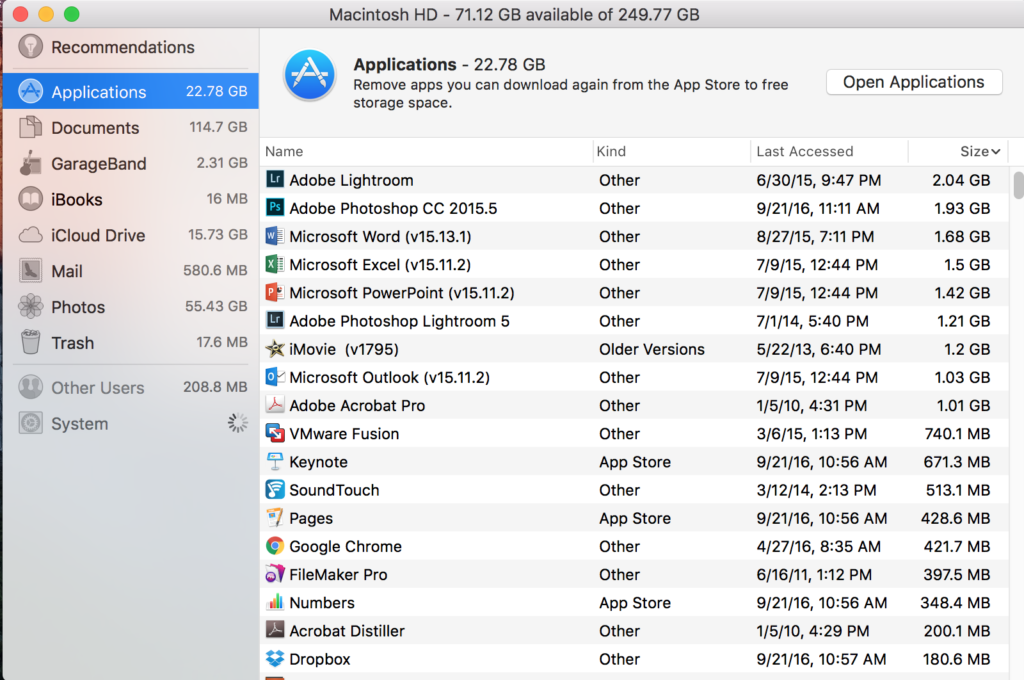
The final item on the list is where the real assistance comes. Apple calls this reduce clutter but basically it allows you to look at files on your machine and make a conscious decision whether you need to still have them on the computer. It will not present files to you that would cause your Mac to not run, but it may present files for applications you use that if you delete will no longer work.

screen-shot-2016-09-21-at-1-48-23-pm

As you click on each one of the items in the left column, you’re presented with a list of those file types. For instance, applications, lists all the applications in your applications folder. Apple has been thoughtful enough to sort this list by size so concentrating at the ones on the top allows you to recover more space on the computer.  This dialog box is just a finder window so if you click on the file name for an application and hit the delete key you will delete that application. You can then do the same for the other types of files such as documents and garageband compositions.

Like many things we’ve seen added into MacOS over the last few years, there were third-party utilities that would do a pretty good job of doing the same thing. But for Apple to provide this built into the operating system is very positive for it’s users. First off you don’t have to research which deletion utility might be the best from the App Store, but moreover you can be fairly confident that when files are delayed they won’t cause the operating system to fail.

As with any file deletion that you do on your computer, it makes good sense to verify you have a backup before you do any of these functions.


Posted in Mac

Installing MacOS Sierra

macos-sierraIt’s that time again! Apple has released a new version of Mac OS called Sierra.  As with any new release there are going to be some minor issues. There are couple of things I want to point out about the install before you do it.

Sierra was released just yesterday and Apple servers are completely overwhelmed. Downloading the update might be quite slow but if you let go it will typically finish. The update process itself is similar to what has been done in previous years. The updater runs after completing the download and you have to approve the install.  After you’ve done this, expect about 45 minutes to an hour for the operating system to do the basic install. But that’s just the beginning.

After the install is complete a number of things have to happen on your computer. First off, all of the computer indexing that the computer uses must be rebuilt.  This index is used to find files on the machine in spotlight.   If you have a large number of files, this can take hours and can slow the machine to a crawl.

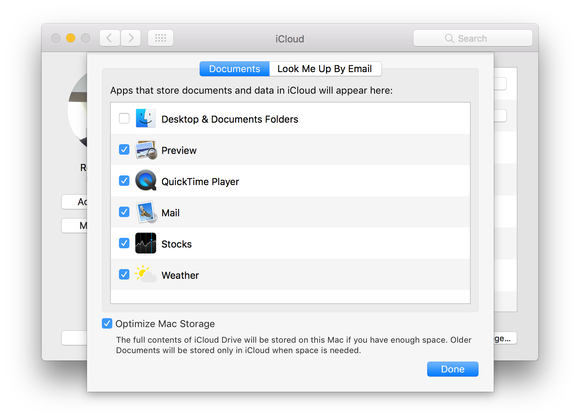
In addition, during the install, you will be asked about using iCloud to store the files on your computers desktop and its documents folder. Uploading these files could take a very long time if you have many stored.  It could also run over your internet service providers data cap.  While this seems like a very handy thing to do, consider it carefully because all those files take space.  That means you could easily run out of iCloud space and be required to purchase more storage.  Using this only makes sense if you have two machines or want all your computers files available from your phone or iPad.

sierra-icloud-drive-desktop-documents-option-100673616-large

But there is more….. The first time you open the updated photos app, it will have to completely rebuild your photo library,  This took 30 min on one of my machines with 15,000 photos but once rebuilt, all the thumbnails of the photos were gone.  I finally realized it was rebuilding them.  But this rebuild process took over night to complete.

So far, I have not found any reason to say don’t install this update.  But just keep in mind that when you do, be prepared for an unresponsive machine for a while while Sierra performs all these background processes.  Perhaps doing the update in the evening so you can let your machine run all night is the best advise.  If you do the install, authenticate iCloud and then open photos, you could let the machine do all this indexing during the night and hopefully you will have a responsive machine in the morning.

Posted in Mac

iOS 10 will be a great upgrade for iPhone and iPad users


I have been playing around with the iOS 10 beta on one of my iPads now for a couple of months. As this update has gotten closer to being completed I continue to be pleasantly surprised with both the quality of the software in beta and also the deep feature set of the update. There has been a lot in the press about the new features in iOS 10 and I can say I have tried most of them. The additions Apple is made in this release, while seemingly not major, certainly enhance the ability of all iOS devices.

I installed the beta in the first place to try out apples new home app. Home is an application that allows you to control HomeKit devices from a single common place. The app lets you control lights, thermostats, and all other existing HomeKit devices. I was pleasantly surprised how well it worked after about the second beta.

There are many other nice additions including a major overhaul of messages. Just this morning I saw one of the nice new tricks messages brings to the table. Quite often I text a link to a product one of my clients has asked me to look for for them. It’s really no big deal as they typically click the link and have it open in Safari to see the product on the products website. This morning, I texted a link to a product on Amazon and rather than sending the actual link, messages converted it to show an image of the product, a short description, and a link. While not earth shaking, it is pretty cool.

With the new iPhone release schedule for September, iOS 10 is right around the corner. Apples new process of going through public beta will certainly provide a better product on day one. I’m excited about getting these changes on all my iOS devices, including my phone.

iOS: Updating your carrier settings


Carrier settings updates are small files that can include updates from Apple and your carrier to carrier-related settings, such as network, calling, cellular data, messaging, personal hotspot, and voicemail settings. You may receive notifications from time to time to install new carrier-settings updates.
If you see the prompt for this update go ahead and accept it. If you do select not now, you can follow these instructions to update your carrier settings:

Make sure your device is connected to the Internet.

Tap Settings > General > About. If an update is available, a prompt will appear.

Note: Occasionally a carrier may release a mandatory update. This type of update will display only an OK button instead of an Update button, to let you know that the update was downloaded and installed.

If you need to know the version of the carrier settings your device has, tap Settings > General > About and look next to “Carrier”.

Changing the name of an Apple Bluetooth device


Bluetooth accessories like Magic Keyboard, Magic Mouse 2, Magic Trackpad 2, and third-party input devices come with a default name that appears in the Bluetooth menu of your Mac. You can give each device a name you’ll recognize.
The question came up at a recent appleJAC meeting about how you go about changing this name. Here’s what Apple has to say about it:

To rename a Bluetooth device, follow these steps on your Mac:

  1. From the Apple menu, choose System Preferences.
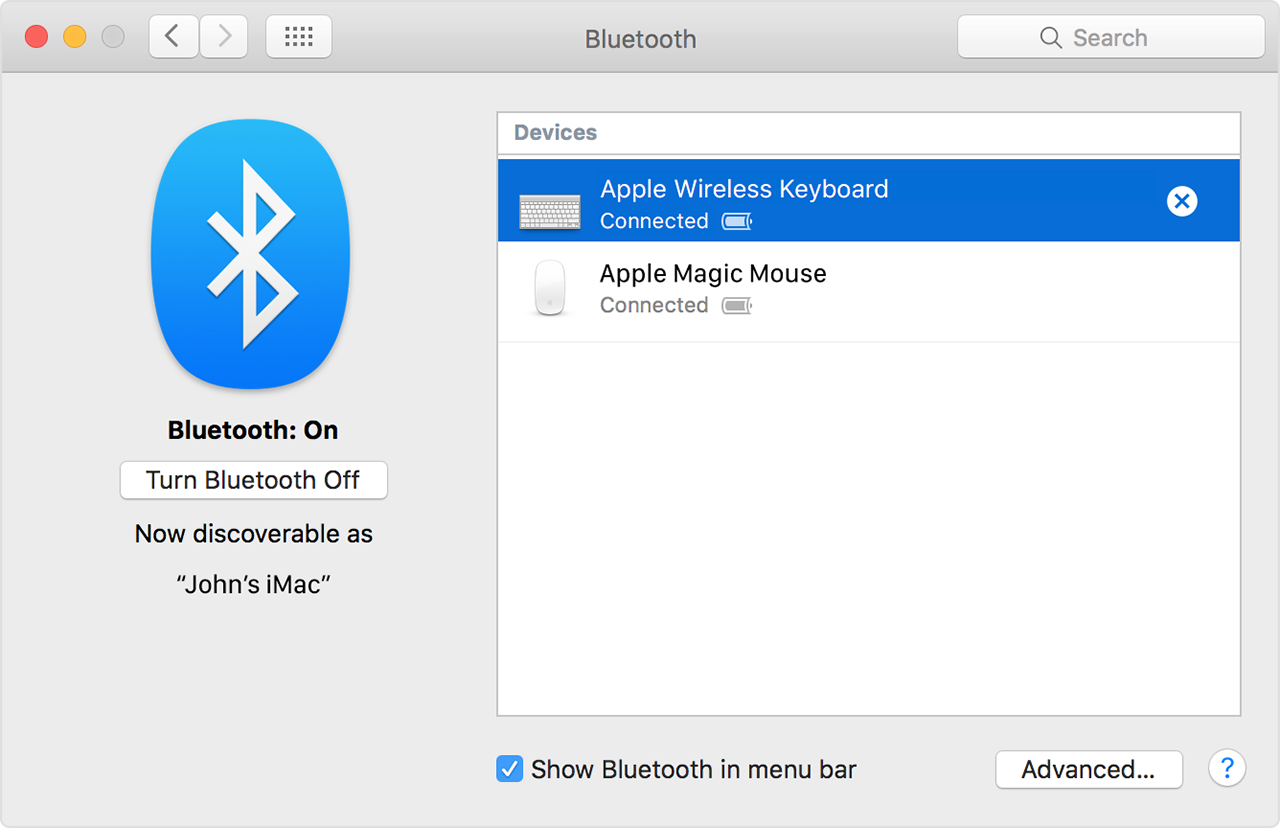
  2. Click the Bluetooth preference icon.
  3. Control-click or right-click on the device’s name to see a shortcut menu.
  4. Click Rename in the shortcut menu, then type a new name for the device.
  5. Click the Rename button to save your changes.

The custom name you give your device now appears in the Bluetooth menu of your Mac and in the Bluetooth section of System Preferences.

Note: When you rename an Apple wireless device, it remembers the name you give it. So if you pair the device with a different Mac, the device will appear as you named it. But with third-party devices, the custom name is often stored on the computer. Because of this, the device might return to its default name if you pair it with a different Mac.

Computer Scams can really Ruin your day…

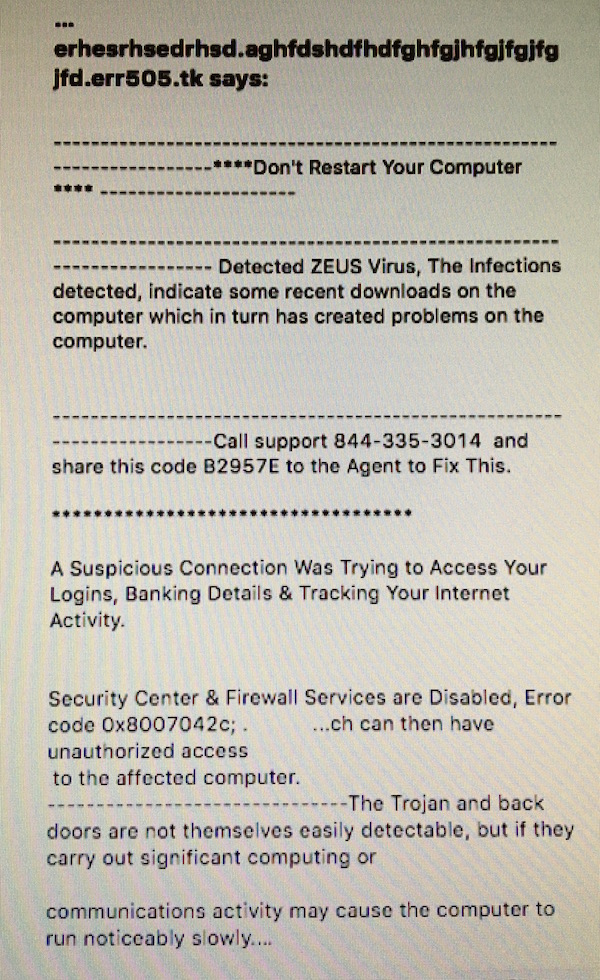
Having a bad day today?  Well it could be a lot worse.  What it you were surfing the web on Facebook and suddenly saw this?

IMG_1137 (1)

Many people have seen messages such as this, particularly by clicking a link on Facebook.  Don’t fall for this scam.  The real infection here is to get you to call the phone number, let them connect to your computer to “Fix” it, and then have them install real spyware.  Then they show you how the machine is “infected” and tell you they can fix it for $190 only to steel your credit card info and make charges to your card.

Don’t make an errant click into a terrible mistake.  Force quit your browser to get rid of the message and ignore it. NEVER call a phone number for a computer problem that pops up on your screen and NEVER let someone you do not know make a connection remotely to your PC or Mac.

This can happen anywhere on the web but lately, many people see this from clicking a link from Facebook.

Q: How do I print labels from Apples Pages Program?

A:  I am making the assumption that you have labels purchased that go into your printer.  If that is not the case, let me know.

First you need to get a template for the label material you have.

Here is a page with lots of these templates.
Screen Shot 2016-04-27 at 8.09.23 AM
If your labels are Avery, the ones at the bottom correspond to Avery label numbers

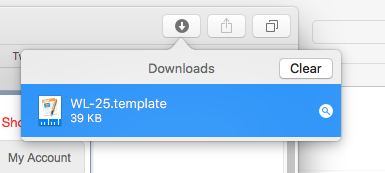
After you download the template go to the top of the Safari window and click the downloads button.

Screen Shot 2016-04-27 at 7.56.54 AM
Once you click on it, double click on the document template you download.

Screen Shot 2016-04-27 at 7.57.15 AM
This brings up this dialog:

Screen Shot 2016-04-27 at 7.58.31 AM
Select Add to Template Browser.

Now the template is loaded in Pages and you can start your new labels.

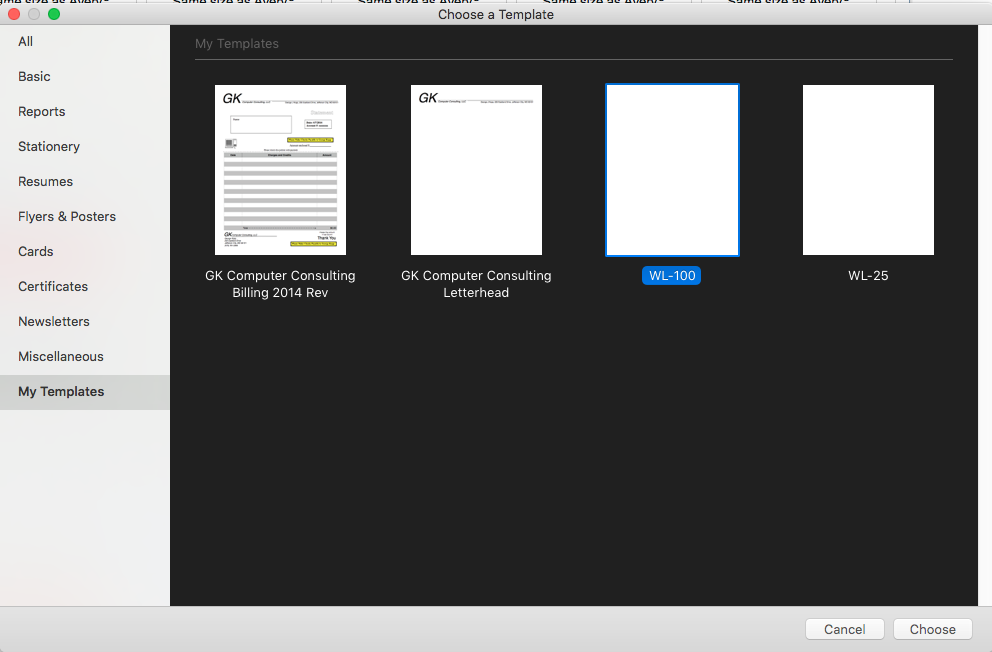
Now pages should start and put you in the new document mode.  On the left is the My Templates dialog.  Select the template you just downloaded.

Screen Shot 2016-04-27 at 8.01.06 AM
Double click the templet to get started. This will open a new label sheet in pages and have all the labels created.

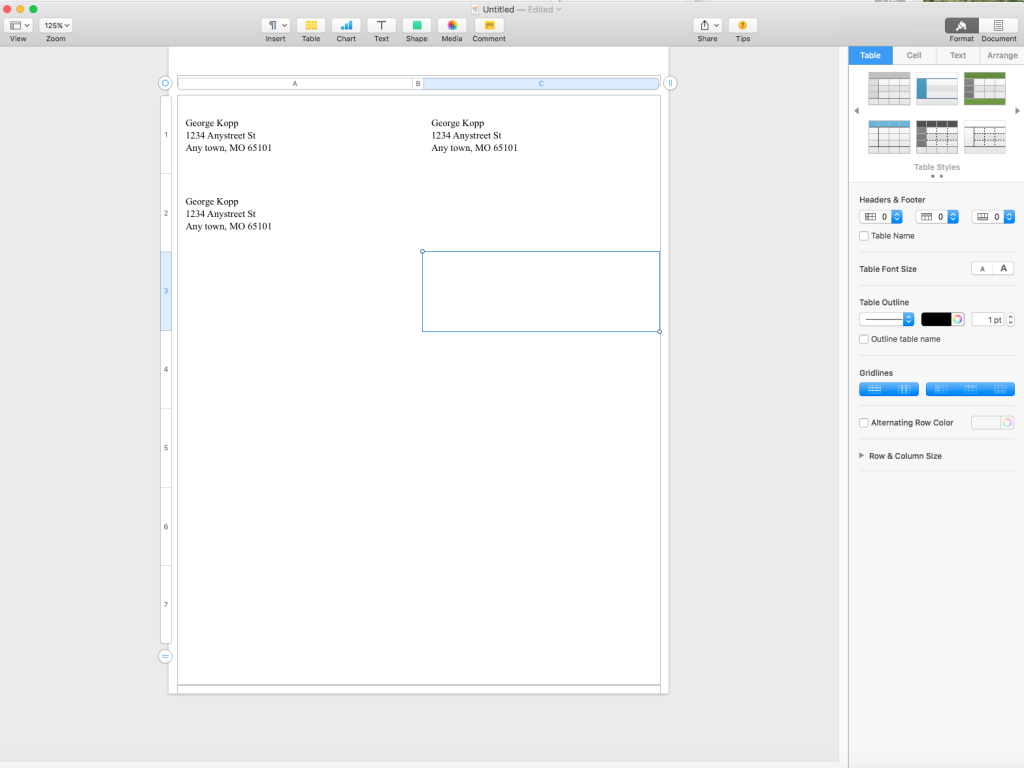
Now you can type the label into the document and when done print the page.

Screen Shot 2016-04-27 at 8.08.00 AM

Brinno Camera Sunset and Sunrise

This is a full night time lapse including sunset, darkness with stars, moon rise, and sunrise captured with the Brinno Construction camera. The settings for this capture were to take a photo every 20 seconds and create a movie at 15 frames per second. This equates to 5 hours of time lapes per minute of this video.

Google Makes NIK Photo enhancement tools FREE

Screen Shot 2016-03-25 at 4.57.23 PMIf you are a user of Photoshop, Photoshop Elements, Lightroom, or Aperture you owe it to yourself to download these plug-in tools from Google.  These are true high end enhancements for all these products and now, Google has made them free.

the Nik collection It includes Analog Efex Pro, Color Efex Pro, Silver Efex Pro, Viveza, HDR Efex Pro, Sharpener Pro, and Dfine.  Each of these are fine additions to the adobe products but together and for free they add a major enhancement to the ability of these products, particularly for Lightroom users.

  • Analog Efex Pro – Explore the look and feel of classic cameras, films, and lenses.
  • Color Efex Pro – A comprehensive set of filters for color correction, retouching, and creative effects.
  • Silver Efex Pro – Master the art of black-and-white photography with darkroom-inspired controls.
  • Viveca – Selectively adjust the color and tonality of your images without complicated masks or selections.
  • HDR Efex Pro – From natural to artistic, explore the full potential of HDR photography.
  • Sharpener Pro – Bring out hidden details consistently with the professional’s choice for image sharpening.
  • Dfine – Improve your images with noise reduction tailored to your camera.

Start by looking at Define and Sharpener Pro.  These are the best noise reduction and sharpening tools I have ever used.

iBooks Enhancements in MacOS 10.11.4

Screen Shot 2016-03-25 at 3.51.21 PMIn the last update of MacOS and iOS, Apple quietly added a huge new feature to iBooks.  iBooks has been a great way to store PDF documents on your Mac and on iOS devices to be able to reference them when you have the need.  One feature lacking has been the ability to store these PDF’s and have them sync with all your iOS and MacOS devices.  In the latest version updates there was the following update statement:

“Adds the ability for iBooks to store PDFs in iCloud, making them available across all your devices”

Finally, your PDF files transfer to iCloud and can be installed on other devices you own.  Unfortunately, Apple really did not talk about how this works.  In both the MacOS and iOS, a dialog box asked if I wanted my iBooks PDF’s stored in iCloud.  Upon agreeing, the PDF documents began to sync….slowly….

Apples help on iBooks added this section to describe these new features:

Sync and save PDFs
The first time that you open iBooks after you update to iOS 9.3 or OS X 10.11.4, you’ll be prompted to use iCloud. Learn more about syncing your books and PDFs using iCloud.

You can also add PDFs to your iTunes library on your computer by dragging and dropping the PDF into your iTunes Book library. The files will appear when you are preparing your device to sync. If you’re using OS X Mavericks or later, drag and drop your PDFs into your iBooks library using iBooks for Mac. All PDF or iBook files in your iBooks library are available to sync to your iOS device via iTunes.

To sync a PDF from your computer to iBooks on your iPhone, iPad, or iPod touch:

  1. Select your iOS device. (Learn how to sync your data with iTunes.)
  2. Under Settings, click Books.
  3. Select Sync Books.
    If iTunes is set to sync only selected books, make sure that there’s a check in the checkbox next to the PDF you want to sync.
  4. Click Sync.

    You can also use iTunes to back up your PDF files. To transfer PDFs to your computer and back them up, transfer purchases from your iOS device to your computer. These files are not in an iTunes Backup. Learn more about what’s contained in iTunes and iCloud backups.

But there are still a few questions:

  • Where in iCloud are they stored?
  • How much space is allocated to iBooks
  • Can I remove a book from any single device without deleting it?

I have searched the web extensively and no one is answering these questions so stay tuned to see if someone steps up and addresses the particulars of this new application feature.