 Part 1: Memory Upgrades
One question I often get is whether someone should upgrade or replace some piece of technology. In the past it was hard to decode if an investment was better made to upgrade hardware or to replace it. Lately it is getting easier to help people make an informed decision. This is the first in a series of post describing upgrades that make sense and when it might be time to replace the computer.
You can say what you want about Apple but there are times it leads the industry in establishing trends. One such example is when it comes to the use of non-upgradeable hardware. Apple was the first vendor to come out with computers that were for all intents and purposes not upgradeable. I am not talking about the addition or more ram or the change out of a harddisk, And most computers today support the addition of external peripherals for adding to your computing experience. I am talking about the elimination of card slots and upgrade bays in its hardware. Years ago, Apple began the process of eliminating these and many in the industry cried foul. When computers cost thousands of dollars, it was hard to stomach the idea that a machine could not be enhanced to make it last longer. But Apple went forward with this philosophy and started a trend.
The majority of computers and devices sold today cannot be upgraded. Whether it is a smartphone, tablet, laptop, or even a new style computer all in one, these machines have few if any card slots and often have processors built into the computer so that they cannot he changed. Some will argue that this is such a waste but in the overall scheme of things being able to make these machines without upgrade potential has allowed vendors to provide smaller faster and cheaper products that we all appreciate. I am going to address a few types of upgrades in a series of posts and give you my broad stroke recommendations for value in your computing experience. There are situations that change this recommendation but this may give you an idea of if upgrading or replacing makes sense for you.
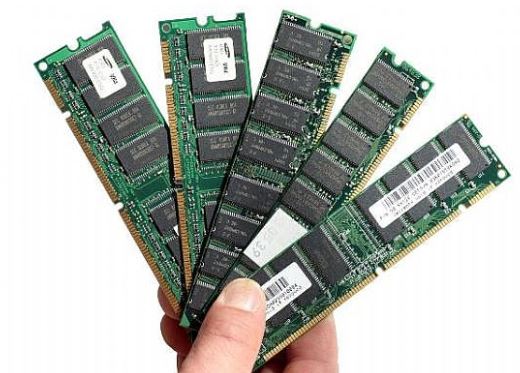
Memory Upgrades
Memory Upgrades, also called Ram upgrades have become cheep. Upgrading ram to improve system performance is a no brainer if this is a possibility in your system. If your computer seems sluggish particularly after you have been running a while, a ram upgrade may be what makes the difference. It is important to understand the value of additional ram to you before jumping in. If you have a machine running Windows 7 or MacOS with 2GB of ram or less, a memory upgrade may be the trick to adding longevity to that hardware. In today’s computing environment, I would consider 4GB ram the magical point for these operating systems. 4GB gives the operating system room to work and allows room to run multiple applications at the same time. There are a couple of things to consider.
With any computer, there will be a maximum allowable ram configuration and there will be requirements for adding ram. I recommend checking with Crucial. You can easily use their configuration tool and determine the exact memory needed for the machine upgrade. It may also alert you to the fact that your machine already has the maximum or cannot be upgraded due to chips being attached to the board. Crucial often has very good memory prices so purchasing ram from them may be the best idea but once you know exactly what type and size you need, shopping around often will allow some additional savings.
With windows, there is one additional caveat. If you are running a 32bit version of the operating system, you machine will only be able to address 4GB. With older versions of Windows such as XP, if your machine has more than 3.2 GB of main memory installed, only 3.2 GB of it will be accessible to Windows. The remaining 0.8 GB of address space is reserved for memory-mapped devices.
Installing ram is usually very easy. If you are uncomfortable inside your computer, getting some assistance is a good idea.
While adding ram is a good idea, adding large amounts is not necessary better. Right now, going much above 8gb of ram is not cost effective for an average user. If you use high end photo editing software such as Photoshop, or video editing software such as Final Cut Pro or Premier, more ram is always better. But if this is not your use, stop at 8GB. Anything more, with todays operating systems is a waste of money.
I consider a computer with between 4GB and 8GB ram to be an optimal mix of performance and cost. If you already have sufficient ram, and your machine is still slow or unresponsive, its time to consider other options. On a windows machine, it is always a good idea to run virus and spyware scans to be sure something is not sapping your performance without you knowing it.
In part 2, I will talk about harddisk upgrades both internal and external. Part 3 will deal with the final replacement decision and how to correctly prepare for your self for a new computer.