Links From My Recent Mac Class

Screen Shot 2014-09-14 at 7.58.26 PMLast night I had the opportunity to teach a class on Macintosh applications. We covered the applications that are included in the Mac operating system. You can never have enough tips about any application, I found the sites on the Internet that provide some great tips for some of these included applications.

Feel free to check these out.

80 handy iPhoto tips and tricks | News | TechRadar
Get more out of Apple email – How to – Macworld UK
How to use the Calendar in OS X Mavericks – How to – Macworld UK
Tips for using Maps on a Mac – How to – Macworld UK
Tips for using Safari 7 in OS X Mavericks – How to – Macworld UK
iMovie (2013): Tips For iMovie ’11 Users
12 Cool Tips and Tricks for iMovie ’11 | Mac|Life
10 Tips for Getting More Out of iCal | Mac|Life
7 FaceTime for Mac Tips, Tricks, and Features | Mac|Life


Posted in Mac

Get ready for your Trip to Yosemite

Screen Shot 2014-09-07 at 11.06.37 AMOS X Yosemite is the newest major operating system release for Mac users, versioned as OS X 10.10, and it’s due to be released soon. This release includes many new feature enhancements and refinements. I have been working with the Beta release and it looks to be a great release of OS X and all users that can update their Macs should do so.  But before you run the updater to install it on your Mac, there are a few things you should do just to ensure that your upgrade goes well.

Yosemite is super easy to install, and it’s similar enough to Mavericks and Mountain Lion that it’s unlikely most users will encounter any trouble with the update regarding app compatibility or system support. But any major new operating system releases offer a good time to run through some simple maintenance  to insure compatibility of the Mac itself, your apps, and also to do some general clean up and, the most important thing of all, back up.

So here are a few things you might want to consider before upgrading your computer to Yosemite

1: Check Mac System Compatibility

At it’s core, updating to OS X Yosemite requires the following:

  • 64-bit Intel CPU
  • 8GB of free disk space
  • OS X Lion or OS X Mountain Lion, or Mavericks
  • Internet connection so that it can be downloaded from the Mac App Store

If some of that sounds like jargon gibberish, but basically, if your machine runs Mavericks, it will run Yosemite. Apple is not published a list of machines but Yosemite will run on, but here’s the list for Mavericks.

  • iMac (Mid-2007 or later)
  • MacBook (13-inch Aluminum, Late 2008), (13-inch, Early 2009 or later)
  • MacBook Pro (13-inch, Mid-2009 or later), (15-inch, Mid/Late 2007 or later), (17-inch, Late 2007 or later)
  • MacBook Air (Late 2008 or later)
  • Mac Mini (Early 2009 or later)
  • Mac Pro (Early 2008 or later)
  • Xserve (Early 2009)

Perhaps the biggest requirement for many users will be having at least 8GB free on the Mac hard disk.  Don’t skimp here. Make sure you have enough free space for the updates before you start. Running the installer puts all of the new software on your computer and then removes the old. So additional free space is needed at the time of install to make it work well. Running out of space would not be a good thing.

2: Install General System Updates & Update Mac Apps

Keeping system updates and apps up to date is good policy for stability and security, but you’ll often get new features too. This can be particularly true when apps have been updated to support new major OS X releases, where a potential new feature built into the operating system may need to be independently included within the apps themselves.

Updating OS X and your apps through the Mac App Store is remarkably simple:

  • Launch the “App Store” from the Applications folder
  • Go to the “Updates” tab and choose “Update All”

3: Do Some General System Clean Up

Major OS X updates are a great time to perform some general system maintenance and clean up to help insure things are running well. Much of this is optional, but if you have the time it’s a good idea to perform some cleaning on the Mac:

  • Delete old apps you no longer use, usually tossing them into the Trash is enough but you can do a more thorough uninstall if desired
  • Trash useless old files from the ~/Downloads/ folder
  • Delete unnecessary caches from user folders and old apps
  • Clean up files from the desktop, either throw them all into a ‘cleanup’ folder or individually into their appropriate places in your home directory – this is an easy task that helps to speed up older Macs

Now go to the utilities folder inside the applications folder and run Disk Utility.  Select the Macintosh HD in the left pane and press the Repair Disk Permissions button.  Apple doesn’t say this is necessary, but I’ve seen far too many times but not doing this causes you problems down the line.

4: Back Up with Time Machine

Last but certainly not least, back up the Mac. Having back ups of your important data and files is very important, and Apple’s Time Machine makes it so easy to backup everything that there is little reason not to do it. Always, always, back up your Mac before installing a major system update. It’s unlikely something will go wrong, but if something does go haywire you can quickly recover if you have a fresh backup handy.

[stextbox id=”info”]For most general users, it is often good to wait a few days after the new OS is available to make sure there are no issues with it.[/stextbox]

That’s about it,  Now go ahead and download and enjoy OS X Yosemite, free is a great price for a great operating system update!

Once the install is complete I typically run the system updates again. This ensures that if Apple has patched the system beyond the release version you get those updates too. It also ensures that any Apple applications or vendor applications that have been updated for the new operating system get installed on your computer


Internet Slowdown Problems

Screen Shot 2014-08-15 at 11.26.09 AMQ: Lately I’ve noticed that the internet has slowed down a great deal. I also tried to purchase music at iTunes and got an error message, three times, that the network connection had ‘timed out’

A: In my experience Internet slowdowns are often a result of two things. Obviously it could be a slow down at the cable company providing the service. But the second thing actually happens more often. The devices that connect us to that Internet sometimes get confused. These are boxes at tend to run 24 hours a day so any little glitch can cause a problem. The first thing I always do when the network seems slow is to unplug the router and unplugged the cable modem. But it’s important to reconnect them in the right sequence.

While these boxes are unplugged, restart your computer. It’s always a good idea to shut down all the way to power off and then turn the power back on.

Next, plug the cable/DSL modem in and then wait about a minute. Now plug the power into the router. This allows the cable modem to reset and make a connection prior to getting the router powered back up. Once you’ve done that the next thing to do is to test the speed of your Internet and see if you’re getting what you’re paying for.

I often use one of these websites to test Internet speed.

http://www.speedtest.net/
http://www.dslreports.com/speedtest

There are also apps to do this on the iPhone or the iPad.

If you’re not getting the speed you’re paying for, it’s time to call your Internet service provider and see if they can do anything to help.

Transcend’s JetDrive Lite : A Low Cost and Fast Storage Upgrade

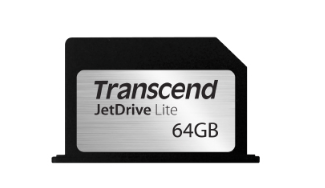
Screen Shot 2014-08-13 at 8.20.04 PMTranscend’s JetDrive Lite 330 Expansion Card gives you the chance to instantly boost the total available capacity of your MacBook Pro system without the need to upgrade to a larger capacity SSD.

With their substantial amount of storage space, Transcend’s JetDrive Lite 330 expansion cards provide plenty of space for professional-quality photos and videos as well as a large music collection. Each 64GB card for instance, can store over 31,000 high-resolution photos, 16,000 mp3 songs, 16 hours of Full HD quality video, or seemingly limitless number of documents.

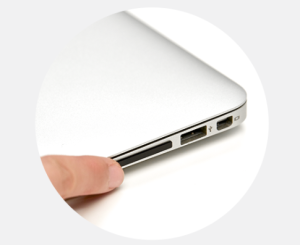
When inserted into the SD card slot of a MacBook Pro 13″ Retina Display, the low-profile Screen Shot 2014-08-13 at 8.20.18 PMJetDrive Lite 330 won’t stick out like a normal SD card and can even be left in place for on the go storage. What’s more, the JetDrive Lite 330 makes fast and efficient file transfer possible with incredible transfer speeds of up to 95MB/s read and 60MB/s write.

Thats the great part. It’s unbelievably fast. I installed the beta for the Yosemite operating system on the drive and it’s nearly as fast to me as running from a internal SSD drive.  I really love the way if it’s flush in the SD slot.

For just $40, I’m able to get 64 GB of pretty darn fast SSD space for my MacBook Pro. It’s a great way to safely try out a new operating system. You got a love that.

Posted in Mac

Mac: Starting apps using Spotlight

SpotlightThere are many applications on a Macintosh that I only use once and a while. Rather than find the applications folder and look for that applications icon, I use a better way that allows me to go directly to where I want to go.

If there’s an app I need to use that’s not in my Dock, I start it by hitting Command + Space bar to open the Spotlight search box, then I begin typing its name. After just a few characters Spotlight has usually realised which app it is, and I just hit Return to start that app. Simple, and quick. No mouse required!

In the next release of the operating system, Yosemite, Apple will make this even more prevalent. When you hit this command key combination, the spotlight dialog will pop up in the middle of the screen so it will be easier to see.

MacBasics: Mac OS Productivity Apps Training in Jefferson City

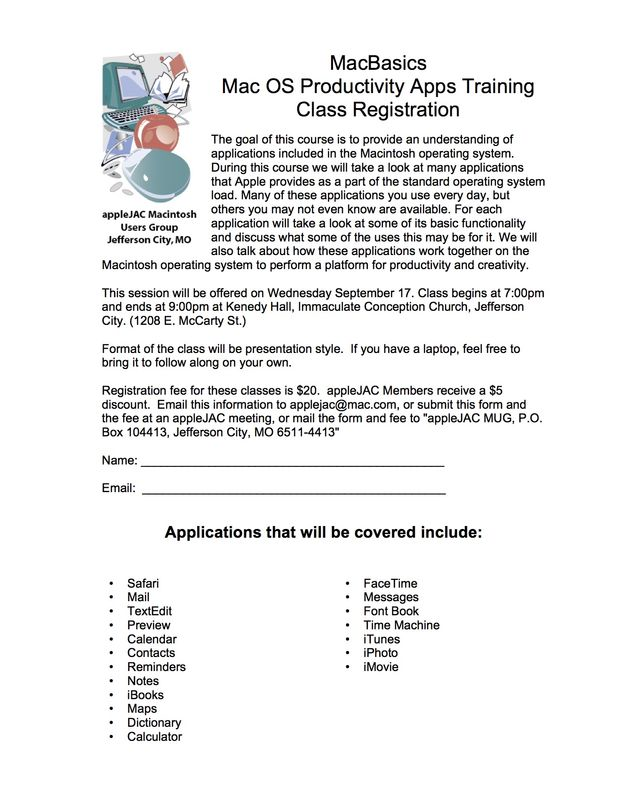
A few times a year, I am asked to do some training for aappleJAC, our local Macintosh Users Group.  One of these classes is coming up in September.  This class will cover the Mac operating system beyond the basics. A basic Macintosh class will teach you to get around in the operating system and find things but Apple has include so many applications with the Macintosh OS that it really cannot cover these in one class.This class, will cover all those applications that Apple includes free as part of the operating system.

Information on the class is below. Everybody’s welcome.

6a00d8341fbd4c53ef01a3fd41d6d7970b-640wi


Posted in Mac

Paste text without Formatting

imagesI don’t know about you, but I never, want to paste something into a fresh document AND carry across its original formatting. I always want to paste and remove the format.  On both the Mac and Windows, there’s a keyboard shortcut that will allow you to do that. Unfortunately, that keyboard shortcut is not simple to do.

On a Macintosh, to paste without formatting (i.e. as plain text), hold down Shift + Option + Command and hit V. It’s a tricky keyboard combo to master but with a little practice you’ll get used to it.

On Windows, in most versions of recent Windows versions,  Ctrl + Windows Key + V also pastes text as plain text. All you have to do is to relearn these command sequences as your standard paste command. If you do that, you’ll always be getting text only without the added format.

Protect your Mac from Power fluctuations with a UPS

A75-2114-mainVFluctuating or unclean power is one of the things that cause electronics most problems. Fortunately uninterruptible power supplies, UPS’s, are readily available and relatively inexpensive. A UPS plugs in to the electric current coming from your house and provides additional outlets.  These devices condition the power coming from the electric outlet before it gets to your computer so that spikes and fluctuations are mitigated. If that sounds similar to a surge suppressor, it’s because it UPS will replace your surge suppressor. It provides the same functions but it also provides one great additional benefit. An uninterruptible power supply provides battery backup for the electrical power coming from your outlook.

UPS’s are made with a battery internal to the unit. All electrical power goes from the outlet in your house to the battery and charges the battery. The battery then supplies power directly to anything plugged in to the device.  If there are spikes, fluctuations or brown outs in the electricity coming from the power company the battery takes over and keeps those from affecting your electronic devices.  If the power coming to your home goes out completely, the battery takes over powering the devices for a certain amount of time depending upon the size of the battery that’s included in the UPS. This function is all well and good, but on a Macintosh, the UPS has the ability to connect to the computer and intelligently give the computer commands telling it that the power is out.  There are similar functions in windows but these often require additional software installed that comes with the UPS.

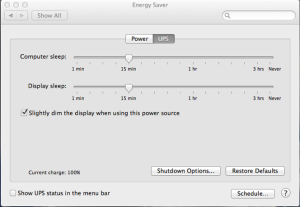
Screen Shot 2014-07-17 at 4.40.07 PMIn recent versions of the Macintosh operating system, Apple has included support for UPS devices built-in. This support is controlled in the energy saver system preference panel. Without a UPS connected, you cannot see the controls. Once you plug in a UPS with a USB cable thats usually included with the device, new and additional options are provided in the same energy saver panel. It is important to note that this USB cable typically needs to be plugged directly into the computer and not through a USB hub.

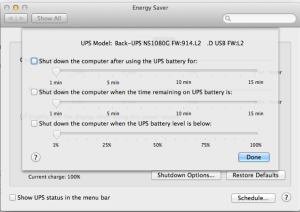
With the UPS connected, looking at the energy saver panel you have the ability to turn on an icon in the menu bar that allows you to check the charging status of the battery in the UPS. You also have the ability to set shutdown options that tell the computer how to correctly shut down based upon the power being given from the battery in the UPS device. Typically, you would want to turn on the option that allows the computer to be shut down when the UPS power reaches something near 25%.

This setting will allow your computer to get through all brown outs and power fluctuations Screen Shot 2014-07-17 at 4.38.47 PMwithout being affected. It will also continue to power the computer for a period of time after the power goes out. In this way you’re able to not have to force the computer to shut down if the power outage is short. If the power outage continues for a period of time that causes the battery power to reduce down by 75%, the computer will begin the shutdown process. The final 25% of the power in the UPS will get the computer shutdown correctly. This way, the hard drive on your computer doesn’t abruptly shut down with the possibility of file loss.

There are a number of UPS devices on the market, but the major player in this field is APC. Uninterruptible power supplies from APC are recognized directly by the Mac and allow this built in software in your operating system to control the UPS.

If you live in a location where the power is not stable, or have reasons that the power fluctuates, a UPS may be just the thing to protect your computer.

Clean up your Mac with Disk Doctor


Screen Shot 2014-07-09 at 7.45.25 PMFor years I recommended a product called CCleaner to clean up all the cash files on your Mac computer. Unfortunately, the company that made that product quit updating it for your releases of the Mac operating system. Recently I’ve run across the another product that will do very similar things.

Disk Doctor, available from the Mac App Store, is a very simple utility that can clean up all of this I needed information.
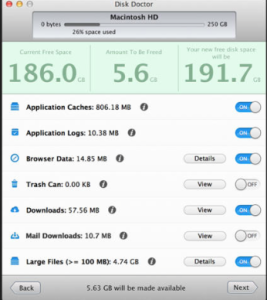
With just a few clicks, Disk Doctor can empty the following:

– Applications Caches
– Application Logs
– Browser Data
– Mail Downloads Folder
– Downloads Folder
– Large Files (files within your user folder that are greater than 100 MB) *Mountain Lion Users only*
– Trash Can

Screen Shot 2014-07-09 at 7.45.36 PM
And while the product is someone of a one trick pony, it is very inexpensive costing only $2.99.  Running this utility takes only a few minutes and will certainly get rid of a lot of information that you have no reason to keep. Running it once a month will ensure that your Mac is running as fast as cleanly as possible.

Network attached storage for the home: The good the bad

Screen Shot 2014-07-02 at 2.06.00 PMEverything you hear these days is about cloud computing. Articles about ways that people are moving to the cloud seem to be all over the internet.  Many are related to many products that can store your files in the cloud.  I have had the opportunity to try a couple of network attach storage devices recently and had one very good experience and one not so good.

So why would you want a home network attached storage device? Well that’s pretty easy to explain . If you’re using cloud storage today you’re likely limited by the amount of cloud storage that’s provided at a low-cost. You can definitely add additional storage for additional cost but that still does not solve the problem of having enough storage for what you want to put in the cloud. Vendors have realized this need and have developed network attached storage devices that you can put in your home and that will provide you a large amount of storage for a relatively low cost. You also have the added security of knowing that your cloud data is located where you put it. There is no risk of the cloud service going out of business or losing your data by doing things this way. It does not eliminate the need for a backup of your network device, but it does provide you that peace of mind in knowing that you have the data and are the only one with the data.Screen Shot 2014-07-02 at 2.06.27 PM

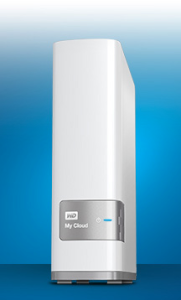
The first one I tried is made by Western Digital called My Cloud. Western Digital is a storage company that makes hard disk drives that are available at a local electronic stores so they were a natural to get into the network attached storage business. If you’re familiar with an external Western Digital hard drive,The My Cloud device will look very similar. On the back of this device you will find an ethernet connection port. This port connects to your local home network and allows you to configure the device for access outside the home. It also provides a USB3 port on the back of the device to allow you to either upload photos from a digital camera or connect directly to your computer.

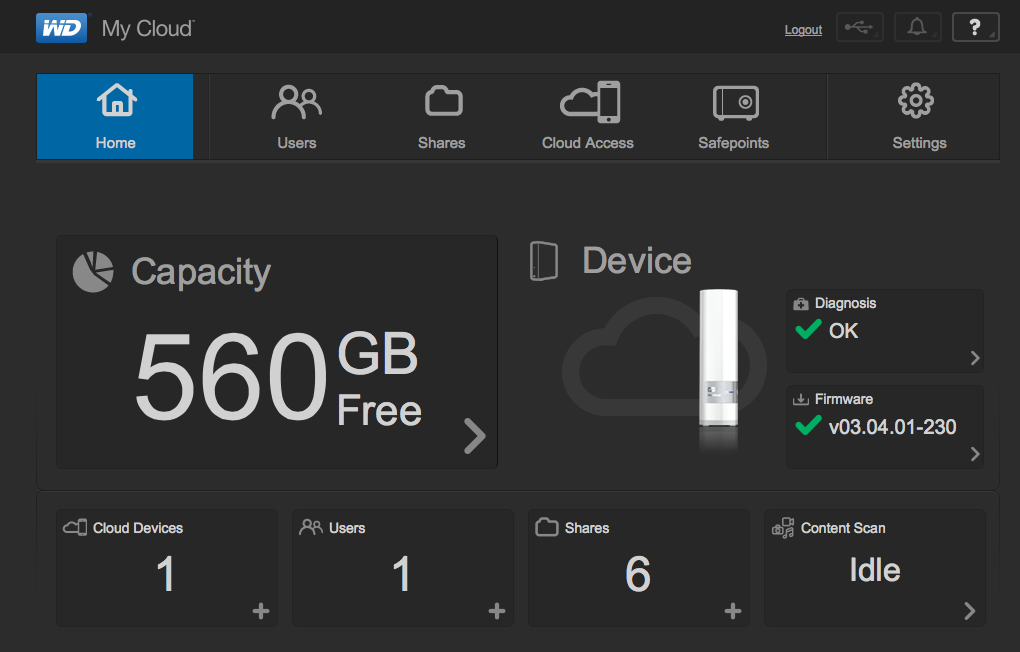
Screen Shot 2014-07-02 at 2.10.13 PMSetting up the device only takes a few minutes. Once you install the included software on your computer it provides access to the device You then connect to the device across your home network to do the configuration. Once it’s connected you can map drive to your computer or you can access the files from the Internet. It’s very easy to work with and works very quickly. Western Digital offers mobile apps for the Android and iOS operating systems that which helps solve another problem many of us face: data fragmentation caused by having stored files on multiple devices. Install the apps onto your smartphones and tablets, and you can send all your media files over the Internet to your My Cloud.

One of the best parts of this network attached device is the cost. A 2 TB unit costs about $150. A 3 TB unit is about $200. Considering the cost of the drive itself is at least $100 to $150, these devices are are absolute bargains.

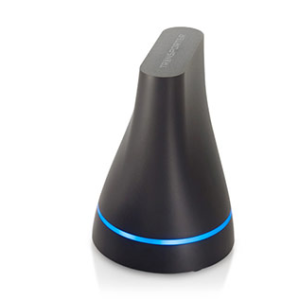
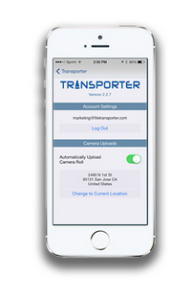
Unfortunately, I can’t be nearly as positive about the second device I’ve had experience Screen Shot 2014-07-02 at 2.28.24 PMwith. This unit was called Transporter from Connected Data. (recently purchased by Drobo). If you were giving points for looks, the transporter would certainly be a winner. It has a very odd shape and a beautiful blue light that pulses when date is being accessed. But looks are about the end of the good things I can say about transporter. The software for this product has been extremely buggy. I ‘ve also found that when I have the software running on my computer in noticeably slows my machine down. You might be able to forgive the company for some problems with the software, but the problems with the transporter only begin there.

The Achilles’ heel behind the beautiful looks of the transporter is that it uses only a 2 1/2 inch drive. As a result, the costs are much higher for drives in a transporter. Plus many small 2 1/2″ drives are truly intended for laptops and not intended for something that spins and runs 24 hours a day. The result of this drive choice is that transporters are expensive and slow compared to other devices. As an example, a 2 TB transporter costs $350. That’s a full $200 more than the Western Digital My Cloud.

Screen Shot 2014-07-02 at 2.28.35 PMOne of transporters claims to fame is that can it can automatically mirror your data to another transporter. In practice, this proved to be difficult to make happen. Configuration, firewalls, and general lack of ability for the device to see itself on the network made doing this difficult. When you add in the fact that to make this work you need a second transporter, you have to wonder what these people were thinking about in their design and selection of product features.

You have to wonder why a company like Drobo, that provides high-quality storage devices, would purchase transporter. Couple that with the fact that Drobo doesn’t even advertise transporter on it’s own website makes me believe that the purchase was more related to software or people that it was to the device itself.

From my experience with these two devices there is no choice. If you’re looking for a low-cost network attached storage device, to build your own cloud in your home, choose the Western Digital My Cloud. Steer away from transporter.   It really does not perform as well as it should, and costs way too much.