iOS9: How about some tips and tricks

Screen Shot 2015-10-23 at 3.45.27 PMHere are some of the best iOS 9 tips and tricks that I have found since it’s introduction.

  • Proactive Assistant – New search feature accessed by swiping right from the home screen. You can turn it off in Settings> General> Spotlight searching
  • Keyboard – Many folks complained about the inability to tell whether the “caps” key was engaged or not. So, Apple gave us a keyboard with lower case letters by default. When you tap the “up arrow” on the left, the keys change to upper case.  You can change the keyboard back to display upper case keys all the time by going to Settings > General > Accessibility. Scroll down to “Keyboard” and tap there. Under Software Keyboards it shows a button next to “Show Lowercase Keys. Tap it off to return to all caps all the time.
  • Button Shapes – Go to Settings > General > Accessibility. Scroll down to “Button Shapes” and click on the button there. If you look at the top of the screen as you tap it, you will see a grayed area appear behind the text “General.” The grayed area will now appear behind many of the text buttons throughout your OS. For instance in Calendar app the text buttons on the bottom of the screen “ Today”, “Calendars,” “Inbox” will now show that grey background behind them making them standout from the white background.
  • Larger Text – Just tweaking up the size of the text displayed on the iPhone can really make a big difference when taking a quick glance at Contacts, Mail or Messages or overall system text. On your iPhone or iPad, go to Settings > General > Accessibility. In the Accessibility screen scroll down to Larger Text and tap there. A new screen appears with a sliding button that scales up or down for size of text. It is set in the middle by default, but you can actually see the text on the screen above the slider grow larger as you move it to the right. I set mine just one “tick” to the right of middle. If you click on the Larger Accessibility Sizes, you’ll see even larger text settings.
  • New notes – The Notes app has always been great for jotting down your thoughts. And now it’s great for so much more. Want an easy way to make a checklist of to-dos? Consider it done. Or add a photo, map, or web link to a note. You can even draw a sketch with your finger. And thanks to iCloud, changes to your notes will be updated across all your devices and on iCloud.com.
  • Public transit in maps – Now you can use public transportation with Maps as your guide. In select cities around the world, a new Transit view shows you lines and stations for subways, buses, trains, and ferries right on the map. When you plan a route, every step of your trip is laid out from point A to point B.  Not yet available in Missouri.
  • Shortcuts in maps search to nearby places – with the Nearby feature, it’s easier to see what’s around you and decide on places to shop, eat, and more.
  • Low-power mode – Across the entire operating system, apps and key technologies have been made more efficient to trim battery usage wherever possible — so you get more battery life for the things you do every day. Thanks to ambient light and proximity sensors, your iPhone knows if it’s facedown on the table and prevents the screen from turning on, even when you receive a notification. The new Low Power mode lets you extend your battery life even further.settings battery – also see what apps are using your battery
  • News app – iOS 9 adds a new app to your Home screen. News puts all the stories you’re interested in, all in one place — so you don’t have to hunt through different apps and websites to make sure you’re not missing the next big story. Articles are pulled from a wide range of sources, from top news organizations to indie publications. Stories are chosen for you based on what you like to read, and the more you use News, the better it gets at picking out just what you’ll want to see
  • Wallet app replaces passbook – Use Apple Pay to securely and easily make purchases with your credit cards, now including Discover. You can even access Wallet by double-clicking the Home button when your iPhone is locked. Soon you’ll be able to use store credit cards, like Kohl’s Charge or JCPenney Credit Card. And you’ll be able to add rewards cards, like Dunkin’ Donuts DD Perks, Walgreens Balance Rewards, and MyPanera, to your Wallet app and receive and redeem rewards
  • New Wallet Features – Double-click from off to pay with wallet or choose a different card
  • New App navigation – Link back to where you came from with “back to”
  • iCloud drive application – The new iCloud Drive app built into iOS 9 allows you to access any file you save to iCloud from just one place — right on your Home screen. Easily search within the app and find the file you’re looking for. Browse all your files by date, name, or any tags you added on your Mac. You can also preview and organize your files without leaving the app.
  • Find my phone and find friends preinstalled
  • Set a reminder about what’s on the screen – Say remind me about this to Siri
  • New Siri preferences – Turn on hey Siri, Silence Siri, and have it learn your voice
  • Slide Over – Now you can open a second app without leaving the one you’re in. So you can quickly browse the web, respond to a text message, or jot something down in a note, then slide that app away and get back to the one you were using before. (iPad only)
  • Split View – With Split View, you can go a step further and have two apps open and active at the same time. Work on a sketch with the reference photo beside it. Or write a paper while copying citations from a book in iBooks. When everything you need is right in front of you, it’s easier to focusSearch inside settings (iPad 2, iPad Mini 4, and iPad Pro only)
  • Picture in Picture – While using FaceTime or watching a video, press the Home button and your video screen scales down to a corner of your display. Tap to open a second app, and your video continues to play — even while you use the other app. So keep watching your favorite TV show while you reply to the email that just came in. (iPad only)
  • Wi-Fi assist in settings cellular – Allows you to use Celular for data when Wi-Fi fails (Uses data from your celular plan)
  • Six digit passcode -Keeping your devices and Apple ID secure is essential to protecting your personal information — like photos, documents, messages, email, and so much more. iOS 9 advances security by strengthening the passcode that protects your devices
  • Quickly trash all mail – hit edit button to trash all
  • Add attachments in mail – Press and hold to add attachments from iCloud Drive.
  • Better upgrading process – iOS 9 does even more to efficiently stream new updates to your device without having to first download and unpack them — which means you don’t need as much free space to update
  • Disable shake to undo – in accessibility
  • Check Your battery in Notifications and Widgets – Pull down from the top of the screen
  • Pinch to zoom in video – When watching some supported video, you can now pinch to zoom in
  • New smart albums in Photos for selfies and screenshots
  • Directly select photos by gliding over with your finger
  • Hide photos in your photo library – Hide tyhose photos in your library you dont want others to see when they look at your device
  • Request safari desktop site and turn off content blockers on the fly – by pressing the reload icon.
  • Quicktype – Shape up your text in no time with an all-new Shortcut Bar, convenient editing tools, and a handy new way to select text with Multi-Touch gestures. And now when you use a wireless keyboard with your iPad, you can enjoy even more keyboard shortcuts. You can even use your on screen iPad keyboard as a mouse!
  • Safari Content Blockers – Safari content blocking extensions don’t automagically identify ads and prevent them from loading. Instead, they identify elements and resources on a web page and can, optionally, hide those elements and prevent those resources from loading. The goal is to show how fast the modern web—read: Safari—really is when you remove all the extraneous code that’s been dumped on top of it.
  • Find on the page in Safari – Safari has a Find in Page feature, although it’s a bit hidden. To perform a search for words on the current page, tap the address bar and type your search. Tap the Find option under On This Page at the bottom of the list to search the current page
  • Safari Reader Enhancements – Customize safari reader mode with color and font and Background

OS X El Capitan: Changes in the Spaces Functionality

Spaces has changed a bit in El Capitan.  Apple has a great help article that covers how it works in the new operating system version.  Here is what Apple has to say:

If your desktop becomes cluttered with open app windows, you can create additional desktops, called spaces, to organize the windows. When you work in a space, you see only the windows that are in that space.

You use Mission Control to show the Spaces bar, where thumbnails represent your spaces and apps you’re using in full screen or Split View.

The Spaces bar showing a desktop space, apps in full screen and Split View, and the Add button to create a space
Tip:   Make your spaces unique by assigning a different desktop picture to each one. Just assign System Preferences to all desktops (see the instructions below), then change the desktop picture in each space.

Create a space

  1. Enter Mission Control, then click the Add button  in the Spaces bar.

    You can create up to 16 spaces.

  2. When you’re done, click a space in the Spaces bar or a window in Mission Control.

Move between spaces

Do any of the following:

Swipe left or right with three fingers.

Press the Control key and the Right or Left arrow key.

Enter Mission Control, move the pointer to the top edge of the screen to show the Spaces bar, then click a space.

Move an app window from one space to another

Do any of the following:

Drag the window to the edge of the screen. After a moment, the window moves to the next space.

Place the pointer over the window’s title bar. Hold down the trackpad or mouse button, then press the Control key and the Right or Left arrow key.

From the space that has the window you want to move, enter Mission Control. Then drag the window up to the space you want to use.

If you drag the window onto an app in full screen, you can use the apps in Split View.

Assign apps to spaces

If you assign an app (or System Preferences) to a specific space, the app will always open in that space.

  1. Press and hold an app’s icon in the Dock.

    You may have to first open the app from Launchpad to see its icon in the Dock.

  2. From the shortcut menu that appears, choose Options, then one of the following:

    • All Desktops: The app opens in every space.

    • This Desktop: The app opens only in the current space. If you use the app full screen, it appears in its own space.

    • Desktop on Display [number]: The app opens in the current space on a specific display (if more than one display is available).

    • None: The app opens in whichever space you’re using at the time.

By default, when you switch to an app, the desktop automatically switches to a space that has open windows for the app. For example, if you create a new TextEdit document in Desktop 3, but TextEdit windows are already open in Desktop 2, your new document opens in Desktop 2. To change this setting, choose Apple menu > System Preferences, then click Mission Control.

Delete a space

  1. Enter Mission Control, then move the pointer to the top edge of the screen to show the Spaces bar.

  2. Place the pointer over the space you want to delete, then click the delete button that appears.

    If the space contains open windows, they are moved to another space.

You can quickly stop using an app in full screen or Split View by moving the pointer over the thumbnail in the Space bar, then clicking the exit button that appears.

How can I download a YouTube Video?

Q: I’ve been searching all over the web to find a way to insert a youtube video into a keynote presentation, but with no luck so far. Keynote will accept videos I shot with my old iPhone, but I don’t see a way to save youtube videos, although I know it can be done. I also know they should be MP4 files, but I’ll get to that later.

A: Here is the way I have found to do it. First note to the YouTube video you want to download and save the URL to the clipboard.  Now Go to http://www.tubegrabber.net.

Screen Shot 2015-03-16 at 1.02.46 PMInsert the URL in the download box and press download now.

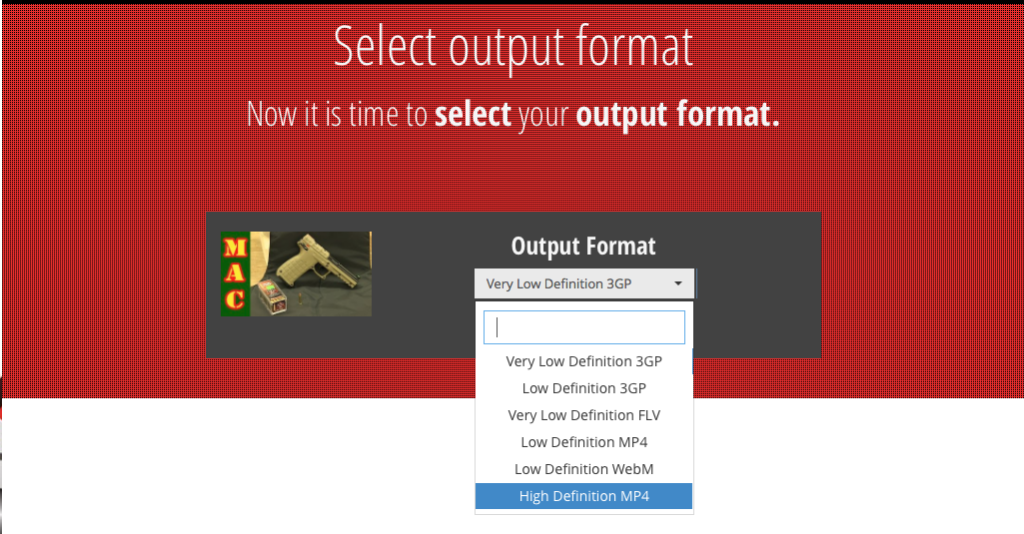
Select either Low definition MP4 or High Definition MP4 as the format

Screen Shot 2015-03-16 at 1.03.07 PM

Press Start Download

Screen Shot 2015-03-16 at 1.03.23 PM

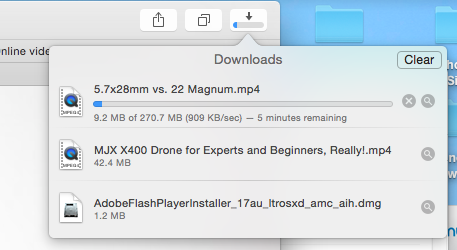
The video will be downloaded to your downloads folder.

Screen Shot 2015-03-16 at 1.03.37 PM

Adware – coming to a Mac near you

adware

As most of you know the consulting work that I do requires me to work on both Macintosh computers and Windows machines. For years one of the biggest difficulties I see with Windows  has been Adware. Wikipedia defines adware as:

… any software package which automatically renders advertisements in order to generate revenue for its author. The advertisements may be in the user interface of the software or on a screen presented to the user during the installation process. The functions may be designed to analyze which Internet sites the user visits and to present advertising pertinent to the types of goods or services featured there.

That’s pretty much exactly what it is. It’s not a virus. It’s more of an annoyance than anything else. Adware has the ability to hijack what you were doing on the Internet and send you information from or possibly even to a website different than what you were looking for. Adware can be subtle. It may send you to websites that are similar to what you were looking for but not exactly the same in an effort to get you to purchase things from a different vendor. It may take over your entire search function on your computer and never allow you to search sites that you want. In this case it only sends you to sites the adware developer wants you to see.

For years a large portion of the problems I see in Windows are related to adware. I always characterize it as software that has its friends. On Windows it’s very common for one Adware infection to lead to many more because the software itself goes out and downloads other adware or malware to install on your computer.

There are great tools in windows to remove much of this like Malwarebytes that allows you to remove much of this adware and clean your computer up. But typically an Adware infection is accompanied by many other problems on a Windows computer.

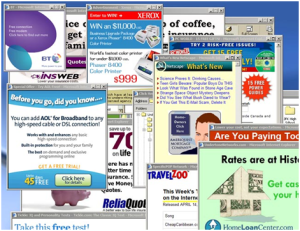
The purpose of all this background is to give you an idea of what Adware is. But the real news is that Mac users are now beginning to join the adware fold with their windows counterparts. In the last week, for the first time that I remember, I ran into a serious adware infection on a Macintosh computer. The person infected was a sophisticated long term Macintosh user who made the simple error of clicking okay to a pop that told them to update their flash player.

Just like on windows this infection was buried down deep into the operating system and difficult to find and remove. But fortunately like windows there is a utility out there that seems to do a good job in this particular case. After removing many parts of this by hand I ran across a product called Adwaremedic and after reading many Google reviews of it ran in to do the final cleanup on the machine. It seems to have done a great job but having only needed to use it once it’s hard to give it a golden recommendation yet.

The main thing to keep in mind for Mac users is they need to think about safe computing just as Windows users have had to do for years. Here are a few things to consider as you surf the web on your Macintosh:

  • Never respond to pop up windows. Always close them using the close button in the window dialogue rather than the cancel button on the window itself.
  • If your computer tells you something needs to be updated in a pop up window never do it there. If it’s flash player, go to Adobe’s website and download flash player from there. Never accept the help that a popup is trying to give you.
  • Be careful when installing applications that are downloaded from places you’re not familiar with. In Windows I found out the hard way that even a well respected site like CNET has massive amounts of malware in their download section.
  • Be careful installing free applications.  If it seems to good to be true, it probably is.

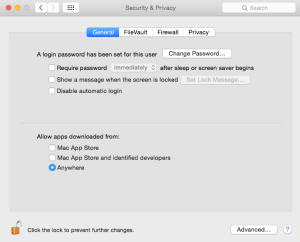
Screen Shot 2015-02-17 at 10.20.39 AMApple has done a great job to keep us from having to deal with this for years.  New versions of Mac OS even prevent us from downloading applications outside of the App Store by default. But there still too many of those out there and typically that has to be turned off to be able to install software you need to use.

To me, it looks like more of these are going to start popping up on our Macs and continue to be a real problem on Windows. Practicing safe computing can keep your machine clean whether it’s a Windows computer or now even a Macintosh.

Top 10 reasons people don’t have a backup

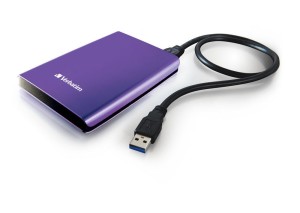
imageAt this time of year many of you will be taking photographs of your family at Christmas. When people gather around you and you click your phone or your camera to take those photos you have to realize that some of the people in those photos and in those situations may not be with us next year. How tragic it would be to not have their memory available to you in the photograph you so thoughtfully took this year. But even when you consider those things many people don’t think that they can have a loss of data on their computer.

Computers today are amazingly reliable. They can run continuously for years and never had a problem. They can store massive amounts of information and never have a problem recalling it. But computers today are still electronic devices that are susceptible to the same things seen been in the past. Electrical surges, loss due to theft, a simple drop off the table, a failing piece of hardware, are all real world problems that I see all the time. In the past having a backup may have been difficult. Backup software was hard to use or expensive to purchase. External drives to store your back up data were expensive. But none of those things should’ve stopped you then and none of those things should stop me now.

Your memories are too valuable to you to risk their loss. Hard drives are inexpensive for backup, costing less than $100 and lasting for years. But I hear all the time great reasons for not backing up your data. So if you’re one of the few people that I’ve talked with who have decided not to back up due to one of these reasons, take a minute and reflect on how silly some of the sound.

The top 10 reasons you don’t have a backup

10.  I have my important files on a thumb drive

Thumb drives are handy particularly for moving files from one place to another. But the cost of thumb drives today don’t make sense for backing up your data. Many people have hundreds if not thousands of gigabytes of data and to have enough thumb Drive storage for all of this would be prohibitive.  Plus what’s easier to lose Van a small thumb drive? Backing up your files and making this your only storage for back up is not a smart way to go.

9.  I can always use drive savers to recover my data if I have a problem.

Drive savers is a wonderful company that has saved many people by restoring unreadable and failed hard drives. They’re extremely good at what they do and unless there’s been a catastrophic drive failure can usually get the data back. But expect to pay. And pay through the nose you will.

Data recovery companies know they have you over a barrel and charge for it  The kind of clean room it takes to be able to do this kind of data recovery is expensive. I once had a client who lost their entire business due to a raid system drive failure. 14 drives RAIDed together and none of the drives failed, but the RAID controller did. The files were mission-critical and he sent them off to drive savers. Drive savers recovered every bit of data. And send him a bill for over $27,000.

So yes data recovery companies can save you. But you have to really need the data you be willing to spend that money. Many people ask me about this option in times of a loss. But only one has ever been willing to pay the cost.

8.  Backing up is too complicated

All of the commercial operating systems today have built-in backup. It’s all easy to set up and does it for you once it’s set up. It may be complicated for you to set it up but I can help you with that for 30 minutes worth of my time. And once it’s set up it does it for you. I just can’t see this as an excuse.

7.  I’ll forget to do it anyway

See item 8 above.  Once it’s set up backup can be automatic.

6.  It’s not going to happen to me

Famous last words. You may have used computers for 20 years now and never had one fail but you also now have 20 years worth of data to lose if yours fails today. Computer components are electronics. Spinning hard drives still have bearings that go out.  If you really believe it’s not going to happen to you you’re just fooling yourself. The law of averages says one day you’ll have a data loss and if you’re not prepared for it think house silly you’ll feel if this was your excuse.

5.  My data is just not that important

Some people don’t believe they create anything on the computer. They just use it for email and web surfing. They may store a few pictures but nothing really important. But thoughts change when you’ve lost data. You remember the taxes that you have stored. You remember the pictures of uncle Gus who’s no longer with us. You remember your business papers. You remember just how important your date is to you.

4.  Running a back up slows down my computer

If your backup software is set up correctly it can back up in the middle of the night when you’re not using your computer. If you’re backup is incremental you’re only copying files that have changed since the last back up. Sure, the first backup takes a long time but after that backups can happen in minutes. In the time it takes you to grab a coffee your computer could be completely backed up.

3.  Managing back up files takes time

Today’s backup systems manage their data automatically. When the drive fills up it deletes the oldest copies of the files in the back up. You never have to touch it and you never have to sort it. If you use a laptop you just have to plug the drive in periodically and let it back up.

2.  Backing up cost too much

For the cost of an external hard drive you can be completely backed up. You don’t need any expensive software because your operating system already include software to do the back up. External hard drive can be purchased for less than $100. Aren’t your memories worth that?

1.  I was going to run a back up tomorrow

How many times of I heard someone tell me that they don’t have a back up but they planned to run one tomorrow. Some people still believe tomorrow never comes. The time to back up is today not tomorrow.

So where do you fall in this list of reasons?  Do any of these sound familiar? I hear them all the time. I tweeted out about two weeks ago to people that follow me “backup backup backup” but unfortunately this week I ran into another situation where a hard drive failed and there was no backup. Don’t let this happen to you.

Take advantage of the after Christmas sales to buy a backup drive. If your backup drive is over three years old maybe it’s time to replace it with a larger one. If your date is truly important to you maybe you need two copies of a backup with one stored off site.

Perhaps a Christmas gift for yourself this year should be sitting down with me for an hour and discussing your backup plan.  It could be the best hour of consulting you’ve ever spent.

More Questions on iCloud Drive

Q: I am not really clear on the iCloud drive. Am I correct with this? First, you need to put items in the icloud drive by dragging them there? Then they should show up on the iPhone but where? Is there supposed to be an icloud drive on the phone? or the pad?  Or would the files just be available, for  example, on pages on the iPhone, since that’s where I worked on them?  This is not totally clear for me.

A: What you say makes perfect sense. Unfortunately that’s not exactly how it works.

The part on the Mac is correct drag things to the iCloud drive icon that’s in your Finder sidebar and that puts them and iCloud Drive. On your Mac you can select iCloud drive and finding those items to open them.

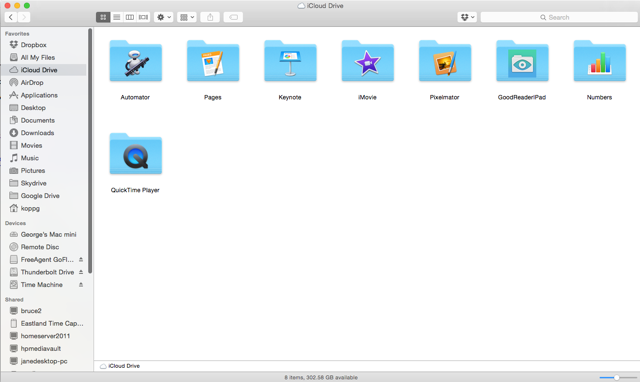
But on the iPhone it’s not that simple, on an iOS device the application has to support iCloud Drive. When it does it creates its own folder on iCloud drive for its specific needs.  Here is a screenshot of my my iCloud Drive.

Screen Shot 2014-12-18 at 4.01.31 PM

Each of the folders with specialized icons is created by an application on the iOS device. Then to access the files in a particular folder, such as pages, you run the pages application on the iOS device. There is no place on the iPhone or iOS platform to look at everything that’s on iCloud drive. You also cannot look for files in other folders. For instance, if you created a home folder on your iCloud drive your iOS apps could not see it.  Each app in iOS only looks in its own folder.

And if that’s not enough, each app from iOS can only look at the root level of that folder.  If on the Mac you create subfolders, iOS cannot see them.

To be quite honest, Apple needs to clean a little of this up before it becomes really useful. For now, I only use it for apps on the phone that I want access to the files on the Mac. Not the other way around.

Hope this clears it up. But it’s not you, it’s confusing by its nature.

Apple has a page on their website that helps clear some of this up.

Dealing with junk mail in iCloud

spamYou don’t get any junk mail do you? Well I sure do. Each mail account that you have deals of junk mail a little differently. You can collect junk, spam, or just a long waste of your time, it all ends up the same, you want to get rid of it.

One of the primary addresses I use is an iCloud account and here is what Apple says about dealing with junk mail in iCloud.

iCloud automatic junk mail filtering

To minimize junk mail, iCloud uses techniques such as trend analysis, dynamic lists, and content filtering to automatically detect and block junk mail before it reaches your Inbox. However, no strategy for managing junk mail is 100% effective, so some junk mail may still reach your Inbox. The information below may help you reduce the amount of junk mail that you receive.

If you think a message may be junk mail, don’t open it

Sometimes the seemingly innocent act of opening a questionable email can alert spammers that their message was received and opened at an active email account. This can encourage more junk mail. To avoid this, you can delete any messages that look like junk mail before you view them.

You can also use the Mail app to mark messages as junk so that later messages from the same sender are automatically marked as junk:

  • In iOS 7 or later, open the message, tap the flag icon at the bottom, then tap “Move to Junk”.
  • In OS X, select the message and click the Junk (thumbs down) icon in the Mail toolbar.
  • At iCloud.com, select the message, then click the flag icon and choose “Move to Junk”. Or just drag the message to the Junk folder in the sidebar.

Spammers can use the email image-loading feature to determine whether your email account is active. Here’s how to keep images from loading automatically:

  • In OS X Mail, choose Mail > Preferences. In the Viewing tab, deselect “Display remote images in HTML messages”.
  • In iCloud Mail, choose Preferences from the Action (gear) pop-up menu in the sidebar. In the General tab, deselect “Load images in HTML messages”.

So those are the basics, but Apple has many other ideas that can assist you in dealing with junk mail problems in your iCloud account. Take a look at their support document for more information.
IMG_0328.JPG

I’ve lost the predictive text bar in iOS 8

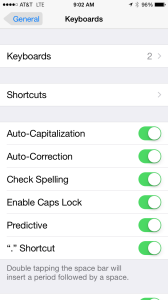
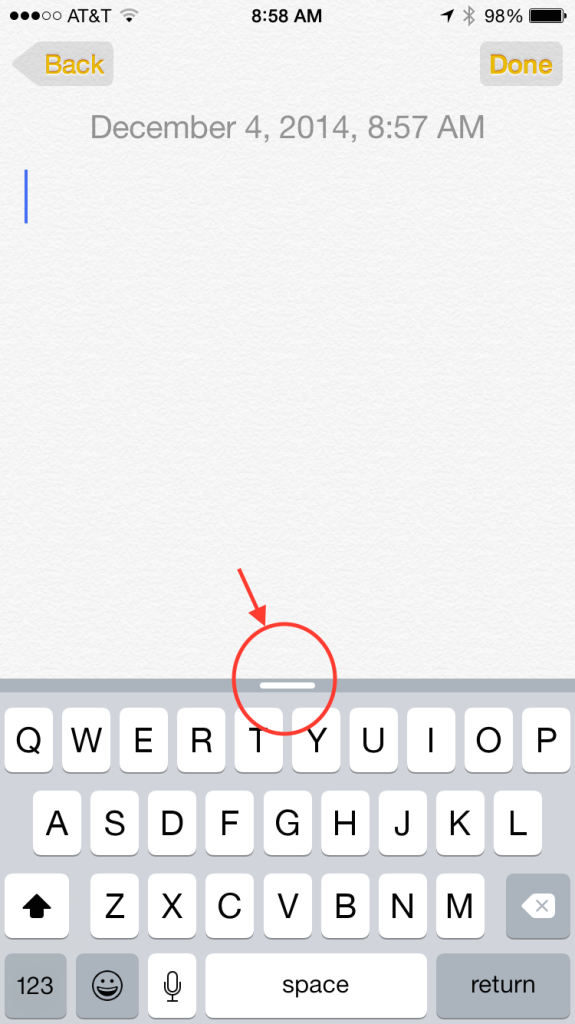
IMG_1375So here’s one that’s kind of easy to miss. People of told me that they can’t find the predictive text bar above the keyboard in iOS 8. They tell me it used to be there but now it’s gone. First I direct them to the settings under keyboard to make sure predictive text is turned on. But typically it is.IMG_1376

What normally happens is your finger accidentally slips when typing on the keyboard and makes the predictive text bar become minimized. If you notice just above the keyboard there may be a small bar at the center of the keyboard area. This bar is a slider that you can click on and drag upward to turn the predictive text bar back on. It’s pretty easy to miss, but once you notice it’s there and turn it back on it’s easy to see how he could accidentally be turned off.

IMG_1374

My iCloud password is wrong again

imgresI believe I finally figured out why some people have so much difficulty with their Apple ID for iCloud passwords. And believe it or not I don’t think it’s truly their fault.

So here’s a common scenario I see with people who use iCloud for sending mail. Out of the blue, you try to send an email on your iOS device or even your computer and you get the message that your user ID or password is incorrect. It typically seems kind of odd to you because you may have just sent an email a few seconds before without any difficulty. So what’s a person to do?

All too often people go into their iCloud settings and try to change their password by reentering it. But unfortunately this is the wrong thing to do.

One thing that Apple needs to get a handle on is why iCloud seemingly goes off-line over and over again day after day for short periods of time. I see this myself almost on a daily basis. I tried to send an email and get that dreaded your password is wrong message. But what the message really should say is iCloud is off-line again. Rather than going and trying to change the password,  if you just leave the message in the outbox and trust that eventually when Apple gets iCloud working, probably within the next few seconds that email message will get sent.

What I see happening is people go in to try to change their password and either get it wrong or it still doesn’t work and then resort to trying to reset their password time after time. The whole process of resetting your password in iCloud is not without trouble also. Many times you ask it to send you an email to do the reset and the email never comes through or the email gets caught in a junk mail filter.

The right thing to do during the short iCloud glitches is to just chill out and leave the message alone. When you start down the path of trying to reset your password and you do it very often you typically get things messed up. Either the password reset didn’t take or you’ve changed it so many times and added to your normal password so many times you can’t get it right again.

So here’s my recommendation to those people but text me and tell me their iCloud password is wrong again. Take a chill, have a cup of coffee, or a stronger drink if you feel the need, and wait for at least 30 minutes before you try to do a reset on your password.

If you want to speed up things many times you can go into the outbox open up that email that you tried to send and press send again. Yes, you shouldn’t have to do that but again iCloud mail doesn’t seem to be perfect and trying to fight the iCloud password game typically ends up as a losing proposition.

Print Dialog is missing Features in Chrome

Q: From my laptop, using the Chrome browser. I can not print double sided from.  I can print double-sided from my stand alone computer. I can print double-sided from my laptop using Safari or Word. Is there something fairly simple that I can do to correct that Chrome problem  and be able to print double sided or should I just use Safari?

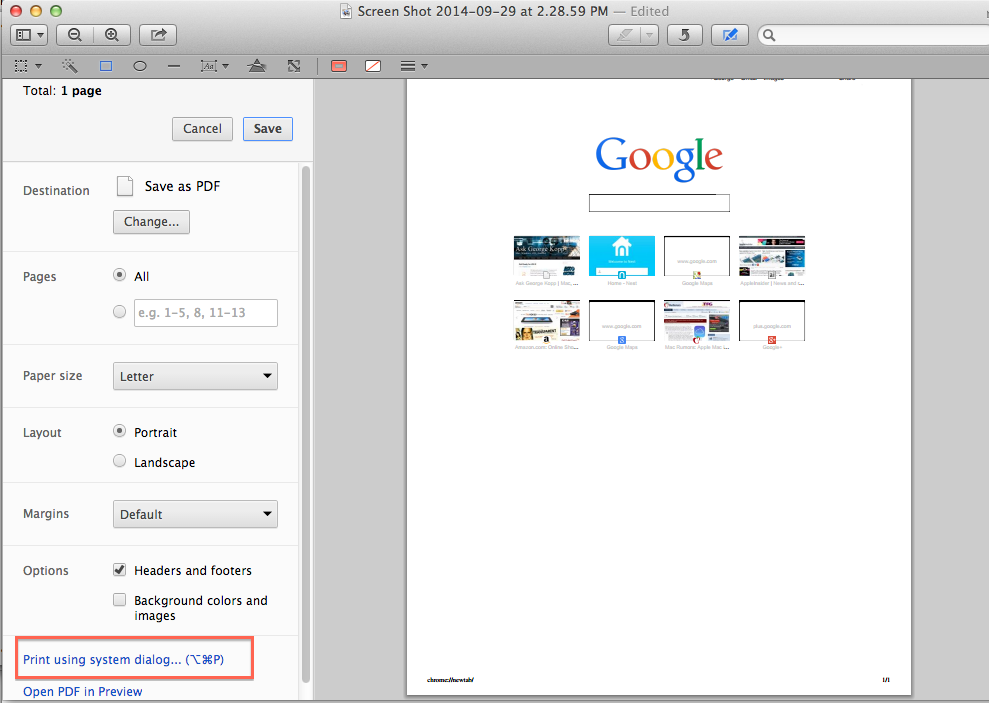
A: Chrome uses their own dialogue to do printing. When you go print from chrome the dialogue looks like this.Screen Shot 2014-09-29 at 2.29.34 PMIf you click on the area that I have highlighted in red that says print using system dialogue, it changes to this:

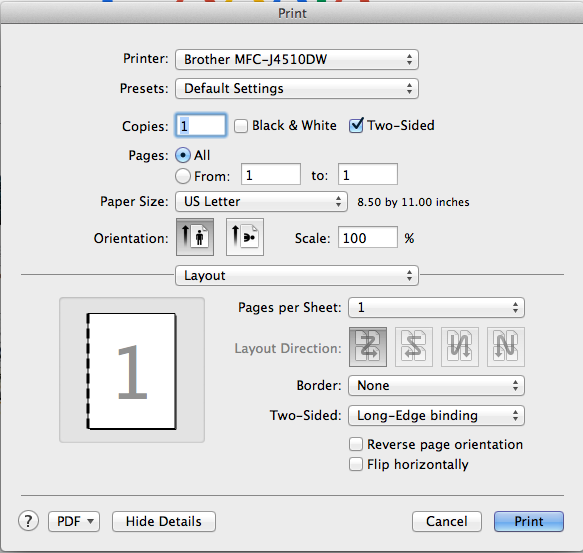
Screen Shot 2014-09-29 at 2.30.13 PMThat’s the same dialogue Safari uses so if you can print double-sided in Safari now you can do it in chrome too.  In this case you would need to click on layout and select two-sided printing.