New Home Control Products

image
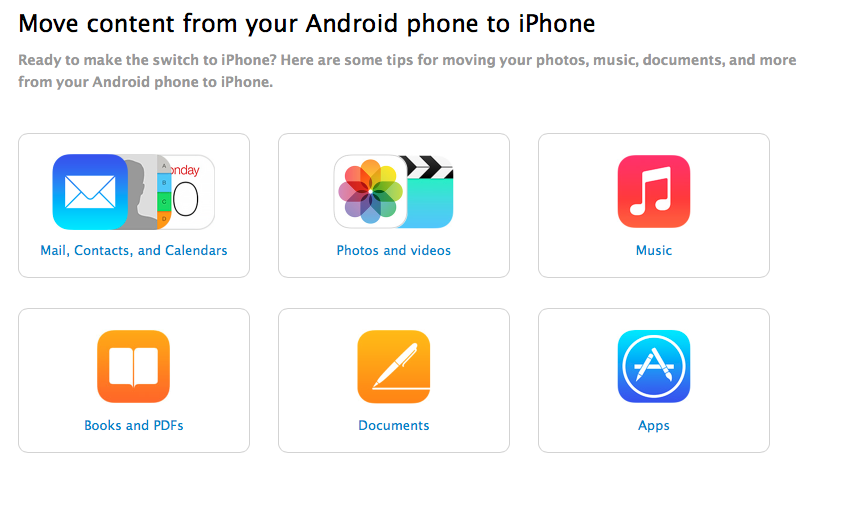
The home control market is in the process of exploding. Many vendors are trying to create products that allow people to create their own smart home and control it from an application on their phone or computer.  Having more products in the market is always great, but determining whether those products really work in your home is another story. I had the opportunity to test a couple more of these products that I’d like to tell you about.

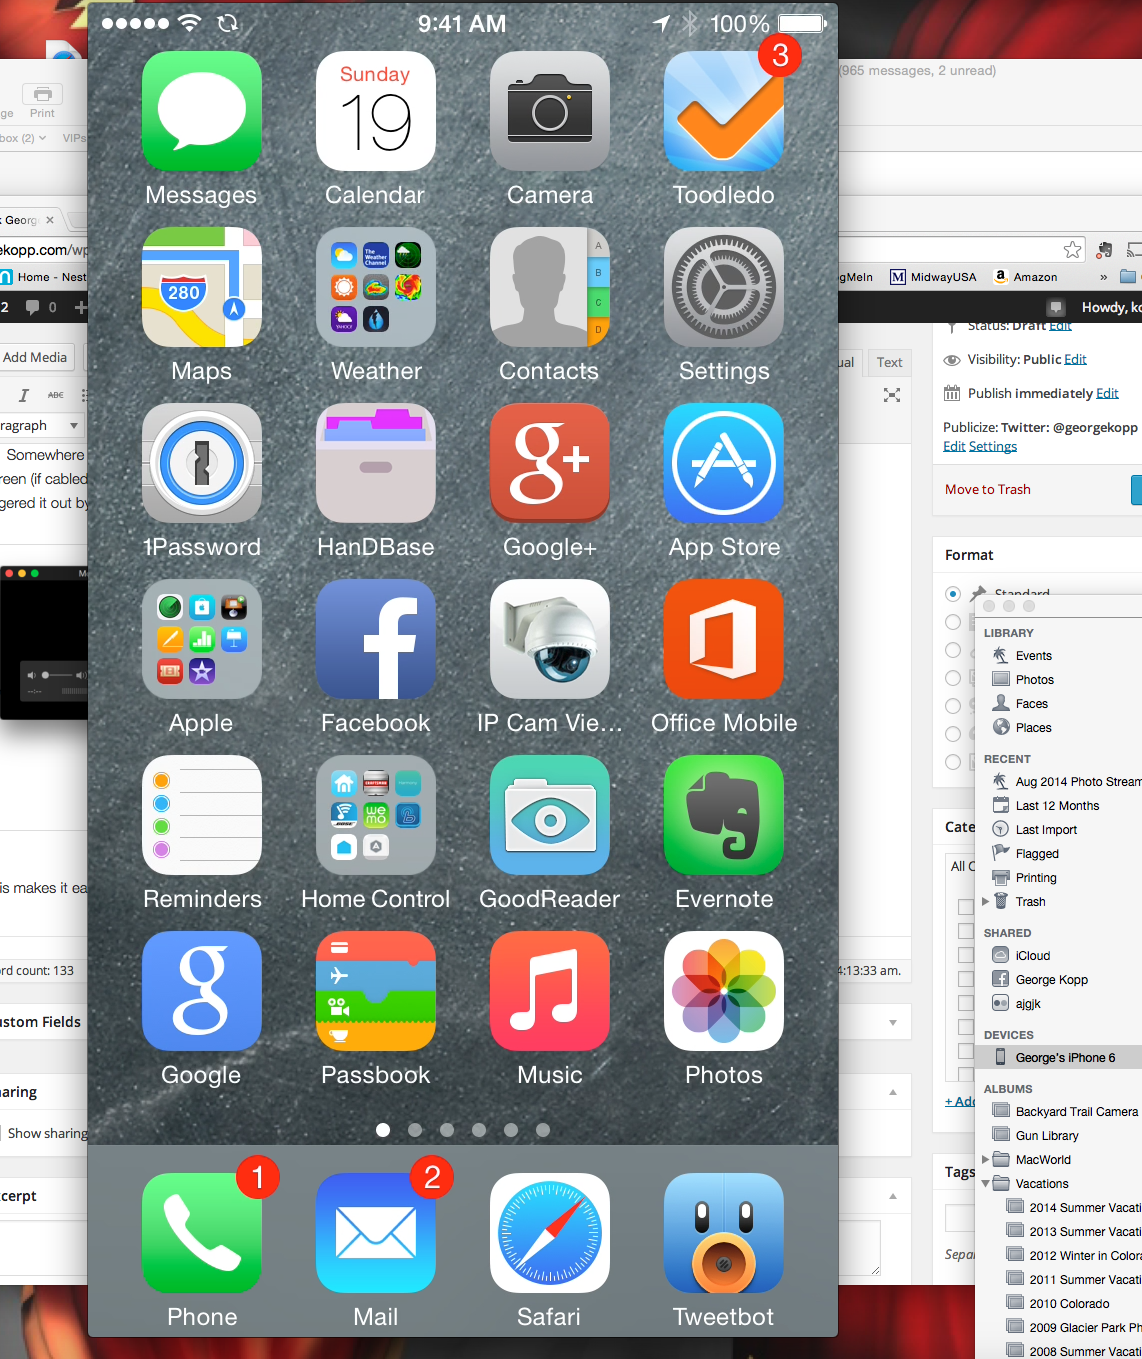
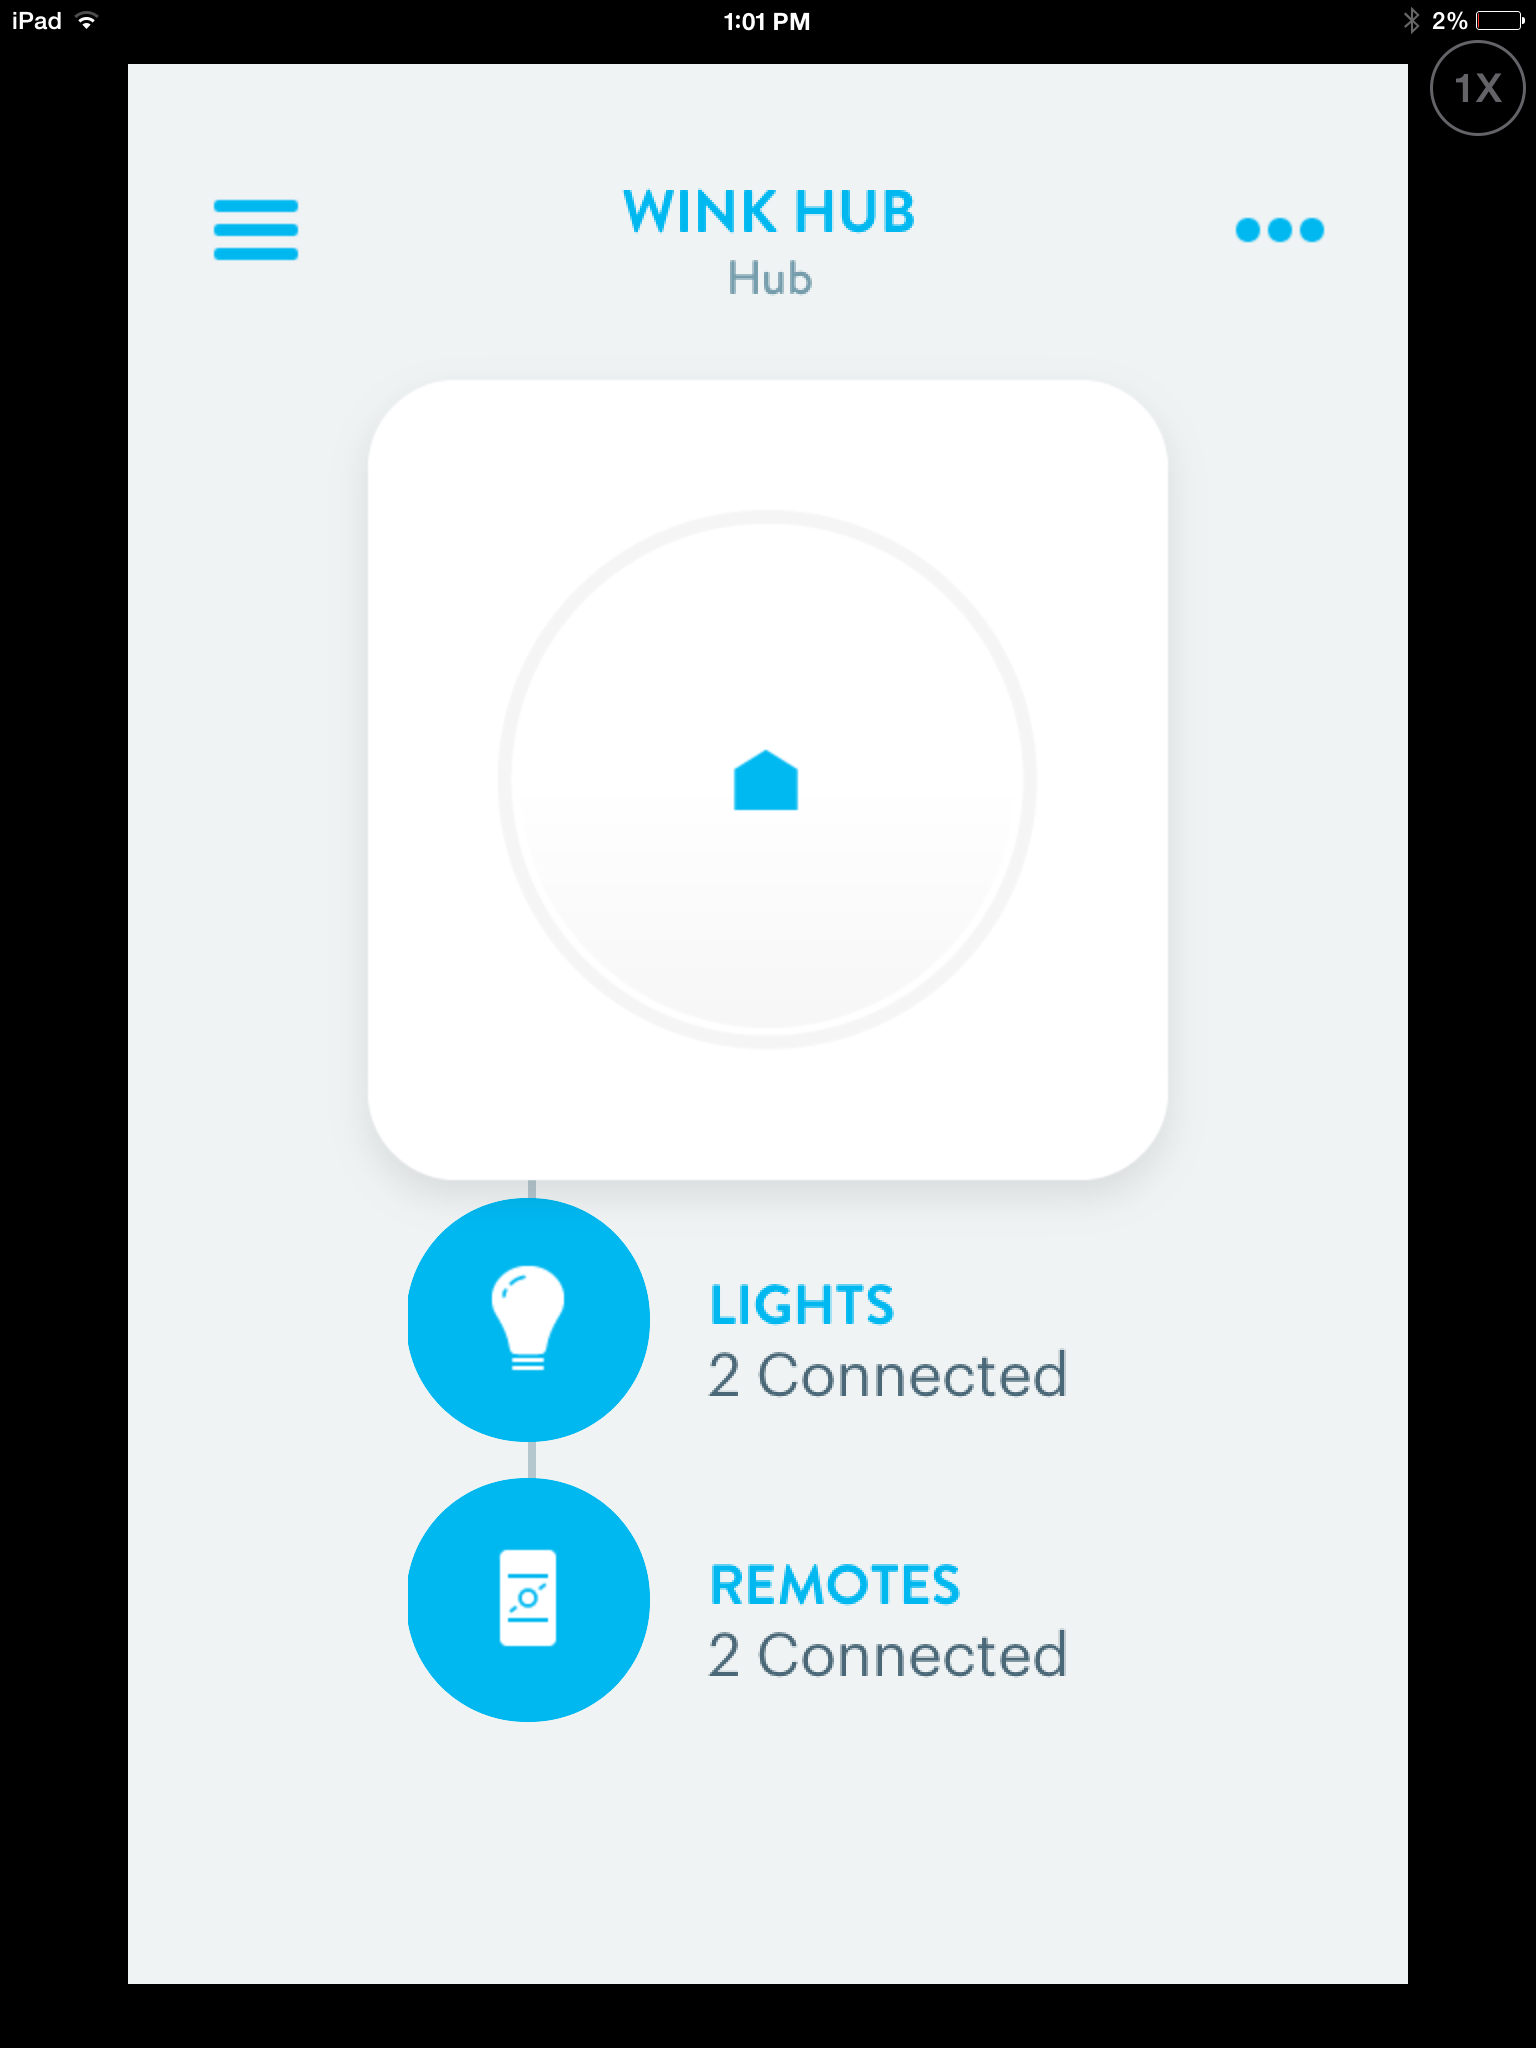
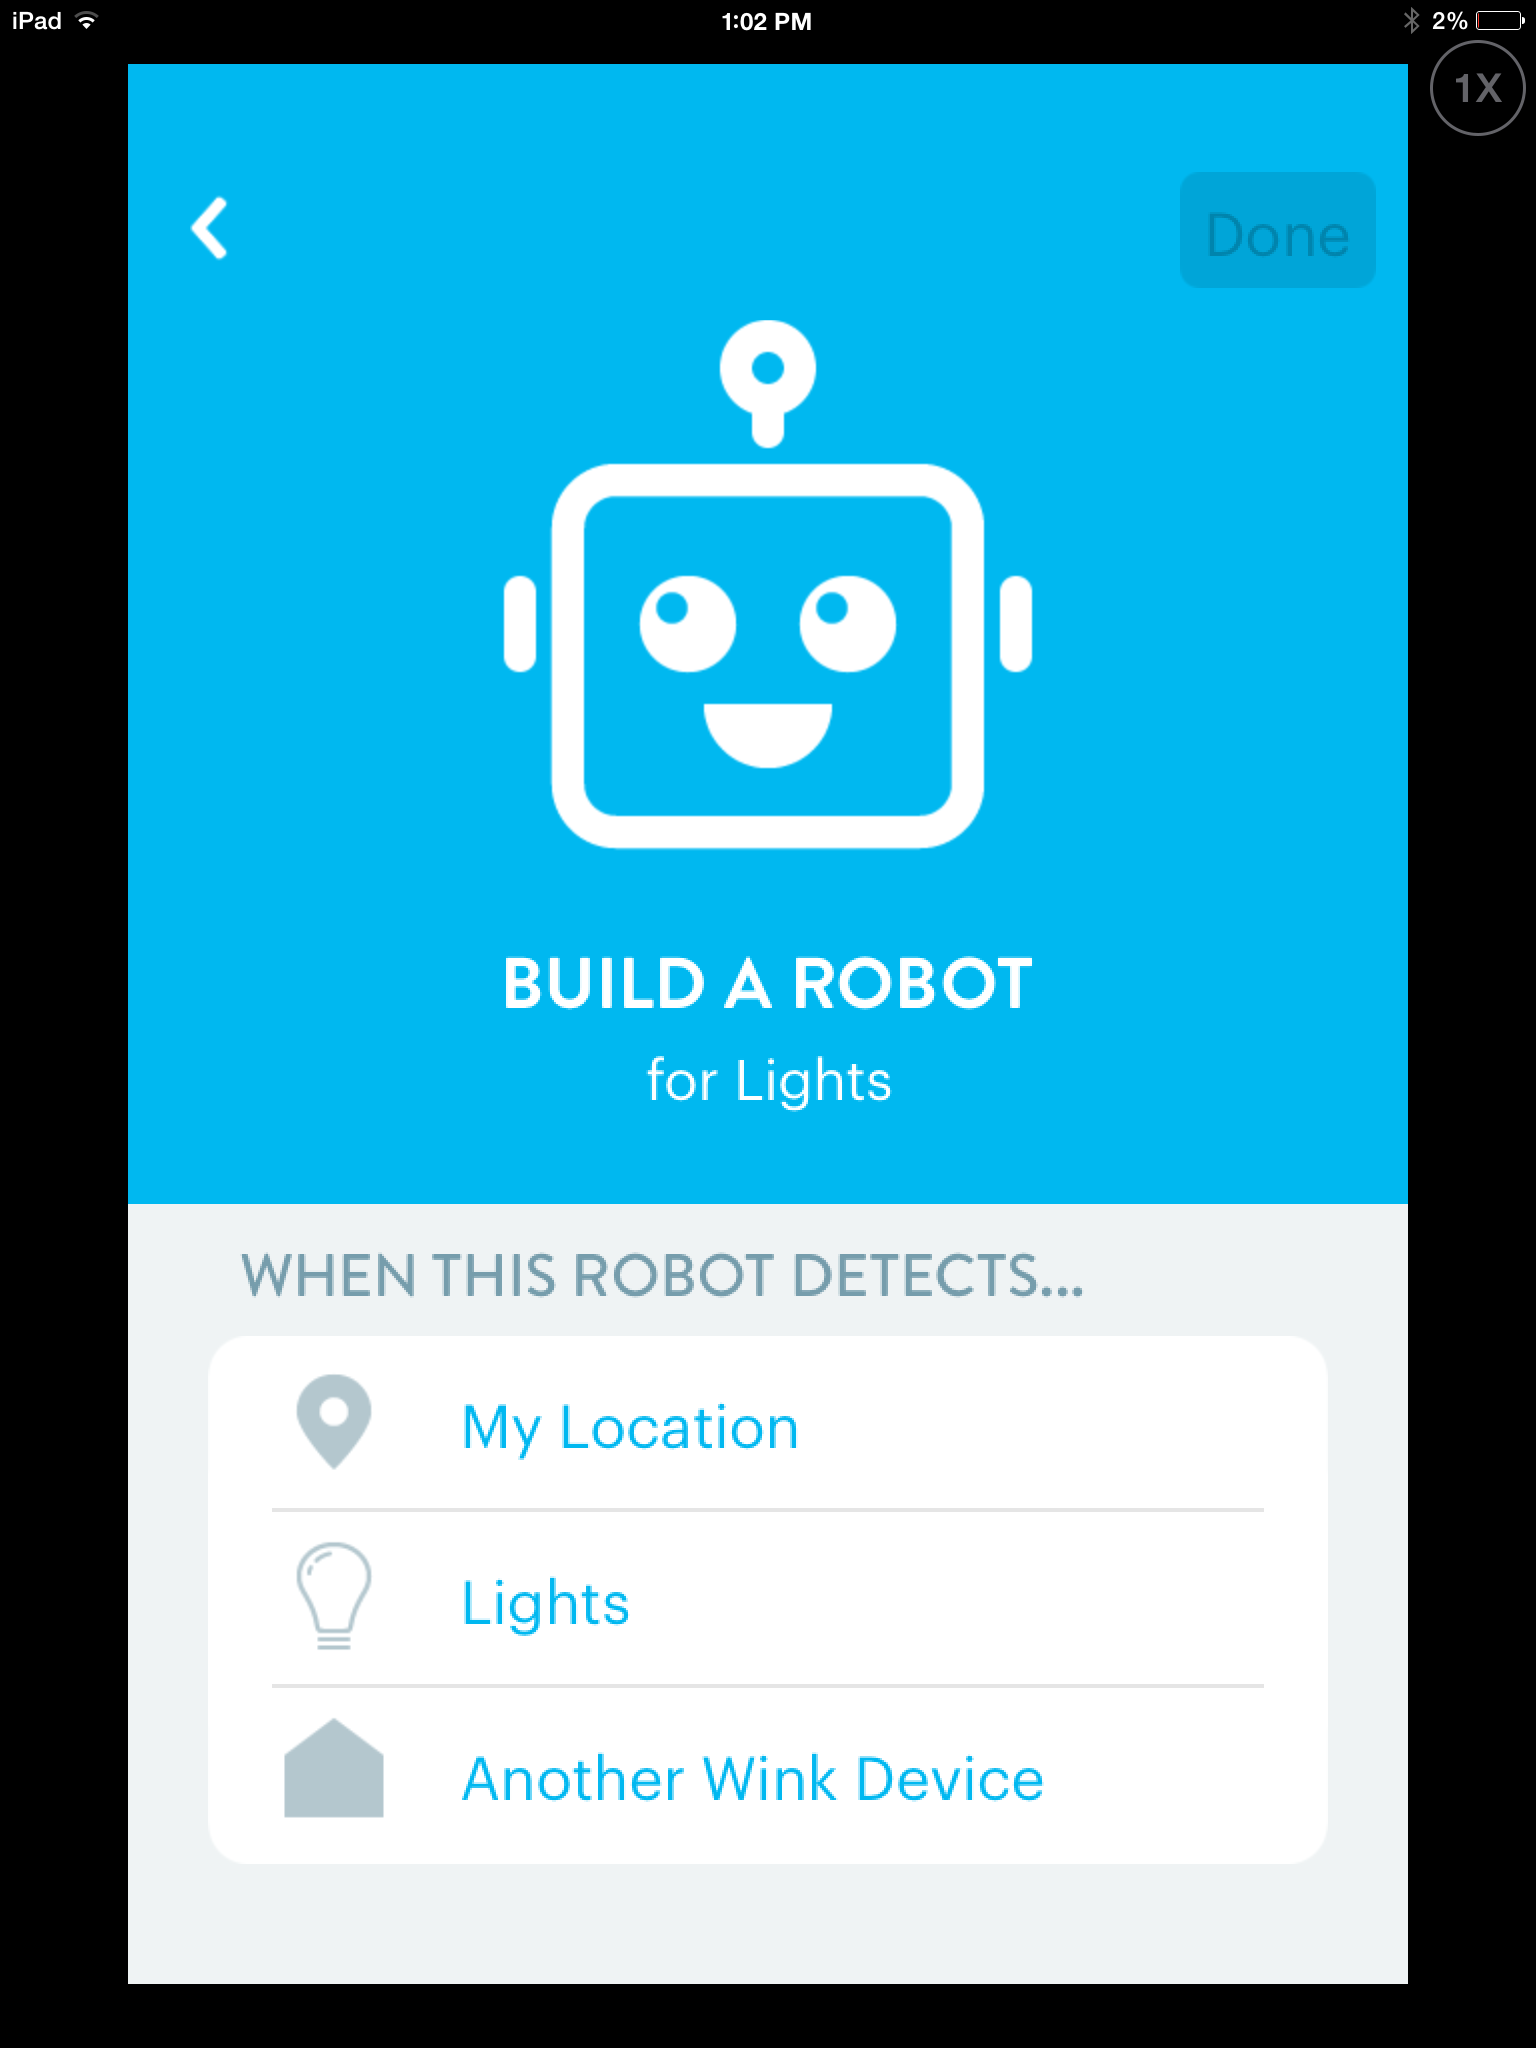
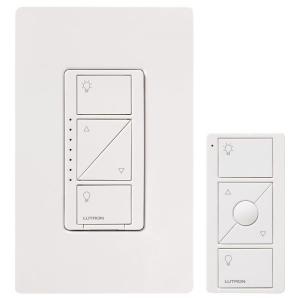
The first of these is called a Lutron Caseta dimming switch and remote. This switch replaces a light switch in your home with a switch that can be controlled from your iPhone, iPad, or android device. For the switches to work you have to have some type of a central home hub that provides control. The home hub I’m using is the Wink hub and I’ve written about it in previous posts.  The switches wirelessly connect to the hub and allow Wi-Fi connected devices to control actions. They give you the ability to be able to create what are called robots to perform functions in your home. An example of this is what I’m using to control my outdoor driveway lights. I installed one of the switches and created a robot script that tells it went to turn the driveway lights on and when  to turn them off.

The switch was easy to install by just removing the existing light switch and wiring this new switch in using the same wires and connectors that were in place. Once installed you use the app on your iPhone or android device to connect to the switch and pair it to the hub.  Once paired with the hub you have control over that device. Then you can create your scripts for how you want the light to function. You also have the ability to turn the lights on and off from any place that you’re on the Internet. This switch comes with a small remote but allows you to have remote control without the use of the phone. So far I’ve been very please with the switch and it’s ease of installation and function.

The other device I had the opportunity to test was a GE link lightbulb. This device is basically a lightbulb that image
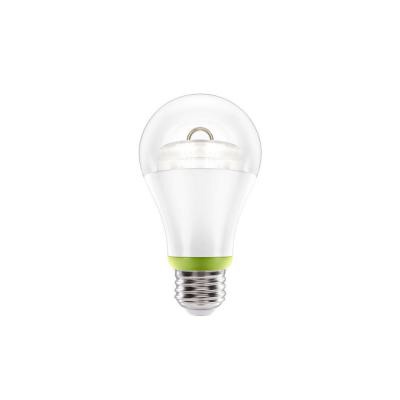
screws into a light socket and allows you to control the light in the same way as the Lutron switch did. It’s installation is even simpler in that you basically screw it  into a light socket and turn on the light. You then use the app, the Wink app  in my case, to pair the lightbulb with your system. At that point you have control of it in the same way as the Lutron switch.

One nice thing about the ability of the Wink hub is the ability to program conditional Robots. In my case, I have my lights set that when I turn a particular light on it automatically turns on this lightbulb. This allows me to control lights based upon the condition of other lights in the house. I can’t say enough about this lightbulb in the fact that it is simple to operate easy to install and works flawlessly. The bulb itself is an LED bulb and provides a nice warm light. This bulb was also relatively inexpensive at less than $15.

I really enjoy making my home smarter. When I pick devices to purchase I try to ensure that I select devices that have a good likelihood of being compatible with many other systems. That way I maximize my use of home control today and prepare for future developments that might come tomorrow.

Capture your iOS Device Screen on your Mac in Yosemite

Q:  Somewhere I saw that with Yosemite I will be able to mirror and capture my iPhone screen (if cabled to to my MB). You might have to show me how that works if I haven’t figgered it out by the time I see you.

Screen Shot 2014-10-19 at 5.59.52 PM
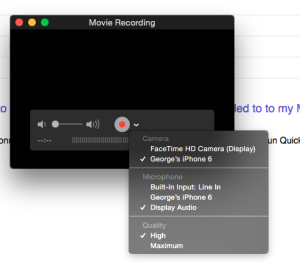
A:  Yes, that is one of the new features in Yosemite.  Just connect your iPhone or iPad to your Mac using the Lightning connector and it will be automatically available as a video camera.  Run Quicktime and select “New Movie Recording in the File menu.  Now change the recording source to your phone .

Now the live view of your phone will show on the Mac and can be recorded if you like.

This makes it easy to record video of your phone screen to a file on your Mac.  Right now in Yosemite 10.10.0 it seems to be a little buggy. If you close iTunes before opening QuickTime it seems to work a little better.

Screen Shot 2014-10-19 at 6.14.53 PM

1Password: Even more valuable in iOS 8

Screen Shot 2014-09-28 at 1.11.51 PMThe new world of the iPhone 6 and iOS 8 is beginning to show its head. And for my money, it’s a pretty sight to see. One of the first applications to take advantage of some of the new features in iOS 8 is 1Password. I’ve used 1Password for years to store passwords on my computer and my iOS devices. It is always been a trustworthy addition to my computing environment and has saved my bacon in remembering a password many times. But one of the things that made it difficult to use was the inability to be able to automatically enter passwords on an iOS device. iOS 8 has changed all of that with the addition of extensions. And 1Password immediately took advantage of it.

On the same day that iOS 8 was released, AgileBits released a free update to 1PasswordIMG_1273 that took advantage of the new extension capability and also the expansion of touch ID use. In the past I would need to enter my master password every time I needed to get  into 1Password. With the update you have the ability to set the settings to allow you to use your fingerprint on an iPhone 5s or 6 to enter your master password for you and take you directly in to the program. This is such a huge time saver that by  itself would’ve been a great update. But Agilebits did not stop there.

Also in the latest update was an extension for the Safari browser that allowed you with a few taps to enter a password from 1Password into a website in Safari. Before this update it would’ve required you to go back-and-forth between 1Password and Safari a number of times to get both the username and password and enter it. Now, after configuring it, a few simple taps enter the password and you’re off to the races in Safari.

To make all of this new functionality work well for you there are a few settings you might want to consider in the 1Password for iOS application. First, you should go into the settings for 1Password and turn on touch ID. With that turned on you should set the amount of time before having to reenter your master password to something greater than just a few minutes. Remember, your passwords will be protected with touch ID anyway. I set the setting to 48 hours initially but I’m considering changing it to 30 days. This setting is the amount of time that passes before being forced to type in your master password.  In between that time period, you’ll only be asked to use your fingerprint to get in to 1Password.

IMG_1274With that said, you need to open the Safari browser and Screen Shot 2014-09-28 at 1.19.56 PMtap on the small square with an up arrow icon in the menu bar. This is how you access the extensions in Safari. Be sure the one password extension is turned on so you’ll be able to use it from Safari.  You may have to tape More to add it in.  I also rearranged it by dragging the 1Password extension forward so that I can get to it without having to scroll after tapping that Icon.

Now, to use it in Safari all you have to do is go to a site that requires a password and tap on that same square with an arrow icon.  Then tap 1password. 1Password will now ask for your fingerprint to take you in to the program. Once you’ve entered it will bring up the passwords that fit the website that you’re on in Safari and you have the ability to touch one of those passwords and have it automatically entered in the browser.

The updates to 1Password prove that the extensions combined with touch ID that Apple has added and iOS 8 are going to be a huge addition for iPhone users. The ability to enter applications with only a touch and to extend Apple’s Safari browser will add many new functions and ease-of-use to the iPhone itself.

1Password is only the beginning. I look forward to all the other applications that will begin supporting these functions and features in the near future.

Posted in iOS

iOS 8 and iPhone 6 Impressions

Screen Shot 2014-09-21 at 6.33.38 PMApple has hit another home run with the new iPhone 6. I selected the smaller of the two devices because I felt like it better fit my lifestyle. The new iPhone 6 is dinner yet has a larger screen than my previous iPhone 5s. It also seems to be faster. But the real star of the show will be the new Apple pay when it becomes available in October. Apple pay will give us the ability to use our phone to make purchases securely. That’s the real killer feature of the new phone. So if you’re closing your contract or have a need or want to upgrade to a new phone, seriously consider the iPhone 6. It’s a very nice phone with a great screen and under contract still at a reasonable price.

Whether you purchase a new iPhone 6 or not if you have an iPhone, iOS 8 is a terrific upgrade. iOS 8 is compatible with iPhone 4s, iPhone 5, iPhone 5c, iPhone 5s, iPod touch 5th generation, iPad 2, iPad with Retina display, iPad Air, iPad mini, and iPad mini with Retina display. So it looks like the iPhone 4 is not going to make the cut. If you perform the upgrade directly from the phone it looks like it’s going to require about 5.5 GB of space for you on your phone. But if you connect your phone or iPad to iTunes, the free space on the phone requirements are dramatically reduced. I was able to update one device with as little as 2.5 GB free.
When you perform the update, there’s lots to like about the new OS. Unlike the last release, the look and feel of iOS 8 will not be dramatically different than iOS 7 was. Many people have a difficult time with the transition from iOS 6 to iOS 7 because the look and feel was a lot different. You won’t see that with iOS 8. The features in bedded in iOS 8 are a little more self. You have to take a look at the list of what’s available to find some of the new things. But it’s well worth looking at.
Some of the things to check out in the new update are:

  • Safari extensions
  • Updates to the Camera application
  • More extensive use of touch ID if you have an iPhone 5s or newer
  • Interactive notifications
  • Updates in the Messages app to allow you to send voice messages and video messages
  • Third-party keyboards
  • Easier ability to delete emails
  • Family sharing
  • Apple’s all new health kit

And those are just the highlights.Iowa State is an excellent update. And if you have a newer phone or a newer iPad it’s all free.

I always recommend making a back up of your device in iTunes before you start the update. And then allow yourself to to three hours for an average update. The larger the memory space on your phone the longer it will take.

And as always, if you feel uncomfortable with making the update yourself, or would like a little assistance, feel free to get a hold of me.

Posted in iOS

Own Android but Tempted by the New iPhones?

Screen Shot 2014-09-17 at 10.21.37 AM

Apple just continues to innovate. Sometimes it’s actually amazing. But not everybody owns an iPhone right now. Many people choose android, and that’s a good solution also. But once in a while, people want to change platforms for their phone. Go from my android phone to an iPhone. And some vice versa. Apple has a new website it gives you information on how to get data over from android to an iPhone. Some of the suggestions are purely common sense but others are really good ideas for being able to get all the stuff that you have from your android phone over to a brand-new iPhone.

So if the new iPhones have you tempted, take a look at the site to see what it’ll take to get your phone information moved over to an iPhone.

Get Ready for iOS 8!

Screen Shot 2014-09-07 at 11.32.00 AMWith Apple about ready to release iOS 8, it’s always good to go back through the list of things that you need to do to prepare before updating your phone with a major operating system update. If you follow these simple steps, the odds of your update going well are greatly increased. Over the years Apple has made installing new updates pretty simple. When the update is ready it will show you on the device by showing you a small red number on top of General icon in the Settings application.  But many times if you go into system updates and check for an update it will show you it’s available before the icon shows. If you’re in a hurry to update, you might give this a try.

1.) Check to see if your device is iOS 8 capable

The iOS 8 update is compatable with the iPhone 5S, iPhone 5, iPhone 5C, iPhone 4S, iPod touch fifth-gen, iPad 2, iPad Air, iPad mini with Retina Display, iPad mini, iPad 4, and iPad 3.  If Apple releases any new devices, iOS 8 will be standard on them.

Screen Shot 2014-09-07 at 11.33.05 AM

2.) Make sure you have enough space for the update

iOS 7 required 700MB of space and while its unknown how much its successor will require, you can be sure its going to be similarly large amount. Apple will prompt you before downloading if you do not have enough space, so either way you will either have to get rid of some unnecessary apps, photos, music/TV shows/movies or other data you might not need right on your device .  One place that I see space often used on iOS device is in the camera roll. If you sync your photos over to your computer and delete them from your phone that will free up that space. You can always put photos back on the phone using iTunes at the time of sync.

You can check how much space you have by going into settings and then general.  Select about and then it will tell you in the list how much free space you have on your device. iOS updates often have additional applications updated too. Apple generally updates many of their apps at the time of the system update so you’ll need additional space for those. Don’t cut your space to close.

3.) Is your device running iOS 7.1.2?

To update to iOS 8, you’ll likely need to be up to date with the latest iOS 7 version, meaning you won’t be able to switch unless you’re running iOS 7.1.2.

4.) Do you have the latest version of your apps?

If you don’t want to lose your app or its data, make sure they are up to date. This will also ensure you get the most out your apps in iOS 8, as they will have been tinkered with for iOS 8 integration. Just check for updates, and apply all updated applications that you find prior to the operating system install.

5.) Back up your device!

This is the most important step you need to take before updating. While everything is done to ensure the transition to iOS 8 goes smoothly, major updates can go awry. To back up, simply follow these steps:

  • Connect your iPhone or iPad into your Mac or PC and open iTunes.
  • Select your device under Source and select “Summary.”
  • Under “Backups” select “This Computer” and then “Back Up Now.”

I also recommend encrypt in your back up. If you encrypt your back up, and give it a password that you have to enter when you restore it, all of your passwords that you stored on your device will remain. This keeps you from having to go back in and reenter passwords in applications, or mail, before you can use the new OS.

[stextbox id=”info”]For most general users, it is often good to wait a few days after the new OS is available to make sure there are no issues with it.[/stextbox]

That’s about yet. You’re ready to go. Enjoy the new OS. All the new features will be great fun to play with.

Posted in iOS

“Wink” Provides and Integrated Approach to Home Control

Screen Shot 2014-09-02 at 1.18.02 PMI’ve dreamed for years about having a home that I could control electronically. Turn lights on and off from my phone, change the temperature of the thermostat, and open and unlocked doors. Over the years I’ve tried a number of products and many have worked very well. The one thing they lack was an integrated approach to being able to handle the controls.

A new product called Wink provides the ability to be able to control many other vendors devices from a single application. Just released in July, this unit allows you to connect other devices into a single integrated approach. While every device I have does not connect today, the open API provided should allow other vendors to make their connections work. This is the same approach Apple has to their HomeKit integration. While I’m absolutely sure that Apple’s products will be terrific, there was one thing I really IMG_0191liked about the Wink system. Wink has a single home unit that includes multiple radios to be able to connect to nearly any type of device. Wi-Fi, Bluetooth, zigbee, and Z-wave radios are all included in the device. These multiple radios allow many vendors devices to be able to connect and integrate together. The real beauty of this approach allows a best-of-breed solution for home control. You can purchase devices that do the best job of providing a particular home control service regardless of how they connect with each other or with other devices you already own. This approach gives you the best opportunity to find the perfect device that fits your needs.

I’m trying out the Wink system in my own home. I was able to purchase two Lutron light switches and get the Wink box for free through a special offer Wink has at the present time. These light switches were easy to connect to each other and to the app on your phone. So the Z- wave radio within the Wink device connects them to my wireless network at home. Then I can use the Wink app on my iPhone to be able to control the switches

IMG_0192Wink also provides the ability to script actions that can be put together. An example is a single button that can turn all the lights in the house that are connected to control switches off. It also has the ability to create what it calls robots. These robots are scripts that are basically if then situations. If a particular light turns on to 100%, then turn another light off. You get the idea.

Wink has committed to providing connectivity to as many devices from other vendors as possible. I’m anxious to see if I will be able to control my nest thermostat and my WeMo light switches through this same application. If Wink continues to develop the way it looks like they have, I look forward to a day where a single app on my phone may be able to control all my intelligent devices in my home.

But Apples HomeKit will be a contender also. So as I purchase new controllable devices, IMG_0190I’m keeping my eye open for support for HomeKit too. That way if HomeKit becomes the better solution, all the devices I purchased can be used with it. Since the Wink controller was provided at no cost with the purchase of the two switches I just bought, I had no investment to lose by giving this a try.

Wink devices are available through Home Depot at Amazon.com.

I’ll continue to give updates on how I’m doing with Wink and home control. Hopefully that control I’m looking for in my home is just around the corner.


Internet Slowdown Problems

Screen Shot 2014-08-15 at 11.26.09 AMQ: Lately I’ve noticed that the internet has slowed down a great deal. I also tried to purchase music at iTunes and got an error message, three times, that the network connection had ‘timed out’

A: In my experience Internet slowdowns are often a result of two things. Obviously it could be a slow down at the cable company providing the service. But the second thing actually happens more often. The devices that connect us to that Internet sometimes get confused. These are boxes at tend to run 24 hours a day so any little glitch can cause a problem. The first thing I always do when the network seems slow is to unplug the router and unplugged the cable modem. But it’s important to reconnect them in the right sequence.

While these boxes are unplugged, restart your computer. It’s always a good idea to shut down all the way to power off and then turn the power back on.

Next, plug the cable/DSL modem in and then wait about a minute. Now plug the power into the router. This allows the cable modem to reset and make a connection prior to getting the router powered back up. Once you’ve done that the next thing to do is to test the speed of your Internet and see if you’re getting what you’re paying for.

I often use one of these websites to test Internet speed.

http://www.speedtest.net/
http://www.dslreports.com/speedtest

There are also apps to do this on the iPhone or the iPad.

If you’re not getting the speed you’re paying for, it’s time to call your Internet service provider and see if they can do anything to help.