Device Independent Applications: Notetaking

Evernote Camera Roll 20140302 145628If your fond of using a tablet for many applications, one of the first things you run into is the need to be able to take notes. These days, all operating systems include a note taking application. Whether you’re running iOS, android, Mac, or Windows, each operating system provides its ability to do notetaking. But many people need the ability to have a universal notetaking application that can be used on both computers and on tablet devices. Over the years, I’ve tried a number of these and I have finally settled on the use of Evernote.

Evernote is a notetaking application that can be used in a web browser or on literally any tablet or computer platform available today. On the Mac, Evernote can be downloaded for free from the app store. On iOS it’s also free in the iOS app store. There is also an application for android, windows, and Evernote can also be used directly in a web browser. This ability to use an application cross-platform gives you the ability to move notes back-and-forth from wherever you happen to be working at the time.

I often use my iPad, and Siri to be able to speak my notes into Evernote. Evernote like many applications on the iPad supports this seamlessly. I open up Evernote, create a new note, and then basically just speak the information I need to take notes about. Evernote provides a lot of additional abilities too. You have the ability to be able to import documents directly into Evernote. You can move the text in easily through cut-and-paste, or you can simply embed the document. By embedding the document in an Evernote note, you have the ability to be able to edit that in the native application that created. Evernote also has the ability to be able to insert pictures, charts, graphs, or basically anything that you can think of.

There are also web browser extensions that allow you to select text directly in a web browser and create a new note from that text. It supports embedding Internet links in the note so that they can be clicked on directly and take you to a webpage. You have the ability to embed photos directly from the camera on your device or from your camera roll. Evernote has the ability to use text markup such as bold italic and underline and also create number or bulleted lists. In many ways, it could be a wordprocessor for many people.

You can create and name notebooks which you can move documents into, or create new documents directly in  notebooks that you have. This provides a great ability to be able to organize your notes into subjects that you can retrieve at a later time.

Best of all Evernote provides this service for free. Evernote also provides an inexpensive premium service that gives you the ability to search inside PDF documents, and also Store your notebooks off-line, giving you the ability to be able to use Evernote without an Internet connection.

If you’re tired of the note taking application that’s included in your device, or if you’re looking for something more universal with more features, take a look at Evernote. I believe it’s the best product on the market today and I use it nearly every day I work.

Amber Alerts on your Phone

amberOver the last couple of days I’ve had a number of people ask me about an Amber alert that went out to their phones you other night. Many people felt that this alert was either annoying or not something they were interested in seeing.

Amber alerts are very important and have their place in being able to let people know of a child abduction.  Unfortunately the way they’ve been implemented through the phone service makes the sound default to something very jarring,  particularly if it comes in the middle of the night. As a result people have asked how do I turn these off.

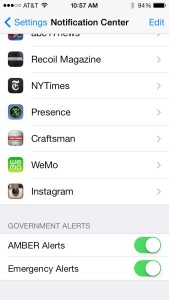
On the iPhone it’s very hard off Amber alerts. Go to settings, Notification center, and scroll all the way to the bottom. There you’ll see two entries that you can turn off and on.  The first controls Amber Alerts. The second Controls other emergency alerts such as weather and national defense alerts. Both of these can be turned off quite easily.

Unfortunately on the iPhone there is no way to change the alert tone. While many people would still like to receive these alerts they do not appreciate the jarring allow tone that is been selected for when these are sent. Perhaps Apple will adjust that in the future.

Doing the same thing in Android can be tricky, because each device is different. If you can’t find the emergency alert option in your phone’s settings, open the Messaging application and look for the option in the messaging settings.

Posted in iOS

Automatic: Your Smart Driving Assistant

Screen Shot 2013-12-11 at 11.46.20 AMThe world is exploding with technology. It’s amazing to see technology entering into so many different areas. One of those areas that has long been ripe for this expansion is Automotive.   Automotive technology has been around for quite a while but unfortunately the technology you get your car is a result of what you get when you purchase the vehicle. In some cases manufactures don’t have very good technology available for their cars. But more often, good technology today Tuesday age poorly in a vehicle.  What may be the most advanced system in the world the day you buy your vehicle tends to be old and dated even before your vehicle is paid for. I have long believed that being able to add tech to a vehicle you all is a natural process.   But unfortunately adding text after-the-fact is to be expensive and also poorly integrated. That’s one reason why I was excited to read about Automatic.

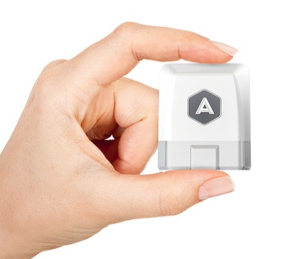
Automatic is a small attachment device that plugs into your vehicles OBD port and provides information that your vehicle computer already has through Bluetooth to an application running on your phone. Automatic supports both iPhone and android devices. Nearly all vehicles 1996 and newer have this port.

IMG_0750The attachment dongle easily plugs in to the same port your mechanic uses when you take your car in for service. It’s easily accessible near the steering wheel. It then uses Bluetooth Low Energy Wireless using Bluetooth 4.0 and sophisticated energy-saving algorithms to allow the link to minimizes your phone’s battery consumption. The application is freely downloadable from respective app stores and can be installed on multiple devices if you choose.

So what kind of information does Automatic supply?

For the most part, you can get Driving Feedback.  Automatic is your auto assistant. It learns about your driving style and gives you subtle audio cues when you do things that waste gas, like:

Rough Braking – Braking abruptly decreases fuel efficiency and dramatically increases wear-and-tear on your car’s brake pads.

Speeding – Highway speeding may not save you much time, but driving 10 MPH over the speed limit reduces fuel efficiency by 12-15%.

IMG_0748

Rapid Acceleration – Stepping hard on the gas pedal decreases fuel efficiency and wastes money.  Automatic shows how you’re doing on every trip.

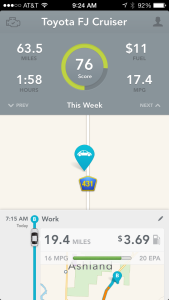
Drive Score – Automatic scores your driving every week to help you improve. A high score could save you hundreds on gas every year.

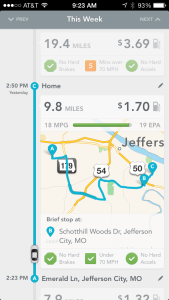
Trip Timeline – The Automatic app displays detailed info about your week, like how much you drive and where. See the actual MPGs for all your trips, even for older cars that don’t display fuel efficiency on the dashboard. Automatic also detects* fill-ups and even tracks local gas prices to show you how much you’re spending.

Crash Alert – Automatic can detect many types of serious crashes using the Link’s built-in accelerometer. Agents from Automatic report the situation to local authorities to get you help in an emergency. An agent will also call your loved ones to let them know the details of the crash and that emergency responders are on the way.

Unfortunately, there are a few things that automatic needs to improve. Right now the system provides no ability to do anything outside of looking at your phone with the data it collects. There needs to be A companion website that allows me to download my information or print reports of what I’ve done. I really want to be able to use automatic too log mileage for my trip and provide me a detailed report of starting and ending locations along with mileage and cost. I hope the company realizes that they only just begun.

There is a short YouTube video about Automatic.

Automotive technology supplied by automatic is a great start. The ability to add a relatively inexpensive device to your vehicle and connect to your phone to act as the brain has been a long time coming. Automatic provide you a great start at this. Let’s hope they continue to improve the system and application.

Protect your home with Nest Protect

IMG_0009By now, most everyone must of heard of Nest. Nest is a company famous for their Nest thermostat. This thermostat connect to the Wi-Fi in your home and give you the ability to modify thermostat settings from any place that you have Internet access. It also provides a great deal of intelligence related to setting schedules for thermostat.

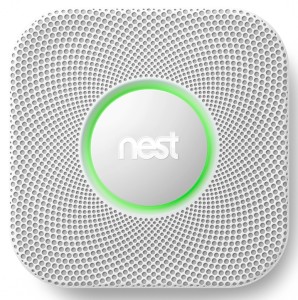
Nest’s latest product is called the Nest Protect. Protect is a connected smoke alarm and carbon monoxide detector. Similar to the nest thermostat, the nest protect connects to your Wi-Fi network and provides the ability to monitor smoke and carbon monoxide detection within your home.
Protect is easy to install. Actually it’s quite a bit easier than the thermostat.  Prior to installation you must decide which model of the unit you want to purchase. Nest provides both a wired connected device and a battery only device. That’s not to say that the wire device doesn’t also have batteries, it does, but the battery only unit does not connect to electricity. You also have to determine whether you want the light color or the dark color version of the device.
IMG_0007Once your protect arrives, it’s extremely easy to install. I installed the wired version in my home.  You begin by removing the existing smoke alarm in the house. My particular alarm was a three wire connected unit a positive, negative, and interconnect wire.  Since nest connects with Wi-Fi, the interconnect wire is no longer necessary.  The installation process wires the two wires in to the unit and mounted to the wall.
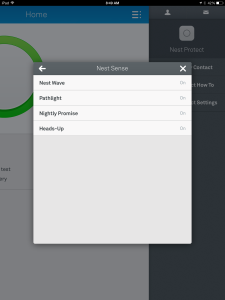
Next you run the test on the unit to make sure it’s functioning properly. The test provides audible information from the speaker in the unit in addition to tones that identify both smoke and carbon monoxide. Running the test allows you to understand what the different tones sound like. An LED light ring on the box also provides information about what type of an alarm is being sounded.
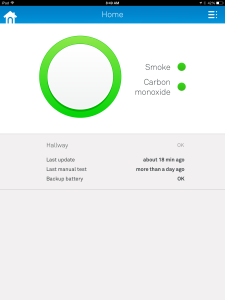
After running the test, you connected to your nest account. After updating the software onIMG_0007 my iPad, I simply press the add device button and walked through the process as it found the protect and connected it to my nest account.  Now that it’s connected, the unit works in conjunction with my wireless network to provide me information in case an alarm sounded.
One intriguing feature of the alarm is that in case of an alarm sounding, it has the ability to both text or email me letting me know if I’m away from home that the alarm is going off. The unit also has the ability to like the way if the alarm is sounded by using white LED light through the light ring in the front of the device.
If this entire process sounds simple, it was. Installing the protect took only a few minutes and provides that additional peace of mind.  Is bad as it is to say, I did not have a carbon monoxide detector in my home and all. The nest protect gives me that in addition to much more fruits connected technologies.
IMG_0008From the first time I installed a nest thermostat, I love the technology the company uses. They make things extremely easy to understand, and provide great features in a connected method through both iPhone iPad or any android device, and through the Internet in a web browser.
I’m happy with my installation of the protect. I also look forward to other devices for the home that nest may come out with in the future. I believe this company really understands home connection information and I look forward to them providing other additional devices that can connect my home to me whether I’m there or not.

How Many Email Addresses Do I Need?

Screen Shot 2013-10-02 at 8.29.08 AMPeople often ask me a question about their email.  They question whether they need an additional email address over the one that their Internet service provider normally provides.  For many people, using the Internet email address put your service provider provides is fine.  Some people, for business or professional reasons, would like to have an additional address that they can use for those purposes. Other people feel that an additional email address, to use for sites that they register on, or for companies who insist upon having your email address, is a good idea to help reduce spam.  I would like to advocate you have more than one email address that you use.  I think that it’s important for you to protect the use of your primary email address from it becoming a spam mailbox. Using an additional email address for this purpose is a good way to prevent that from happening.

But how many email addresses do I need?

There was a time when retrieving email from multiple providers was a difficult thing.  It often requires you to log onto different websites and retrieve mail one site time.  In some cases, it even require you to run a specialized piece of software provided by that email vendor that allows you to get email from them.  But these things of changed. Today is easy to configure your email client to pick up multiple email addresses and merge them together into a single inbox for you to look at.  It’s also simple to segregate those email addresses based upon the way you use them.  For instance, if you have one particular email address that you use for signing up for coupons, you can have all of those coupons put in one location that you can then look at at your leisure.

My rule of thumb is that many people need three email addresses. First off, you need your primary email address that you use with friends and family. These are people that you want to be able to contact, and you want to make sure that that email address does not get compromised with spam.  Secondly, I’m a strong advocate of using a throwaway email address, that you can get free from many providers, for signing up for things that you dont care if you lose contact with.  If this address is sold by someone who you’ve provided it to, and ends up on the spam list, you can easily delete this email address and create a new free email address for this purpose.  Finally, many people that work, have an email address provided by their employer. Others who work for themselves, have a need to segregate their work email from the personal email. So many people will need a third email address for this purpose.

Applications such as Windows live mail, or mail on the Mac, allow you to easily set up these email addresses to all be retrieved the same time, show up in a single inbox if you like, and provide rules for what to do with emails that are on specific subjects.  Even higher in applications such as Microsoft outlook allow you to do the same thing.  In this way, having multiple email addresses becomes transparent to you as a user.

Where do I get another email address?

First off, if you’re setting a new email addresses you may want to consider using a high-quality free email service is your primary personal email address.  This way, if something causes you to change Internet service providers, you do not lose contact with those personal friends and family that are most important to you.  My first recommendation would be to use Gmail for this purpose. Microsoft also provides Outlook email at Outlook.com that’s a free email and also has very good performance.  Apple will provide you an iCloud email address for free also. One caveat with the Apple iCloud email address. If you’re using iCloud on the computer to synchronize contacts and calendars, you can only have one iCloud address active at any one time.

Other providers such as AOL, or Yahoo, also provide email addresses for free. Many people consider AOL, Yahoo and Hotmail spamming email addresses due to the fact that these email addresses of been around a long time and are often thought of as email services with high spam content.  I would also caution against using one of these three email addresses as your business email address.  There’s something about doing business with someone with a Hotmail account that makes people uneasy.

[stextbox id=”info” caption=”Types of Email Arddresses”]

Personal Email Address – your most prized email that you protect aginst spam.  Only give this out to friends and family.

“Throw away address” – one you can give to everyone.  If it becomes too much of a spam pot, you can delete it and start over with another free one.

Business Email Address – an address that you use strictly for business purposes.

[/stextbox]

If you follow this idea, and have more than one email address, you’ll find that your primary email address it’s less difficult to deal with and you’re able to continue to use it for much longer period of time.
Backing Up your iOS Device

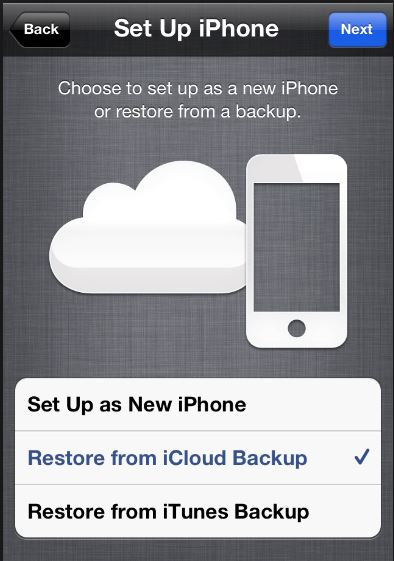
iPhone BackupHow important is your data? Most of us realize that a good backup is worth it’s weight in gold. Many of us have backup methods are we back up our computer data and even sometimes take that data offsite. But more and more we are finding our most important computing device these days to be our smart phone or tablet. These devices are with us all the time. We store information in them that’s extremely personal to us but critical for us to have available. Having a good method to backup your handheld device is extremely important. If you have an iOS device, there are typically two methods to choose for backup. 

Backing up to iCloud

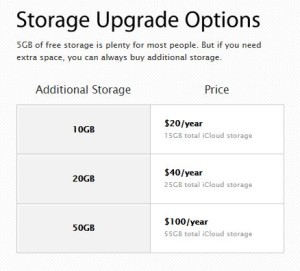
A wireless backup in the cloud. How perfect could that be. Seems like a no-brainer to use this method for backing up our device. There are problems associated with a cloud-based backup strategy. The biggest problem is the limited amount of storage space Apple provides us on iCloud. Sure iCloud is a free service and you can add additional storage space for a cost. Unfortunately these costs are not trivial. Many of us have iPhones or iPads with a relatively large storage capacity.

iCloud Storage OptionsWhen you sign up for iCloud, you automatically get 5GB of free storage. That may be plenty of room, particularly if you only have one device, because of the way iCloud stores your content. Your purchased music, movies, apps, books, and TV shows — as well as your Photo Stream — don’t count against your free storage. That 5GB goes a long way for your mail, documents, account information, settings, and other app data. And if you need more storage you can easily purchase an upgrade right from your device. But many people have a single issue that causes them to run out of space very quickly.

Photos you take on your device go into the Camera Roll. All these photos get backed up to iCloud and DO use part of the storage that iCloud provides you. People who routinely keep hundreds of photos in the camera roll will quickly exhaust the 5GB of space Apple provides and not realize why they have done so. If you sync your photos to your computer, or be sure you have saved them there from your Photo Stream, you should be able to remove these photos from the Camera Roll.

Many people believe they need to leave them there to keep them on the phone. But, you have to keep in mind that if you have Photo Stream turned on, they will be copied to the stream and available from that selection on your device.

Another way to deal with this is to sync your photos to your computer. This is in my opinion a preferred method for ensuring those photos are backed up. In general, I recommend people keep no more than 100 photos in the Camera Roll. With that many photos, a standard iCloud account should provide enough storage for two iOS devices.

Backing up to your computer

In the early days of iOS backing up your computer was the only option. Your computer typically has larger amounts of storage has the ability to keep copies of the backup. But even this can cause a space problem in the attic. If you have a new machine with an SSD drive, you may have limited storage space available. Backing up your device to your computer will make a copy of everything on it so it’s much larger than the storage space that iCloud uses for it’s backups. Since iCloud storage eliminates the need to copy anything you’ve purchased from Apple, it is able to store more information in a smaller space. When backing up to your computer though all information gets copied and takes much more space.

If you have storage space on your computer, backing up to get may be a good solution for you. By plugging your device into your computer, you not only can back it up, but you can download those photos out of the camera roll too.

But just like backing up to iCloud, there are things you need to be aware of when backing up to your computer. When you back up your computer it keeps a full copy of the device. If you change devices often, you may have full copies of older devices you no longer own still stored on your computer.

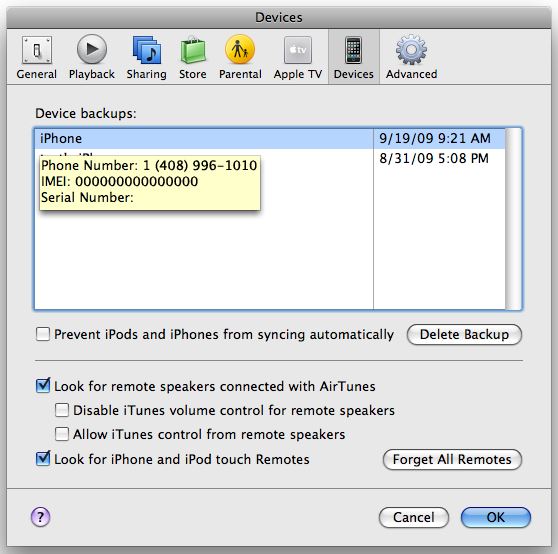
iOS Backups If you want to delete a backup created by iTunes, follow these steps:

  1. Open iTunes Preferences:
    • Windows: Choose Edit > Preferences
    • Mac: Choose iTunes > Preferences
  2. Click Devices (the iOS device does not need to be connected).
  3. iTunes will show the phone number, IMEI, and serial number of the backed up iPhone when you position your mouse pointer over a backup (iTunes shows only the serial number for iPad and iPod touch). Use this to locate the backup for the iOS device you want to delete. Select the backup you want to remove and click Delete Backup.
  4. Confirm you wish to remove the selected backup by clicking Delete Backup.
  5. Click OK to close the iTunes Preferences Window.

Deleting extra copies of old devices can save significant storage on your computer.

George’s Recommendation

Because backing up is something that needs to be seamless, I recommend using iCloud is your main backup process. In doing this, you must keep in mind that you need to sync your photos once in a while to your computer to reduce the number of images that are stored in your camera roll. As long as you do that, iCloud storage is usually sufficient to be able to backup both your iPhone and your iPad if you have one.

[stextbox id=”info” caption=”Turning on iCloud for Backup”]

iCloud automatically backs up the most important data on your device using iOS 5 or later. After you have enabled Backup on your iPhone, iPad, or iPod touch in Settings > iCloud > Backup & Storage, it will run on a daily basis as long as your device is:

  • Connected to the Internet over Wi-Fi
  • Connected to a power source
  • Screen locked

You can also back up manually whenever your device is connected to the Internet over Wi-Fi by choosing Back Up Now from Settings > iCloud > Storage & Backup

[/stextbox]

Why do my iPhone text messages show in different colors

photo 1If you use an iPhone You may have noticed that sometimes when you send a text message, the text is in blue and other times it’s in green.

Apple is introduced iMessage as a tool for sending text messages. iMessage uses the Internet, or your data service, to send text messages rather than using text services provided by your cellular provider. This way, texts do not cost you when you send them. But iMessage also allows people using Macs to be able to see text messages coming in by using your iCloud account.

If you tie your iCloud account to your phone messaging application, a text message sent from your phone will also go to iOS devices and Macs that are logged in to iMessage. Apple indicates an iMessage connection between two devices by showing those text messages and blue. So if you’re using I message and the person you’re sending two is also using I message them those text show up as blue text.

The other benefit iMessage provides is that it  is two-way conversational. Once you send a message, below that message you’ll see the word delivered. That says that the message you sent made it to the other person’s device. When the other person looks at the iMessage Below the message will change from delivered to read. This way I text conversation between two people in iMessage allows you to track when the messages received and when the person looks at it.

photo 2But what if a person doesn’t use I message or you’re sending a text message to someone on a different style phone. That’s why the text you sent sometimes look green. If the text messages being sent using your cellular provider’s text messaging system, the message shows up as green.

The extra benefits of being able to tell when a message is delivered or read makes iMessage a great tool.  Unfortunately both you and the recipient must be using a Mac or an iOS device for this to work.

Posted in iOS

Logitech Harmony Smart Control: The one to Purchase.

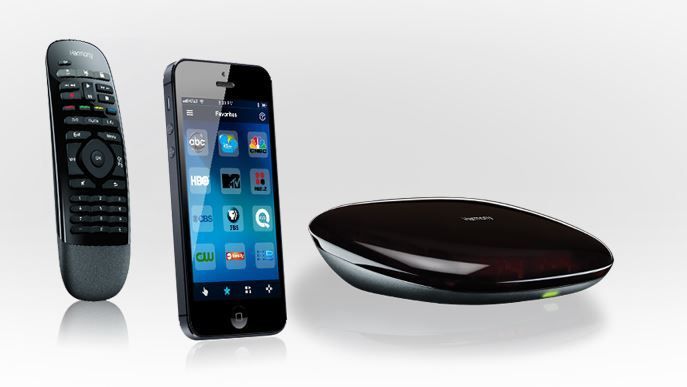
Harmony 1Universal Remotes.  I can personally remember 4 different ones I purchased over the years.  Some as simple as a universal Sony remote about the size of a hard backed book that did a good job with simple on off and channel commands.  Others as complex as a Harmony remote with a screen on it that was programmed by a USB cable.  All sort of worked.  None really worked well.  That all changed with my purchase of the Logitech Harmony Smart Control.  Finally. I have found a smart remote that I feel can put all my other remotes in a drawer.

What makes this one so special?

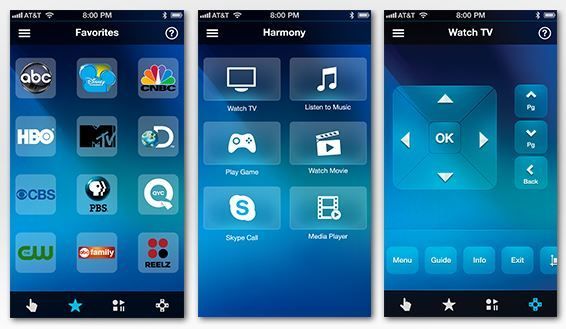
How many people sit on the couch to watch TV these days and have their iPhone or iPad right at their side.  Logitech takes advantage of this with this new remote product.  ALl programming of the remote is done through your iOS device.  And yes, Android is also supported.  Using the Harmony app (free from the Apple app store)you connect to the device and program it from the web.  You simply follow the prompts, make selections of the brand and model of devices you have, tell it what port the device connects to the TV on and it all gets programmed for you.  It even creates shortcuts to common activities like Watch a Movie that can turn on the TV, turn on the Blu-ray player, and set the correct connection port.  All of this happens from the push of a button.  This integration with iOS makes getting the remote to control all your devices very easy.

Not only will it control all your devises that use an infrared remote, but the unit has Bluetooth built in so it seamlessly addresses devices like the PS3 game console that uses Bluetooth.  Unfortunately for my aging Bose system, it does not do Radio Frequency (RF) devices.  In addition, this device handles the AppleTV very well.  Other units make it hard to access the menu button but this one maps it automatically for you.  Everything is seamless.

Harmony 2With this unit, you can easily control your home theater devices.   Anyone in the house can download the Harmony iPhone or Android app turn their mobile phone into a personal universal remote control, including 50 favorite channel icons and gesture control.  When your mobile phone is not available, you can use the included simple remote control. It lets anyone in the family change the channel and adjust the volume.   Simply press one button to switch to favorite activities, like watch TV or play a game.

It controls what you already own.

Logitech says you can consolidate 8 remote controls into one simple mobile app. Harmony is compatible with over 225,000 home theater devices. And unique to Harmony is their patented Smart State technology, which remembers your devices’ power and input settings and automatically adjusts them based on what you want to do.  If you are unsure if your device is supported, Logitech provides a great presale site to check.

Here is the best part of this product.  It’s reasonably priced for a smart remote.  Priced at just $129, it is a universal remote that I can finally recommend to people.

Mac Utopia for Printing from your iOS Device

b5384659-e759-4b52-8fe2-114f8aa2f887One question I get asked often is how do I print from my iPhone or iPad to my printer. This sounds like a simple request but in fact, the ability for these small for factor devices to send a print is a little more difficult than for a computer to do the same task.

Apple created these small devices with the intent for them to be fast and agile. As a result, it tended to design functions like printing so that it off loaded some of the computer processing power to the printer rather than requiring the device to do it. When Apple prepares a print job from an iOS device, it creates it in a single universal format. Unlike computers, where drivers for specific printers need to be loaded to allow them to print, Apple uses only one generic universal format for its print output file. When a print job is created on one of these devices, the file is quickly prepared in this universal format and then sent to the printer to have it process into the native format the printer expects to see. So that ends up being the problem for printers. If they do not know how to handle and process the file into the format they need, they cannot print from these devices.

When Apple introduced printing they designed a device standard called AirPrint. AirPrint designates a printing device that has the ability to do this conversion and thereby is supported for printing from any iOS device. If you are looking to purchase a printer today, looking for a printer that supports AirPrint is a great idea. This way, these newer printers support iOS printing right out of the box. But what if you already have a printer and don’t want to replace it at this time?

This is where third party products come in to play. If you have a Mac, the one I would recommend is called Printopia by ecamm.

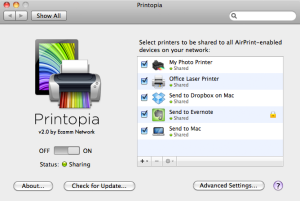
Printopia acts as that middle man between your iOS device and a printer. It does this conversion from Apples universal format to the native format for the printer. Printopia is a small piece of software that runs on your desktop Mac and processed these print jobs into a format the printer wants to see. It is simply installed on your Mac that already has access to the printers you want to use. Every printer that is installed on the Mac is made available to iOS through Printopia.

Once you install the software, it senses the printer drivers already installed and creates a connection to serve iOS devices. It really is that simple to install.

The only requirements are for this to work are that your Mac needs to be on so it can process these print jobs and it needs to be on the same network that your iPhone or iPad are connected to.

You can also save Paper With A Printopia Virtual Printer. This lets you “print” a file directly to your Mac or even send files directly to a Mac app such as iPhoto and Evernote. No need to waste paper next time you need to print a confirmation page. You can even send the file Print the file directly To Your Mac’s Dropbox Folder.

Printopia works With Leopard and even works on PowerPC Macs so that Mac OS X 10.5 and PowerPC Mac users won’t get left out in the cold. s. Purchase only if you like what you see. Have questions? Send us a message, and we’ll write back as fast as we can.

Printopia costs only $20 and is a great way to easily enable iOS printing in a Mac environment.