Which Hard Drive do I choose for backing up my Macintosh or my PC?

Q: With all the choices, which Hard Drive do I choose for backing up my Macintosh with Time Machine or my PC?

A: I wish there was a simple answer, but unfortunately there isn’t one.  Choosing a backup drive involves a number of factors that need to be take into account.  Many of these factors depend on the type of machine you have and the size of your original harddisk.  In this article, I am going to look at a number of decision points and attempt to provide some assistance in making that selection.

Internal vs External
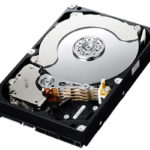
Raw drives are drive mechanisms that are sold without a case,   These drives are intended to be installed inside the computer box.  For Mac users, this decision point is simple.  None of the current or recent Macintosh machines can support adding an internal drive.  If you use a PC, and have a tower yo use an internal drive but then you have to open the case and install it.  While usually not too difficult to do, it just adds one more possibility to get things configured wrong.  There was a time where raw drives were much less expensive but that time has passed. So, in my opinion, external is the answer.

Brand

These day, there are many brands of drive available at your local Staples or Best Buy.  The brand of the drive actually has little to do with the quality of the unit.  The actual harddisk mechanism inside the box is likely made by 1 of 3 manufacturers and telling the difference between them is not really important.  It really all boils down to case design, interfaces and price.

Don’t be fooled by vendors that want you to spend more money for either a “Mac” version of a drive or for a “premium” model.  The drive mechanism is likely the same part.  Mac formatted drives are just that, pre formatted for a mac.  That is no big deal because you can easily reformat a PC formatted drive on the Mac.  In fact, time machine recognizes a new drive plugged in and asks to reformat it if it is a PC model.  Don’t pay extra for this formatting alone.

Also don’t pay extra for backup software.  Time Machine, which is a builtin feature of MacOS 10.5 Leopard or newer, is better than any of these backup solutions that ship with new drives.  Only consider backup software if you are using 10.4 or older on a Mac and in my opininon, your money is better spent upgrading a current MacOS release to do your backups if your machine will handle it.

For PC users, it depends on the operating system.  In Windows 7 or 8, backup is a control panel that you can configure.  In Windows 10, it is called File History.  Select the Start​ button, select Settings > Update & security > Backup > Add a drive, and then choose an external drive or network location for your backups.

All that said, I do have a couple of favorite brands.  Both Seagate and Western Digital make fair priced external drives that work very well.  There are a number of models available and best of all, you can get them locally at the Best Buy of Staples store.  When I recommend a drive, I choose one of these two.  One of them is usually in the weekly ad from Best Buy or Staples and on sale.

Desktop vs Portable drive

Either a desktop or portable drive will work fine.  Portable drives are usually smaller, have less capacity, and cost more.  If you are using a desktop Mac, purchase a desktop drive.  There is little reason to spend the extra for the portable one.  If however you are using a laptop, you may want to still purchase a desktop drive.

Desktop drives are usually made from a more available, more reliable and larger mechanism.  These drives usually use a 3 ½” drive mechanism.  These drives are available in larger sizes and at less cost.  Portable drives use a 2 ½” mechanism just like those used in laptops.  These are smaller, have less capacity, use less power, but cost more.

One important consideration is that a Desktop drive will need to be plugged into electricity while a portable drive usually is self powered from the USB or the Firewire bus.  This is nice for travel since you don’t have to plug it in to power, just the computer.

If you own a laptop, but use it quite a bit in one place, a desktop drive is likely a better solution.  If you want a backup drive that can travel with you, choose a portable drive for that application.

Size

My recommendation is to think of the future and purchase a drive as large as you can afford.  You will be amazed at how data accumulates and how fast you fill the drive you have.  Raw drive mechanisms are available as large as 6Tb today.  External desktop drives are available that large also but the real sweet spot here today is the 2Tb or 3Tb drive.  Portable drives are available as large as 4Tb with their sweet spot being at the 1TB to 2TB level.

On a Mac Time machine is very smart.  It will use all the space you give it and continue to keep copies of data from the past.  The general thing to remember is always select a drive twice the size of the internal drive you want to backup if you can.  This way you have plenty of space for multiple backups in time machine.  This gives you the most flexibility.

On a PC, you may need to ‘prune’ you backup when it fills the drive,  You can manage the backup space in the same location that you setup the backup in Windows.

Interface (ports)

Drive makers, including Western Digital and Seagate make many models.  One of the many considerations for drive pricing is the type of interface ports the drive has.  Some of the common interfaces you’ll see are:
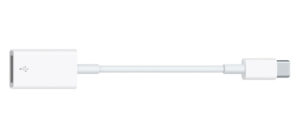
USB – all drives these days include USB 3.0.  USB 3 drives are backward compatible with USB 2 so no matter if your machine supports only USB 2, get a USB 3 or 3.1 drive.  Newer machines may have a USB-C style connecter so be sure to check that out before bringing a drive home.  If your machine supports USB-C, use that connection because it will provide the fastest throughput.  If the drive you chose still uses a USB 3 port, a cheep USB-C to female USB 3 adapter can be had for less than $10.

Firewire – In past years, I would have always recommended that you use Firewire.  But these days, Firewire is a dead technology.  If you have a Firewire port on your computer and you want to use it, be sure to select a drive that has both a Firewire and a USB interface to future proof your purchase.  Firewire drives may be hard to find since the technology is being phased out..  Some Macs like the new Macbooks and Macbook Air do not have Firewire at all.

eSATA – External SATA.  SATA is the native interface od all of todays drives.  The External version of this is called eSATA.  This connection is only available on some tower PC’s and is problematic so I recommend considering it.

Ethernet – This port allows a drive to work connected directly to an Ethernet network.  It is technically called Network Accessible Storage or NAS.  This is what Apple did in the time capsule (a great but more expensive backup unit).  Having this port allows a drive to hang on a network rather than be connected to a machine.  But, it is important to note, these drives are not compatible with Time Machine unless you use the Apple Time Capsule.  If you need some extra traditional storage that you may want to share, this is a good option but for Time Machine, it is is only a consideration if the drive is advertised to support it.  One such drive is the Western Digital My Cloud.  It supports time machine and a lot more. I use one as a secondary backup and while not as fast as directly attached storage, it works great.

So what do you get?  My recommendation here is to get a drive uses USB 3.  Some newer drives may have USB-C connections, and I suspect we will see this a lot more in the future but for now, converting to USB-C if that is the only port your machine has (2015, 2016 MacBook or 2016 MacBook Pro) is simple and inexpensive.

Price

Drive prices have dropped a lot lately.  Price should be one of the last things to think about.  My recommendation is to purchase drives near the sweet pricing spots I described above.  These are the ones in the Sunday circulars. Again, I recommend you purchase a drive as large as you can afford.  Larger drives above the sweet spot size will cost a little more and are usually fine choices if you have a great deal to backup.  These larger drives will become tomorrow’s sweet spot and cost will go down.

What will it cost?  Today, in February 2017, an 1 Tb USB external drive costs between $59 and $79 depending on features and sales.  A desktop 5Tb drive runs about $129 to $149.  With prices this low, more is always better.

Conclusions

All this is probably much more than you want to know about backup drives.  These conclusions will be my opinions of what you should get in a nutshell:

•    Consider as a first choice a Western Digital or Seagate drive
•    Get a desktop Model unless you need to backup your laptop on the road
•    Size the drive a minimum of twice the size of your internal drive
•    Get a drive with a USB 3 port even if you don’t have a computer with USB 3. Someday you will and USB 3 is much faster than USB 2.
•    Watch the weekly circulars.  Drives are always on sale

A USB-C Docking Solution for your Macbook and 13” Macbook Pro

When Apple announced the 2015 Macbook with a single USB-C port, Many potential users were put off by the fact that if you plug the machine again to charge it, you had no other connections that you could use on that MacBook.  This made a machine problematic for many things including plugging in an external hard drive for backup.  Fortunately the battery life of the new MacBook was quite good so that you didn’t need to charge very often but it was difficult to imagine not having the need to plug something in, anything in, while you’re charging the machine.

A number of new port extension devices were immediately announced to add additional ports back that Apple removed. One of the first that actually saw the light of day, was from Other World Computing, OWC. OWC’s USB-C Doc was announced right after the new MacBook but didn’t ship for a number of months. When it did ship, users of the new MacBook finally had a port extension device that would allow them to make full use of their new computers.

While it was introduced shortly after the 2015 Macbook, the OWC USB-C Dock is compatible with both the 2015 and 2016 Apple MacBook and 13″ 2016 MacBook Pro  models.  The 2016 15” MacBook Pro is not compatible as per the MacSales website.  I suspect this is due to the higher charging wattage required for the larger screen device.  With a 80w power supply, the dock does not have enough power to charge apples new 15” flagship model.

When paired with one of the compatible machines, the dock adds a plethora of ports for the user to make use of.  These ports include:

  • 5x USB 3.1 Gen 1 ports (including 1x USB Type-C)
  • High-speed Gigabit Ethernet
  • Front-facing SD card reader
  • HDMI with 4K display support
  • Combo audio in/out port
  • 80W of power to charge your computer and devices

The dock is available in all 3 of the colors that the Macbook is available including Silver, Space Gray, Gold, and Rose Gold for a perfect match with your new laptop.  If you have a 13” Macbook Pro, the Silver and Space Gray colors match your unit too.

Ascetics of the Dock

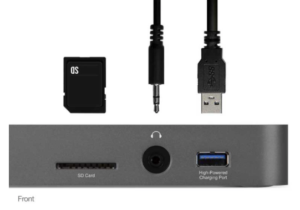
The dock is made of plastic and metal and weighs enough to keep the unit firmly placed on your desk.  A blue LED light shows from the bottom of the device indicating it is powered up and ready.  A green LED is also on the bottom that shows data connection with the laptop has been made.  The front of the doc has the SD card reader, audio port and a USB 3.1 port that remains powered even when the laptop is disconnected.  This port is high power enough to charge an iPhone or iPad.

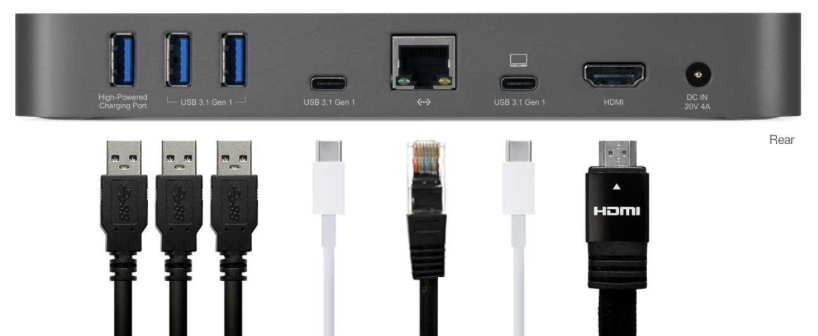
The back of the dock contains the majority of the ports including the port to connect it to your laptop.  It is important to note that of the 2 USB-C ports on the back, the one with the small computer above it is the port that must be used with the included cable to connect to the computer. The other USB-C port is an active port for plugging in other USB-C devices.

Also on the back of the dock are 3 USB 3.1 ports, with the left most port also being of the higher power type, an 10/100/1000 Ethernet port, a HDMI port capable of driving a 4K display, and a place for the included power adapter to be connected. One item of note is that the use of the Ethernet port required the installation of a driver from OWC that was available on their website but with the release of MacOS Sierra, the driver is no longer necessary.

How Well Does it Work?

In my experience in using the dock with a 2015 Macbook, the dock worked flawlessly.  All of the ports connected fine to the laptop and worked with expected speed.  In fact, I was encouraged by the fact that USB-C seems speedy enough to handle multiple streams of data being copied to devices.  While this was likely not something necessary in the real world where for the most part a single device at a time will be used, it is good to see that for me it worked very well. I did find that if I did not eject some older drives from the Mac before allowing the Mac to sleep, they sometimes did not come back without unplugging them and plugging them back in.  For my use, my laptop is set not to sleep while the power adapter is connected so I do not feel this is a major issue.

From talking with other owners of the dock there may be a problem with some older USB devices plugged into the dock not being recognized.  This may be related to the sleep issue I experienced.  I was unable to reproduce that problem when I did not allow the Macbook to sleep.

I was quite happy with the fact that the dock remained sturdy on my desk and did not move around when the cables were tugged slightly.  Some competing units that are much lighter exhibit this problem.

Even a bonus…

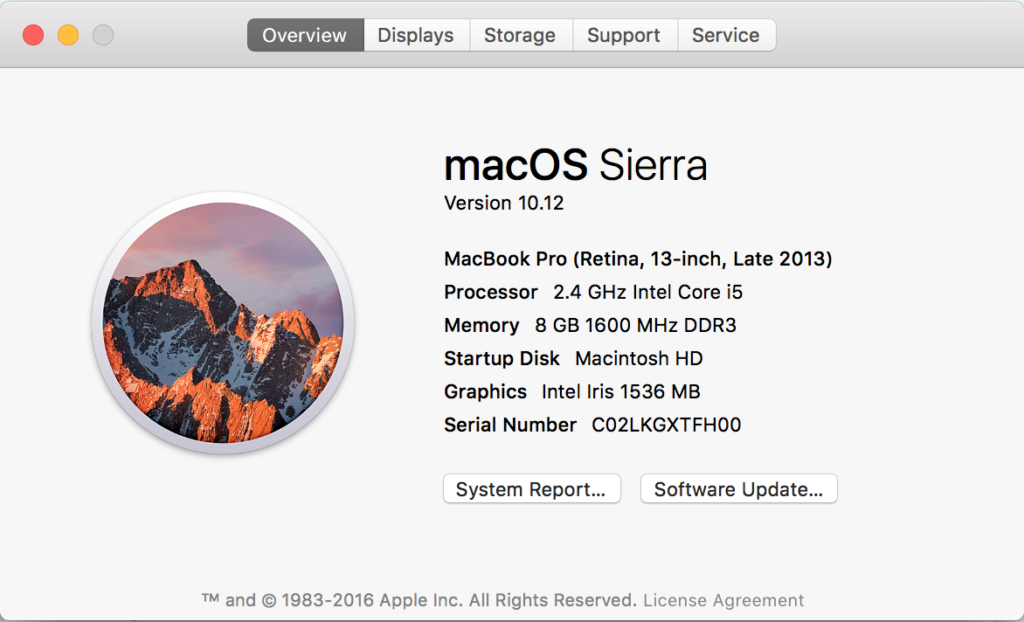
I also used a USB-C to USB 3.1 cable to connect the dock to my 2013 Macbook Pro.  To my suprize I was able to confirm that the USB ports, card reader, audio port, and Ethernet port  worked fine.  I did have some difficulty getting a TV connected by HDMI to connect but for a completely unsupported use of the device, it was very impressive.

Conclusions

OWC has a winner in their USB-C dock for users of Apples smaller laptops.  It works easily and performs very well.  For a Macbook user with only one USB-C port, or a 2016 13” Macbook Pro without touchbar with only 2 Thunderbolt 3 ports, this device adds the expansion that Apple believes users no longer need.  The only recommendations I have are that the USB-C cable proved short for many applications.  In long term use a longer USB-C cable will likely be necessary unless you ar going to position the dock right behind on next to your laptop

OWC provides a 2 year warranty with the dock.

The New Think at Apple

I spent many years in government working for what I considered to be a very well run and productive agency. About 10 years before I retired, the organization when through a transformation that it never recovered from. They called it Quality improvement, participatory management, and a number of other things. They sold it at the time as the way private sector works in highly productive companies. But what it really was consisted of a way for those not in power to gain power and become important. It was a disaster. Lots of improvement meeting, teams formed, consensus building, and touchy freely crap that made people feel better but improved nothing and always caused decisions to drag out. We hired many consultants to help us down this path and they made millions while productivity was sucked out of us in meetings.

We went from an organization that always tried to quickly react and do the right thing to an organization that tried to not make a decision until everyone agreed. So many times the consensus decision was really the wrong decision but after beating us down we just wanted the process to end.

One of the hallmarks of this was a months long effort to develop a mission statement and values that everyone ‘bough into’.

The reason I recount this story is that I continue to see our beloved Apple going this direction under its current leadership.

I saw this article and now am convinced that this is the case.

http://appleinsider.com/articles/16/12/16/apple-gives-retail-employees-t-shirt-keepsake-credo-for-holidays

I guess ‘credo’ is todays word for mission statement and values.

So what is Apples ‘credo’?

img_0482

All this, at the same time I learn that Apple’s new policy on Applecare when work is done outside an Apple Store replaces the parts but does not load operating systems. Huh?

A client called Apple on an iMac hard disk failure under AppleCare. He was directed to take the machine to a company called Gravity in Columbia. He took the machine in and they were to replace the hard disk but wanted to charge $75 to load an operating system on the new drive and $75 to restore his time machine backup. I had him call Apple support and complain but he was told that they were free to charge whatever they wanted because the store was not a corporate Apple Store. So disappointing. He is now still waiting for the machine to be completed after 11 days. Had he called me first, I would have sent him to Joe Mertzlufft in Columbia but he didn’t.

This experience with Apple definitely did not “enrich lives”.

In my opinion, Apple needs to quit concentrating itself on saving the planet and work a little more on saving its customers.

…. and yes, in case your wondering how this ties together, we all got Mission statement TShirts too.

George
Sent from my iPad

MacOS Sierra: Optimize Disk Storage

Do you ever run out of this space on your computer? This is a very common thing to happen particularly in these days with many of us are using laptops with smaller solid-state hard drive. Whenever you run out of space, you have to search your hard drive for things that you can delete. Sometimes it’s pretty obvious to look in places like your downloads folder but other times some of the large files to get put on your hard drive are stored in on hidden locations.

In MacOS Sierra Apple thought of this problem and provided us some tools to help her move some of these extraneous files. Define these tools you should start by going to the apple menu and selecting about this Macintosh.

screen-shot-2016-09-21-at-1-45-46-pmAcross the top of the dialogue there are a number of taps. Select storage. Your Mac will now study the files on your hard drive and organize them in the bar graph shown for the disk.

screen-shot-2016-09-21-at-1-46-00-pm

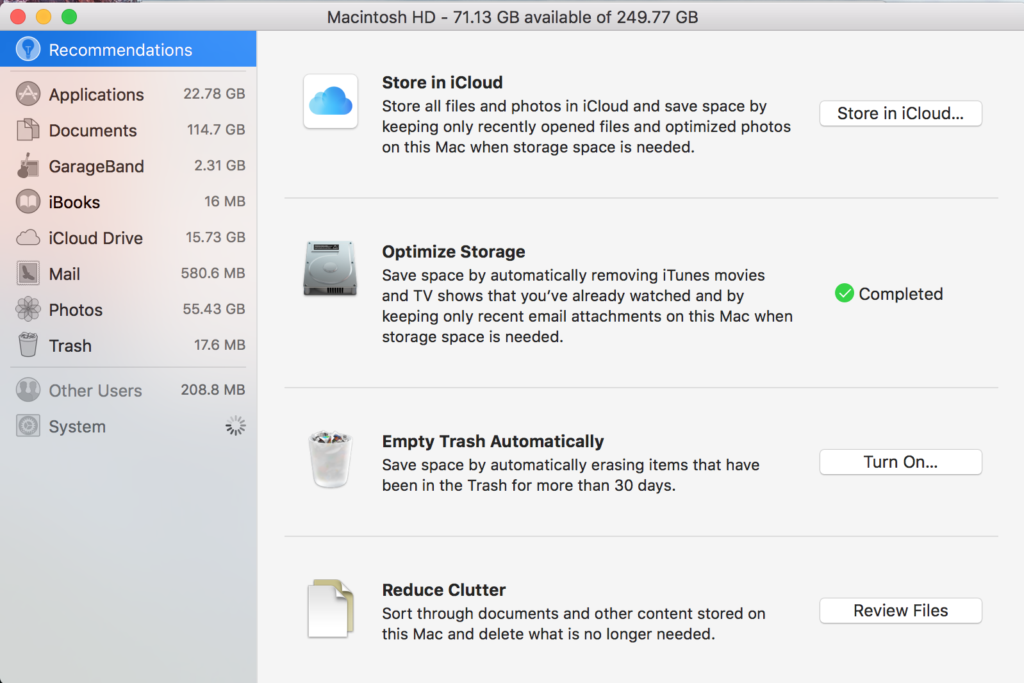
New in this version of the operating system is the button that says manage. Click manage and you’ll see the screen below.

screen-shot-2016-09-21-at-1-47-18-pm

You want to wait until the spinning wheel finishes counting all of the different types of files on your computer. This utility provides for ways that you can optimize storage. First off you could store files in iCloud. That may be a good solution for you but you’ll need to make sure you have purchased enough iCloud storage space to allow this to happen.

The second item called optimize storage will delete iTunes movies and TV shows that you’ve already watched and also delete older email attachments that are stored on your computer whenever storage space is needed.

The third item is a new toggle that allows you to automatically empty the trash. This way you know longer have to purposely empty the trash because the Mac to do it for you. Keep in mind if you’ve ever had to recover a file from the trash this may not be something you want to turn on.

The final item on the list is where the real assistance comes. Apple calls this reduce clutter but basically it allows you to look at files on your machine and make a conscious decision whether you need to still have them on the computer. It will not present files to you that would cause your Mac to not run, but it may present files for applications you use that if you delete will no longer work.

screen-shot-2016-09-21-at-1-48-23-pm

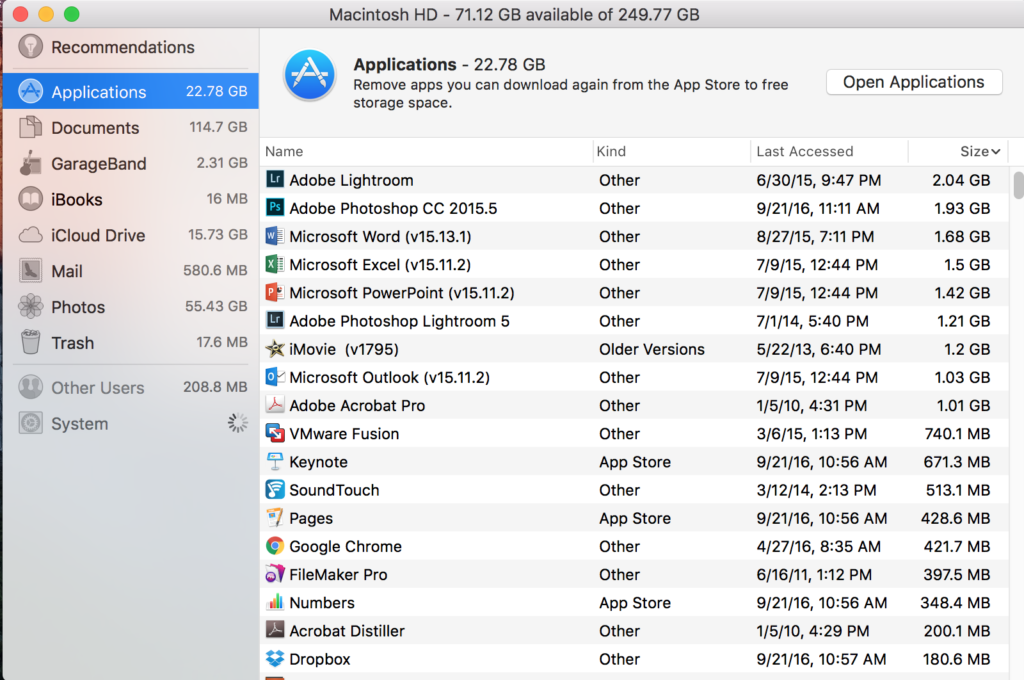
As you click on each one of the items in the left column, you’re presented with a list of those file types. For instance, applications, lists all the applications in your applications folder. Apple has been thoughtful enough to sort this list by size so concentrating at the ones on the top allows you to recover more space on the computer.  This dialog box is just a finder window so if you click on the file name for an application and hit the delete key you will delete that application. You can then do the same for the other types of files such as documents and garageband compositions.

Like many things we’ve seen added into MacOS over the last few years, there were third-party utilities that would do a pretty good job of doing the same thing. But for Apple to provide this built into the operating system is very positive for it’s users. First off you don’t have to research which deletion utility might be the best from the App Store, but moreover you can be fairly confident that when files are delayed they won’t cause the operating system to fail.

As with any file deletion that you do on your computer, it makes good sense to verify you have a backup before you do any of these functions.


Posted in Mac

Installing MacOS Sierra

macos-sierraIt’s that time again! Apple has released a new version of Mac OS called Sierra.  As with any new release there are going to be some minor issues. There are couple of things I want to point out about the install before you do it.

Sierra was released just yesterday and Apple servers are completely overwhelmed. Downloading the update might be quite slow but if you let go it will typically finish. The update process itself is similar to what has been done in previous years. The updater runs after completing the download and you have to approve the install.  After you’ve done this, expect about 45 minutes to an hour for the operating system to do the basic install. But that’s just the beginning.

After the install is complete a number of things have to happen on your computer. First off, all of the computer indexing that the computer uses must be rebuilt.  This index is used to find files on the machine in spotlight.   If you have a large number of files, this can take hours and can slow the machine to a crawl.

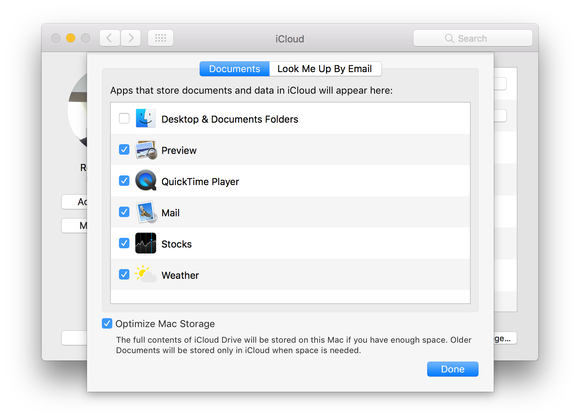
In addition, during the install, you will be asked about using iCloud to store the files on your computers desktop and its documents folder. Uploading these files could take a very long time if you have many stored.  It could also run over your internet service providers data cap.  While this seems like a very handy thing to do, consider it carefully because all those files take space.  That means you could easily run out of iCloud space and be required to purchase more storage.  Using this only makes sense if you have two machines or want all your computers files available from your phone or iPad.

sierra-icloud-drive-desktop-documents-option-100673616-large

But there is more….. The first time you open the updated photos app, it will have to completely rebuild your photo library,  This took 30 min on one of my machines with 15,000 photos but once rebuilt, all the thumbnails of the photos were gone.  I finally realized it was rebuilding them.  But this rebuild process took over night to complete.

So far, I have not found any reason to say don’t install this update.  But just keep in mind that when you do, be prepared for an unresponsive machine for a while while Sierra performs all these background processes.  Perhaps doing the update in the evening so you can let your machine run all night is the best advise.  If you do the install, authenticate iCloud and then open photos, you could let the machine do all this indexing during the night and hopefully you will have a responsive machine in the morning.

Posted in Mac

Changing the name of an Apple Bluetooth device


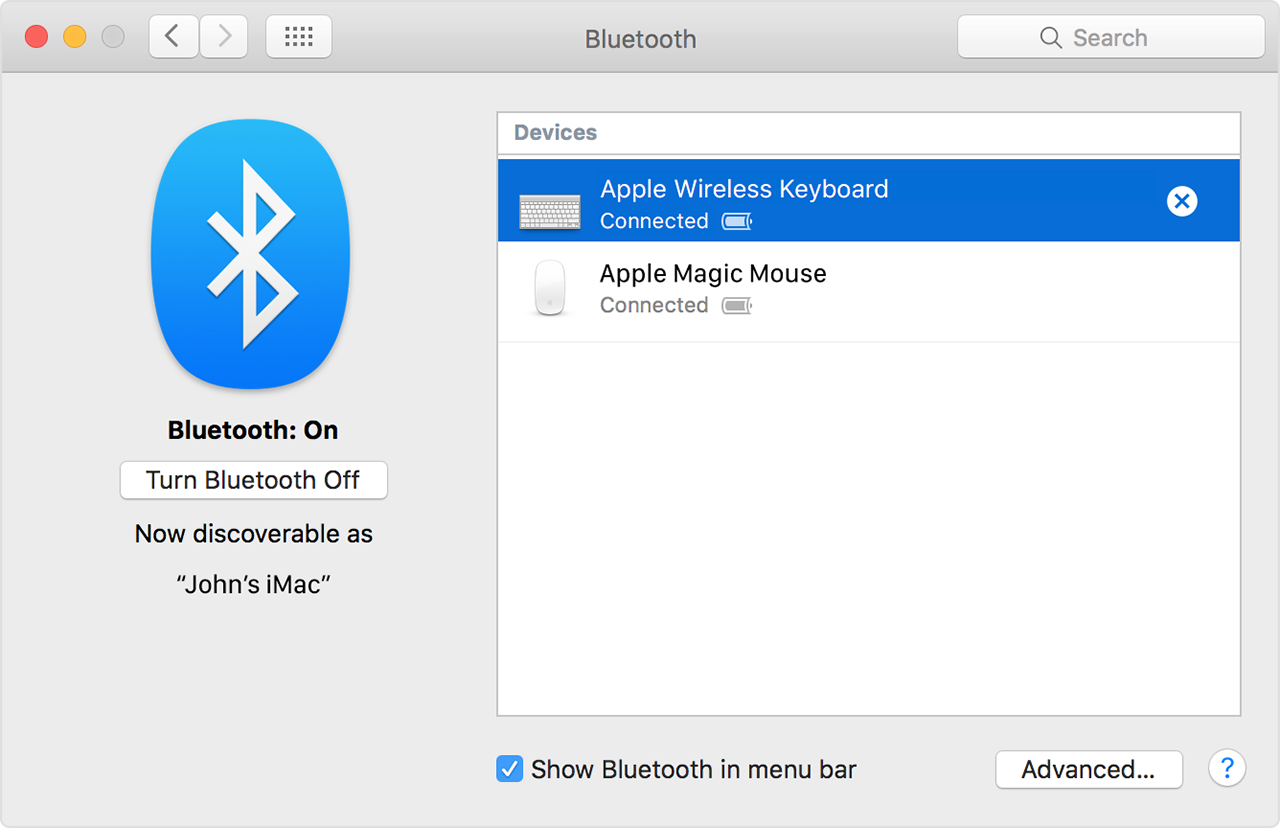
Bluetooth accessories like Magic Keyboard, Magic Mouse 2, Magic Trackpad 2, and third-party input devices come with a default name that appears in the Bluetooth menu of your Mac. You can give each device a name you’ll recognize.
The question came up at a recent appleJAC meeting about how you go about changing this name. Here’s what Apple has to say about it:

To rename a Bluetooth device, follow these steps on your Mac:

  1. From the Apple menu, choose System Preferences.
  2. Click the Bluetooth preference icon.
  3. Control-click or right-click on the device’s name to see a shortcut menu.
  4. Click Rename in the shortcut menu, then type a new name for the device.
  5. Click the Rename button to save your changes.

The custom name you give your device now appears in the Bluetooth menu of your Mac and in the Bluetooth section of System Preferences.

Note: When you rename an Apple wireless device, it remembers the name you give it. So if you pair the device with a different Mac, the device will appear as you named it. But with third-party devices, the custom name is often stored on the computer. Because of this, the device might return to its default name if you pair it with a different Mac.

Computer Scams can really Ruin your day…

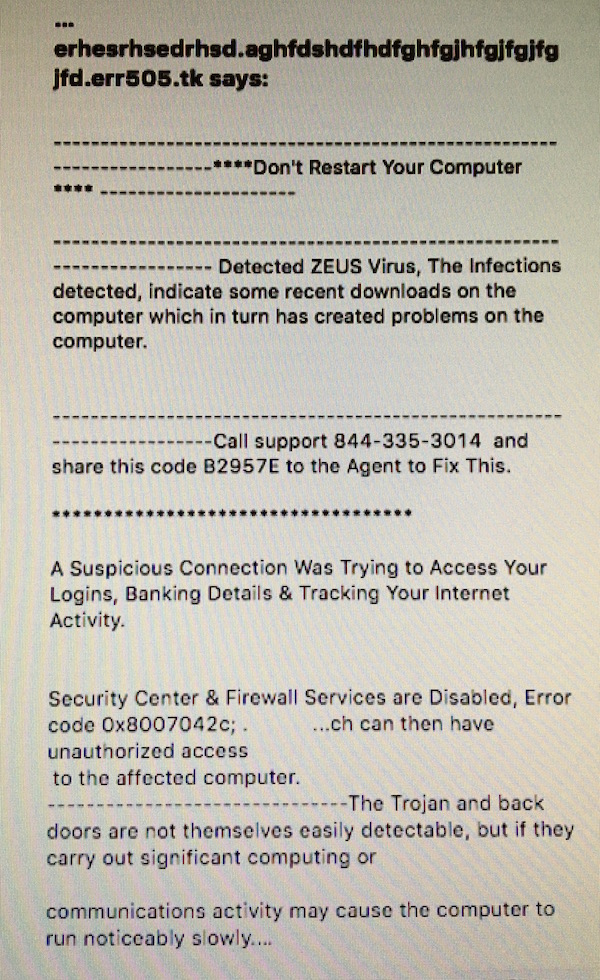
Having a bad day today?  Well it could be a lot worse.  What it you were surfing the web on Facebook and suddenly saw this?

IMG_1137 (1)

Many people have seen messages such as this, particularly by clicking a link on Facebook.  Don’t fall for this scam.  The real infection here is to get you to call the phone number, let them connect to your computer to “Fix” it, and then have them install real spyware.  Then they show you how the machine is “infected” and tell you they can fix it for $190 only to steel your credit card info and make charges to your card.

Don’t make an errant click into a terrible mistake.  Force quit your browser to get rid of the message and ignore it. NEVER call a phone number for a computer problem that pops up on your screen and NEVER let someone you do not know make a connection remotely to your PC or Mac.

This can happen anywhere on the web but lately, many people see this from clicking a link from Facebook.

Q: How do I print labels from Apples Pages Program?

A:  I am making the assumption that you have labels purchased that go into your printer.  If that is not the case, let me know.

First you need to get a template for the label material you have.

Here is a page with lots of these templates.
Screen Shot 2016-04-27 at 8.09.23 AM
If your labels are Avery, the ones at the bottom correspond to Avery label numbers

After you download the template go to the top of the Safari window and click the downloads button.

Screen Shot 2016-04-27 at 7.56.54 AM
Once you click on it, double click on the document template you download.

Screen Shot 2016-04-27 at 7.57.15 AM
This brings up this dialog:

Screen Shot 2016-04-27 at 7.58.31 AM
Select Add to Template Browser.

Now the template is loaded in Pages and you can start your new labels.

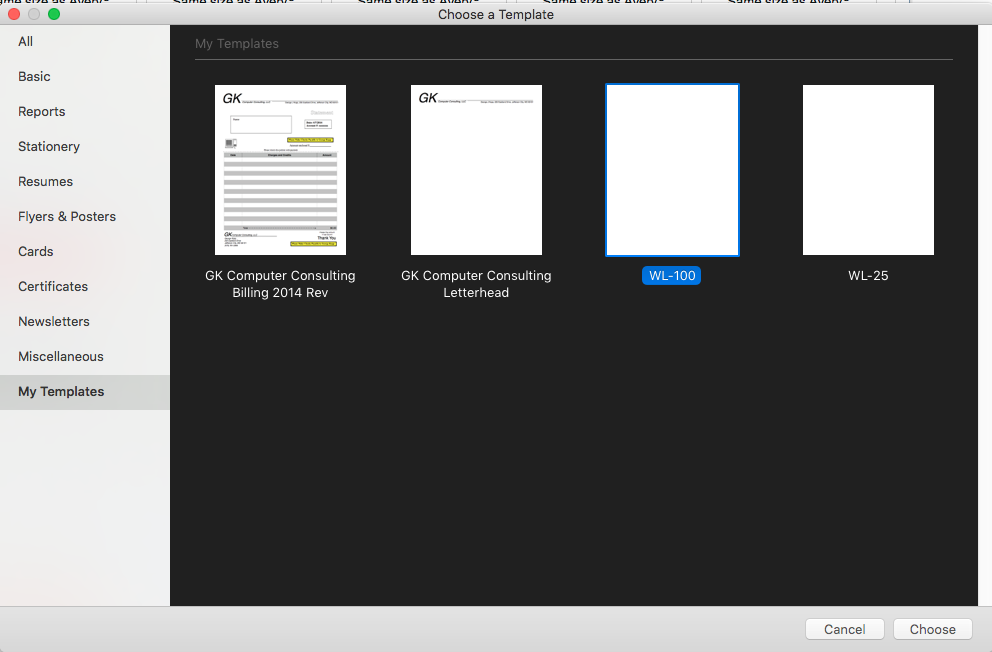
Now pages should start and put you in the new document mode.  On the left is the My Templates dialog.  Select the template you just downloaded.

Screen Shot 2016-04-27 at 8.01.06 AM
Double click the templet to get started. This will open a new label sheet in pages and have all the labels created.

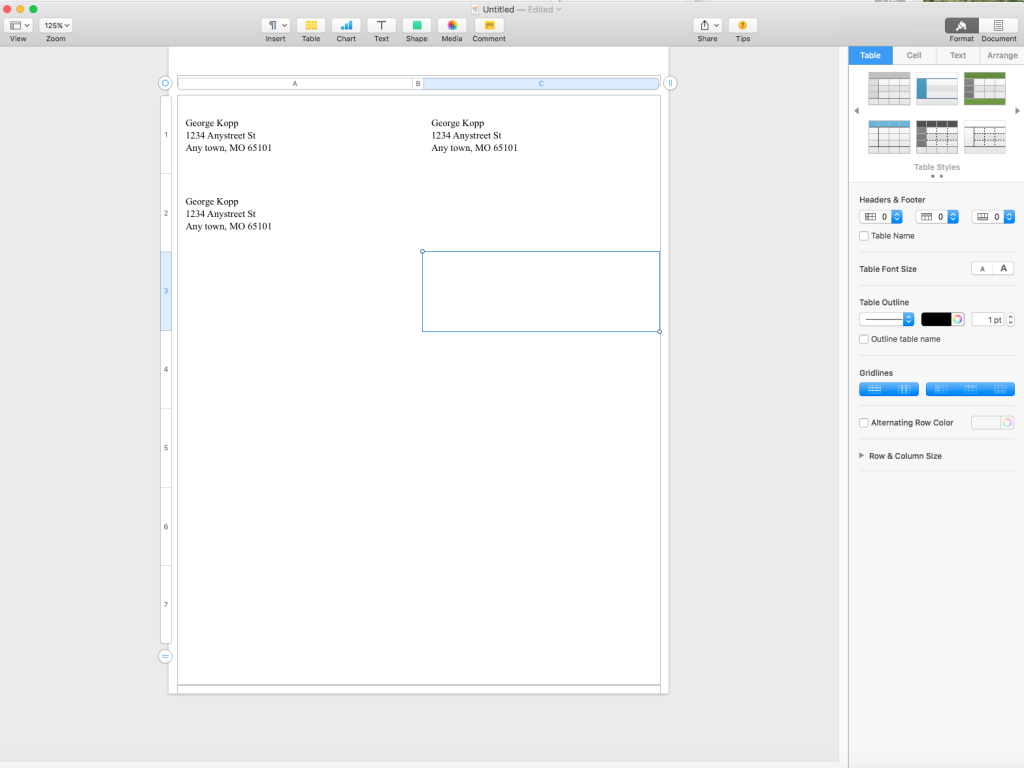
Now you can type the label into the document and when done print the page.

Screen Shot 2016-04-27 at 8.08.00 AM

Google Makes NIK Photo enhancement tools FREE

Screen Shot 2016-03-25 at 4.57.23 PMIf you are a user of Photoshop, Photoshop Elements, Lightroom, or Aperture you owe it to yourself to download these plug-in tools from Google.  These are true high end enhancements for all these products and now, Google has made them free.

the Nik collection It includes Analog Efex Pro, Color Efex Pro, Silver Efex Pro, Viveza, HDR Efex Pro, Sharpener Pro, and Dfine.  Each of these are fine additions to the adobe products but together and for free they add a major enhancement to the ability of these products, particularly for Lightroom users.

  • Analog Efex Pro – Explore the look and feel of classic cameras, films, and lenses.
  • Color Efex Pro – A comprehensive set of filters for color correction, retouching, and creative effects.
  • Silver Efex Pro – Master the art of black-and-white photography with darkroom-inspired controls.
  • Viveca – Selectively adjust the color and tonality of your images without complicated masks or selections.
  • HDR Efex Pro – From natural to artistic, explore the full potential of HDR photography.
  • Sharpener Pro – Bring out hidden details consistently with the professional’s choice for image sharpening.
  • Dfine – Improve your images with noise reduction tailored to your camera.

Start by looking at Define and Sharpener Pro.  These are the best noise reduction and sharpening tools I have ever used.