Adapters for the Thunderbolt 3 (USB-C) or USB-C port on your Mac

If the cable from your external display, hard drive, camera, or other device doesn’t connect to the Thunderbolt 3 (USB-C) or USB-C port on your iMac Pro, iMac, MacBook Pro, or MacBook, you might need an adapter.

Apple has a tech support article describing many of the connected types you may want to use.  While this article is not completely comprehensive everything available, it’s a great place to start.

Posted in Mac

Finding Topics for your Website

Over the years, I have setup a number of websites. Once I setup a site for someone the first question I usually get is “I don’t know what to write about”. There is a site that looks like it would be useful. Check out Answer the Public.

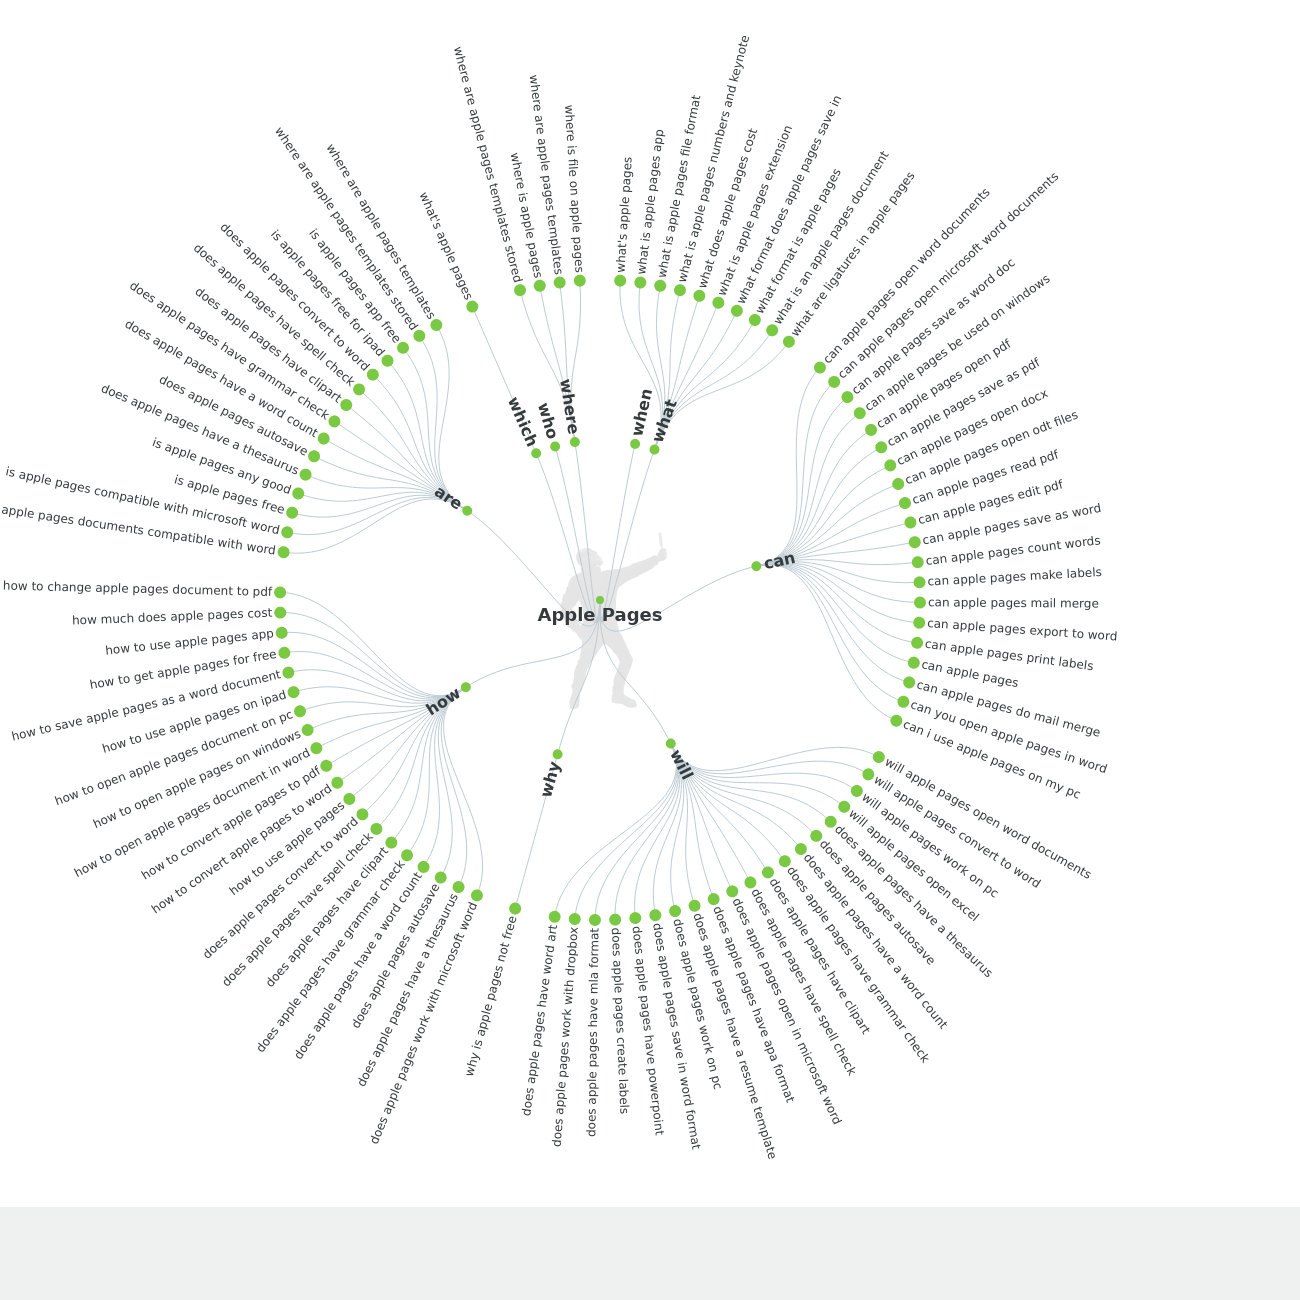
This site aggregates bing and google search history to tell someone what people are asking about a particular topic. For instance, look at a search for ‘Apple Pages’.

These are the “long tail” questions people are asking in Bing and Google about Apple Pages.  This gives a site creator an idea of what people are looking for so they can taylor their site to give them what they want.  The more of these questions you cover in your site, the better chance you will get the hits.

This can be very helpful in giving someone ideas for what to write about and post on your website.


Local Apple user group hosts Q&A at May Meeting

Mark your Calendars!  appleJAC users group in Jefferson City is hosting a Question and Answer meeting at 7pm on May 1st at Immaculate Conception Church, Kennedy Hall.  This is a golden opportunity to get your nagging questions answered on Macintosh, iPhone, iPad, or anything Apple related.  This group, that meets monthly, has a wealth of knowledge relating to all things Apple.  It it was made by Apple, or connects to an apple device, we will do our best to answer you question.

Feel free to bring you computer, phone or tablet along and get those questions you have answered.  Since many people will have questions, you will likely learn about many things you were afraid to ask about. You can ask questions from the floor or write them down and submit them.  There are no dumb questions!

You don’t have to be a member to attend so mark May 1 on your callender and plan to learn more about your Mac, iPhone to iPad..

For more information on appleJAC or the upcoming meeting, check out their website.

Cleaning your iPhone cases and Covers

For a long time I have been looking for something that would lead those rubberized covers and cases we use on our iPads and iPhones.  Over the years I’ve tried many things from different types soaps to even running them through the dishwasher.  Believe me, the dishwasher idea was not a good one. Unfortunately, most of the soaps I tries, while able to remove dirt, did a very poor job in also removing the oils from fingerprints.

Recently, I’ve run upon something that does a terrific job. The item called a Mr. Clean Magic eraser.  It is a foam sponge that is infused with some light bleach.  These items are great for removing scuffs off walls and stuck on dirt on a auto interior, but I had never considered them for cleaning the rubber coated iPad covers.  I gave it a try and found it to do a terrific job.  I simply moistened the sponge and vigorously rubbed the cover.  Then I dried it thoroughly.  I dont recommend this for the glass but it definitely Dows a great job on the covers.

The next time you need to clean one of those covers, give it a try.

Getting Ready for iOS 11!

With Apple already in beta testing iOS 11, it’s always good to go back through the list of things that you need to do to prepare before updating your phone with a major operating system update. If you follow these simple steps, the odds of your update going well are greatly increased. Over the years Apple has made installing new updates pretty simple. When the update is ready it will show you on the device by showing you a small red number on top of General icon in the Settings application.  But many times if you go into system updates and check for an update it will show you it’s available before the icon shows. If you’re in a hurry to update, you might give this a try.

1.) Check to see if your device is iOS 11 capable

The iOS 11 update is officially coming to the iPhone 5s and later, all iPad Air and iPad Pro models, iPad 5th generation, iPad mini 2 and later and iPod touch 6th generation. This means popular devices like the iPhone 5 and iPad 4 are staying put on iOS 10.  If Apple releases any new devices, iOS 11 will be standard on them.

2.) Make sure you have enough space for the update

iOS 10 required as much as 2GB of space and while its unknown how much its successor will require, you can be sure its going to be similarly large amount. Apple will prompt you before downloading if you do not have enough space, so either way you will either have to get rid of some unnecessary apps, photos, music/TV shows/movies or other data you might not need right on your device .  One place that I see space often used on iOS device is in the camera roll. If you sync your photos over to your computer and delete them from your phone that will free up that space. You can always put photos back on the phone using iTunes at the time of sync.  In previous releases, Apple has offloaded applications to automatically free up space but it is always a good idea to do the cleanup yourself, just to be sure.

You can check how much space you have by going into settings and then general.  Select about and then it will tell you in the list how much free space you have on your device. iOS updates often have additional applications updated too. Apple generally updates many of their apps at the time of the system update so you’ll need additional space for those. Don’t cut your space to close.

3.) Is your device running iOS 10.x.x?

You’ll likely be able to update from any version of iOS 10 version and quite likely any version of iOS 9.  If your device is running a version older than iOS 9, you may have to update that far first and then move to iOS 11.  We will have to wait and see to be sure.

4.) Do you have the latest version of your apps?

If you don’t want to lose your app or its data, make sure they are up to date. This will also ensure you get the most out your apps in iOS 11, as they will have been tinkered with for iOS 11 integration. Just check for updates, and apply all updated applications that you find prior to the operating system install.  Apple usually announces the release date of a new iOS version about a week before it is available.  That is a great time to update your apps.

5.) Back up your device!

This is the most important step you need to take before updating. While everything is done to ensure the transition to iOS 11 goes smoothly, major updates can go awry. To back up, simply follow these steps:

  • Connect your iPhone or iPad into your Mac or PC and open iTunes.
  • Select your device under Source and select “Summary.”
  • Under “Backups” select “This Computer” and then “Back Up Now.”

I also recommend encrypt in your back up. If you encrypt your back up, and give it a password that you have to enter when you restore it, all of your passwords that you stored on your device will remain. This keeps you from having to go back in and reenter passwords in applications, or mail, before you can use the new OS.

So here is my final bit of advise…..

For most general users, it is often good to wait a about a week after the new OS is available to make sure there are no issues with it.

That’s about it. You’re ready to go. Enjoy the new OS. All the new features will be great fun to play with.

Posted in iOS

Application Specific Passwords for your iCloud Account

App-specific passwords allow you to sign in to your account securely when you use apps that don’t natively support two-step verification or two-factor authentication. There has been quite a bit of conjecture on the internet that very soon, any non Apple application that access iCloud data, like Microsoft Outlook, and specifically Windows machines accessing iCloud information will be required to use an application specific password.

Before creating app-specific passwords, two-factor authentication must be enabled for your Apple ID. As of iOS 10.3 and later, two-factor authentication is automatically setup for new Apple ID accounts. iOS 10.3 also auto-prompts existing accounts to upgrade. This makes sense as apple has been pushing people to use two-factor authentication now in many ways.

To make an app-specific password, do the following:

  1. Sign in to your Apple ID account page at https://appleid.apple.com
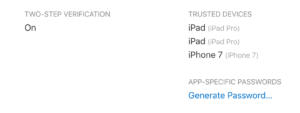
  2. In the Security section, click Generate Password below App-Specific Passwords.

  3. Fill in a name for the password you are creating so you can remove it if you desire later
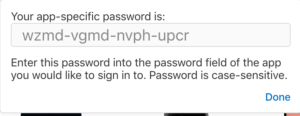
  4. A dialog will come up and show you the password that was generated

  5. After you generate your app-specific password, enter or paste it into the password field of the app as you would normally.

You can have up to 25 active app-specific passwords at any given time. If you need to, you can revoke passwords individually or all at once.

If you want to revoke one of these application specific passwords, in the security section of your applied management page, click on edit.  Then under App specific passwords, click View History.  You will be shown a list of all the application specific passwords you have used.  Click on the one you want to remove and click to remove it.

Get used to this because tighter security is coming to an iCloud account near you very soon.

Windows 7 forever! – Don’t Be that guy

Windows 7 was a terrific operating system. In fact for many things you do today Windows 7 is still preferred over windows 10. Many people continue to use Windows 7 machines very efficiently and insist that they’ll never move to windows 10. To be quite honest, I completely understand that feeling and in many ways think they areright on the money. But there comes a point of time when you need to face a few facts and I believe the recent ransomware hacking that were seeing may be one of those first early facts that you might want to make note of.

Microsoft says it still supports Windows 7, and in fact Windows 7 is still the promenade operating system being used in business today. If you have a Windows machine running Windows 7 and are happy with it I think continuing to use it is the right thing to do. The real issue becomes when it’s time to purchase a new computer and have to decide what to purchase. Do you buy a windows 10 machine and move forward, or do you drag your feet in the dirt, insist on Windows 7, and join the window 7 forever crowd?  This is a decision many people will be faced with and I want to tell you a few things that I’ve seen in the past that make that decision pretty clear.

Of course, I use a Mac much of the time and I’ve seen the same thing on the Mac side. People don’t want to move to the new operating system because it’s different, because it may slow their machine down, or for many other seemingly valid reasons. But Apple does a good job of forcing you forward. It provides the new versions of operating systems for free, it provides updates for most of its apps for free, and it tries to ensure the new releases of the operating system make your machine run at least as fast as it did prior to installing the new release. But there still are a few machines that I run across still running old Mac operating system like snow leopard, an operating system that’s at least seven years old.  It’s many of the same people that then wonder why they can’t update their applications, or why new printers don’t provide drivers for them, or things just don’t quite work when connected to their brand-new iPhone.

Well people I’m here to tell you windows is going that same path. Windows 7 today may still be very viable, but a new machine you purchase today needs to be usable for at least five years, and I think that may be a problem. The recent ransomware attack, targeted Windows XP users. These people also believed the Windows XP was going to be the operating system they used forever. It was fast, and it was thin, so it didn’t require a lot of resources on older computers. But Microsoft ended support for Windows XP. So the XP operating systems quit being updated leaving holes open for attackers to go after. Sure, Microsoft did issue an emergency patch for Windows XP related to this outbreak, but we can’t depend on that and in fact in my opinion it provided a disservice to all computer users.  It’s just encourages people to stick with the old and not move to the new. Now Windows 7 today is not in that same situation, but it’s time must be coming.

I remember one time that OS2 was the operating system used by most banks. Many of those banks held onto that operating system as long as they possibly could until it got them to a point that there systems were in serious trouble. At that point they were forced to make an upgrade rather than making an upgrade in a timed and planned fashion.  In fact many believe it was that decision, that kept many banks from providing electronic banking and Internet-based technologies to their customers for a long time. In hindsight, they made a very poor decision.

Last week I set up a new machine for user that purchased Windows 7 on that machine. They didn’t want to go through the learning process to learn windows 10 so, they bought a brand-new Dell computer with a six-year-old operating system. Well that certainly works well for them today, I don’t believe we can depend on that continuing to be the case.

So what’s the point of my anecdotes this morning?  The point is, when you buy new hardware get an operating system that is new also. Resist the thought of trying to run on the old release. Bite the bullet and pay for those software updates that you’ll need for the new operating system. Move forward, don’t drag your feet in the dirt.

Just remember, a week ago many businesses were still running Windows XP thinking, “it’ll be fine “or “we don’t want to have to upgrade our operating systems yet “. But today, in the midst of these hacking attacks, I believe there are many government agencies, many hospitals, and many businesses, that may be rethinking their thought of staying on the old operating system.

Don’t make that same mistake. If your in the market to purchase a new Windows machine, go with windows 10. Microsoft has declared it’s their future, so it needs to be yours too.

Cleaning up Your Time Capsule Backup

Erasing a Single Computer from a Time Capsule Drive

Many people use the same hard disk to backup multiple Macs.  This is great particularly when the disk is network attached such as a time capsule.  But over time as you replace machines, sometimes your old backup gets left behind and your drive fills up.  It is easy to remove old machines from the time capsule backup done with time machine.

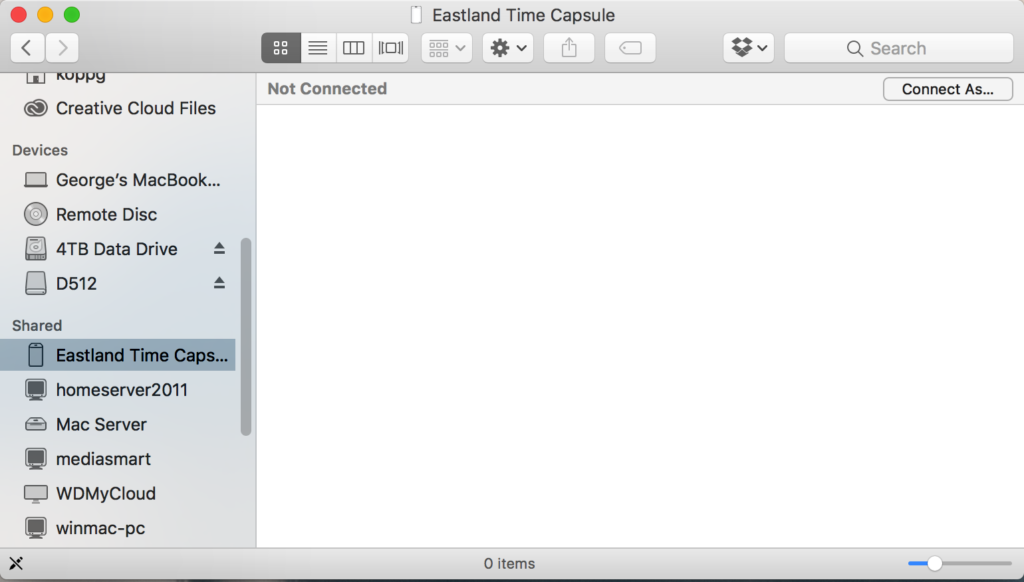
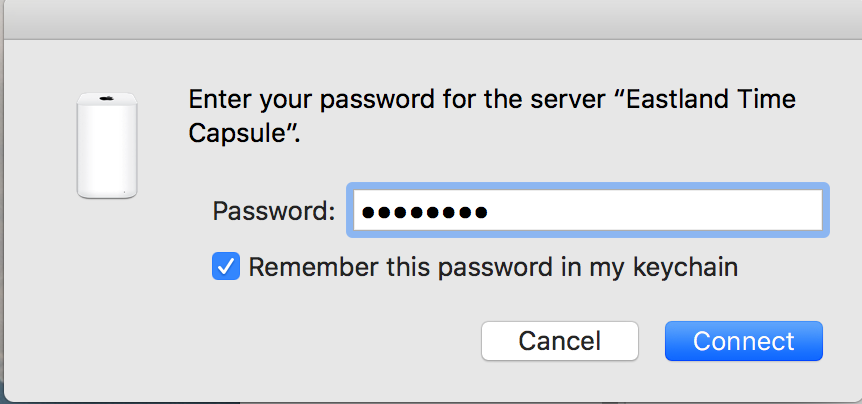
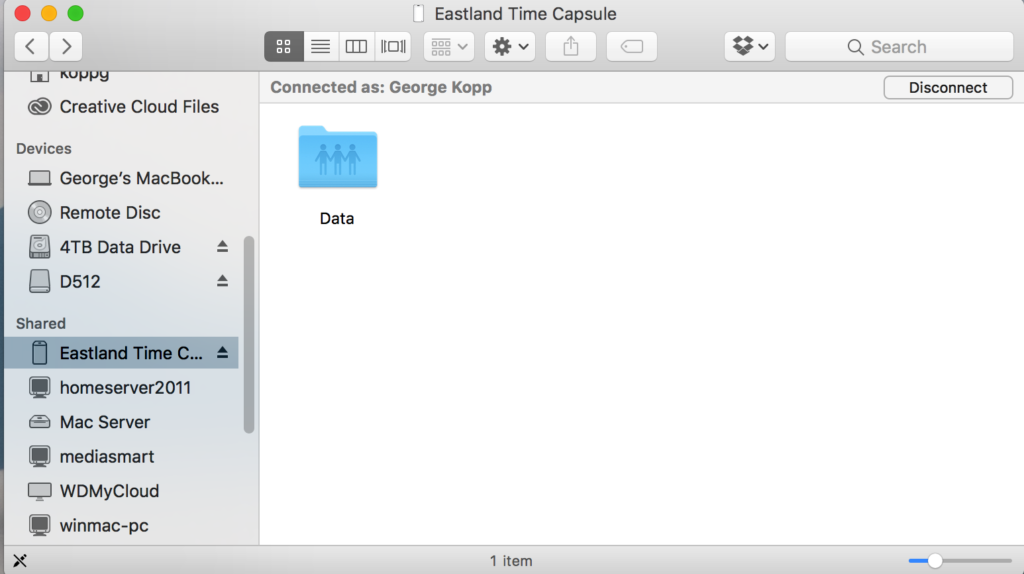
First you need to mount the drive from your time capsule to your computer.  In the finder sidebar, scroll down to Shared Devices and select the time capsule.

If you have never connected this way to the time capsule, it may ask for a password.

Once connected you should see the Time capsule drive.

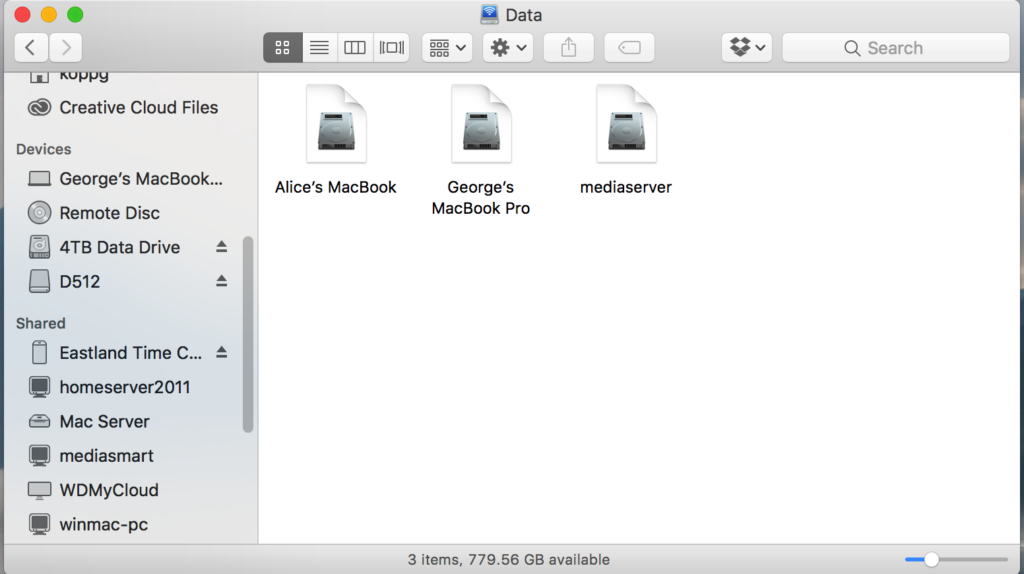
Open the folder you see and you will see individual machine icons listed as drive container (Disk) icons.

Now, you can drag any of these containers to the trash and empty the trash.  This might be a good time to go get a cup of coffee because it often takes quite a while to delete.

You may need to unplug the time capsule and plug it back in to get it to recognize the additional space has been cleaned up,

Erasing the entire Time Capsule Drive

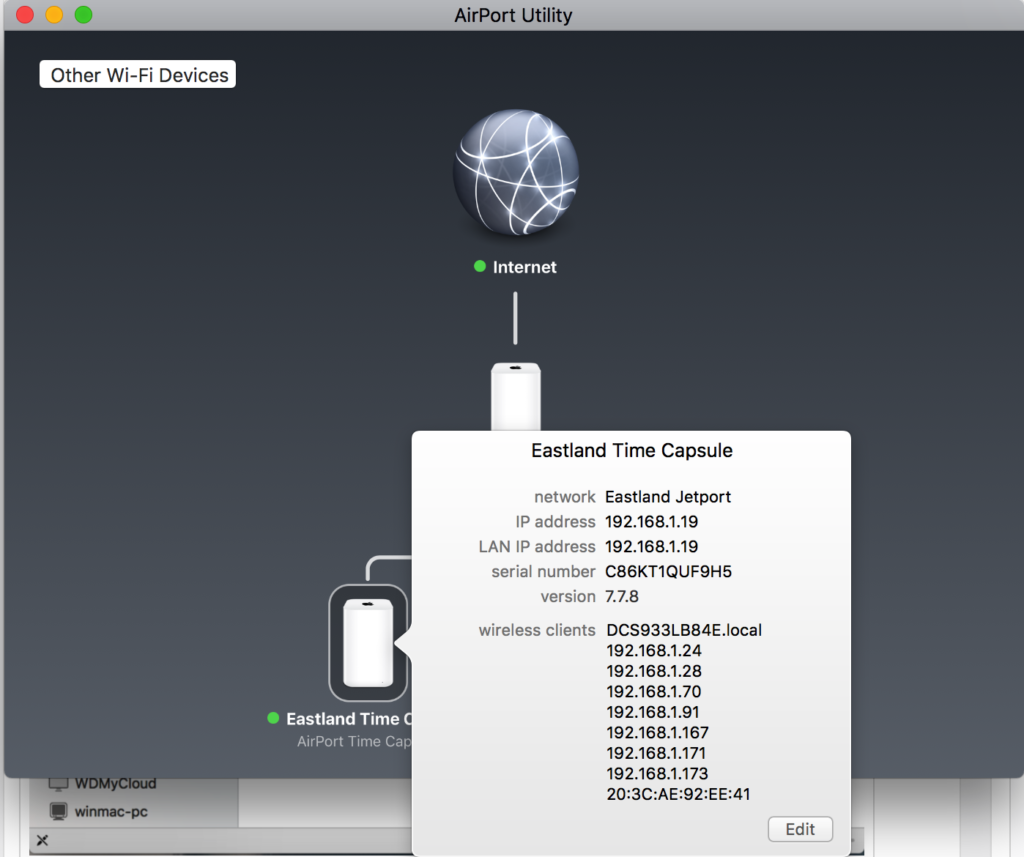
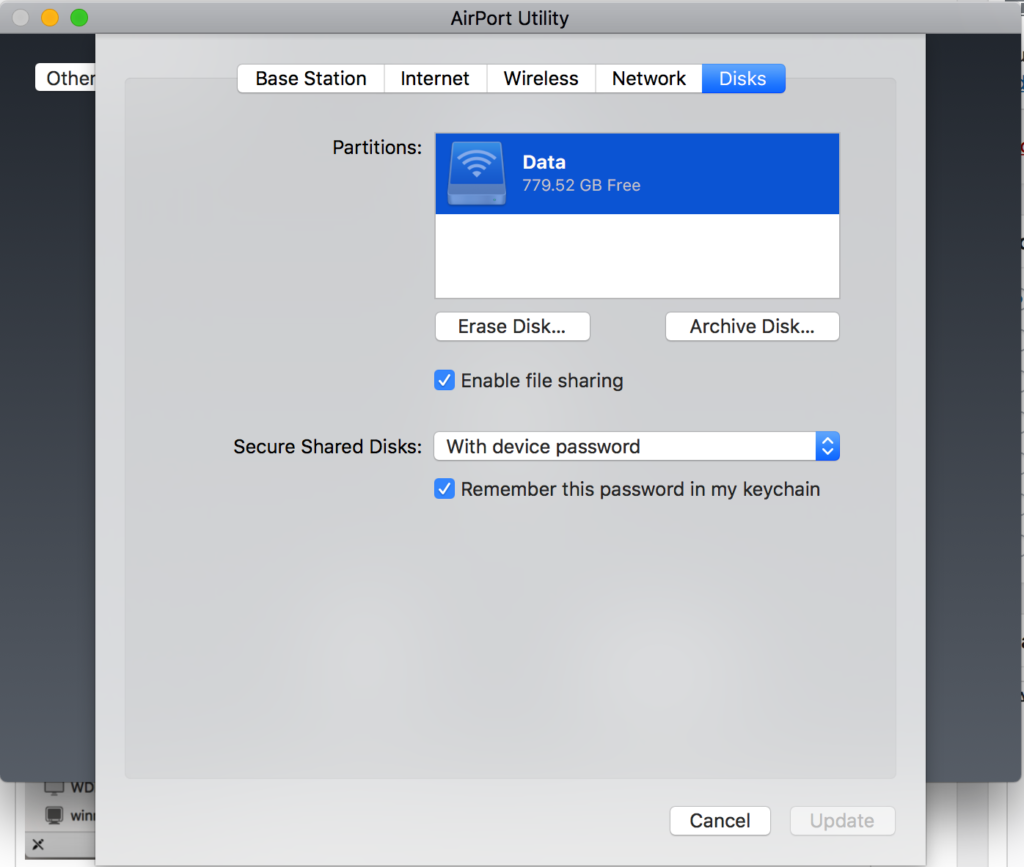
If all else fails you may need to completely erase the time capsule drive.  This will of course delete the backups from all the machines using it and require you to reconfigure the backup for those machines.  Start by opening Airport Utility and selecting the Time Capsule.

Click Edit and select the Disks tab.

Press Erase and confirm you want to erase the disk.  Now take that coffee break as the disk is being erased.  You can close Airport utility and the Time Capsule will finish on it’s own but will still take some time.

Pruning old backups from your Time Machine Drive

If you want to delete olde backup files from your Time machine drive, take a look at this article.  The first portion tells how to do it with the time machine interface.  The second part might not be advised since it requires using terminal commands.