360° Photography

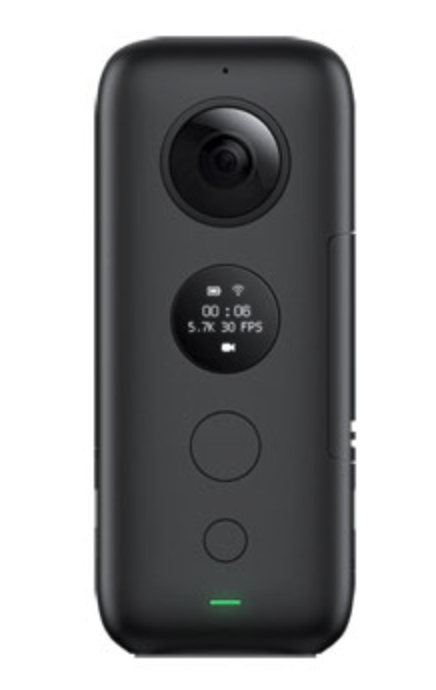
One of the new photo types available with some cameras is 360° photography. The photograph below is a 360° photo taken with a Insta360 One X camera. Photos like this give you the ability to have a perspective of the scene from any direction regardless of the way you were pointing. The camera itself has two lenses each with a 180° field of view. Each lens takes a photo and the two photos are stitched together. As part of the stitching process the software removes the camera from the photo. It’s actually quite interesting to see the results.

Click on the image below and move your mouse around to see the full scene.

iPhone X: Return to the first home screen

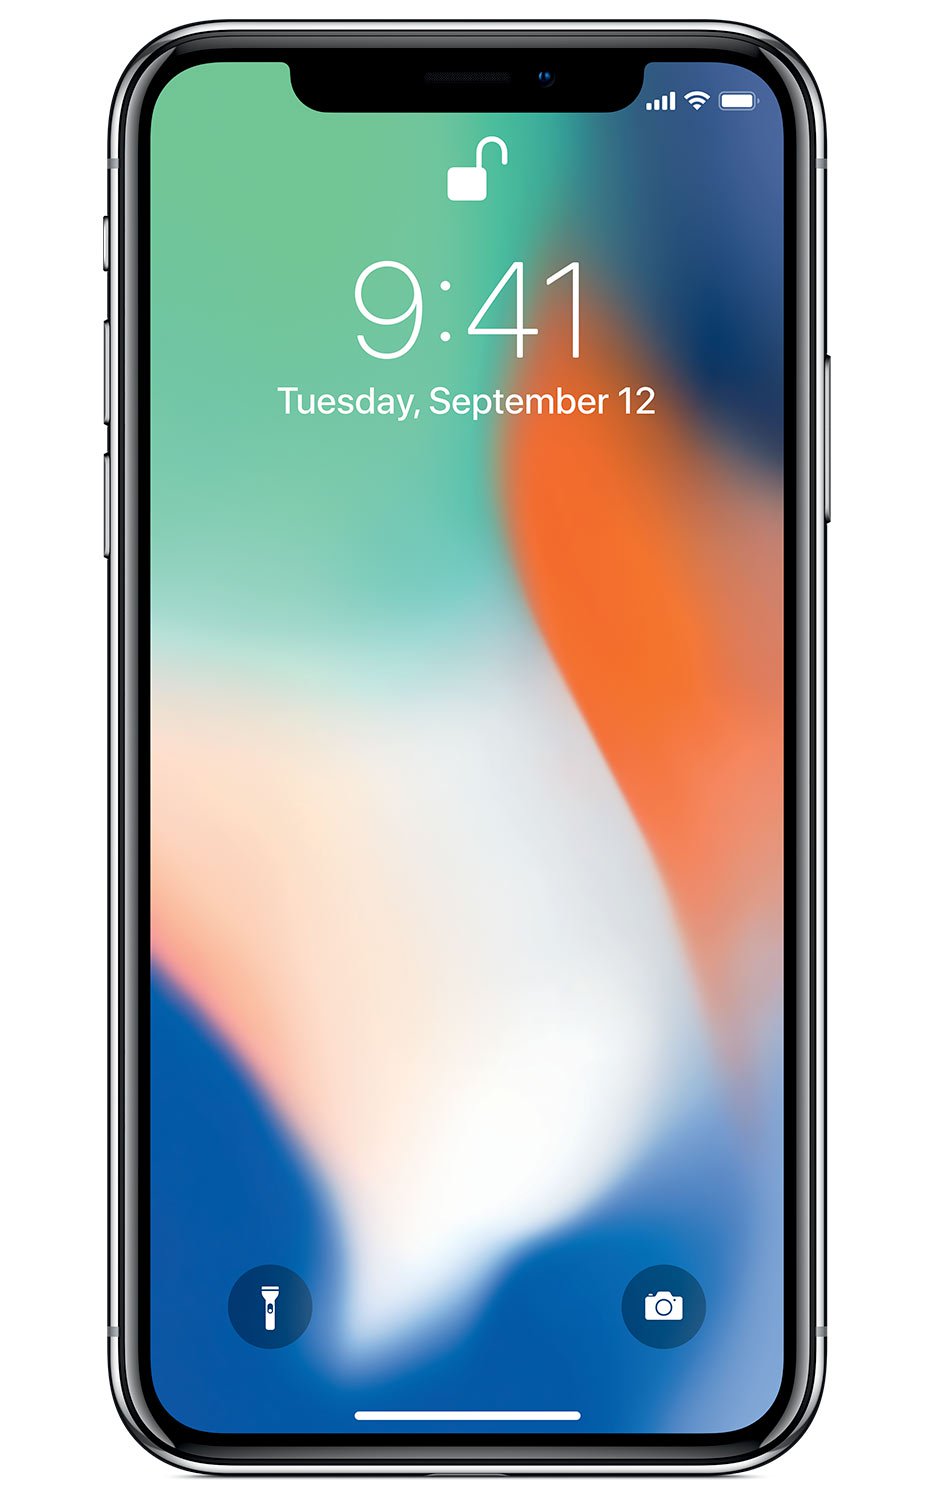
Many of us have been using iPhones for a long time. We all know if you’re on a home screen that is not the first page you can simply double tap the home button to return to the first page of your home screens. Unfortunately, without a home button, the iPhone X doesn’t work that way.

I I have always wondered if Apple provided a shortcut on the iPhone X to do that and so I looked it up. It’s amazing I haven’t run across this simple trick before.

On the iPhone X To move from any application back to the home screen all you have to do is quickly swipe up from the bottom of the screen. But if you’re already on one of your home screens, and you again swipe up from the bottom of the screen quickly, it takes you right back to that first page of your home screen just like double tapping the button did in the past.

I probably should’ve looked at trick up sooner.

How to Identify legitimate emails from the App Store or iTunes Store

If you’re not sure whether an email about an App Store, iTunes Store, iBooks Store, or Apple Music purchase is legitimate, take a look at this new support document from Apple. It covers many of the common spam phishing attempts that are so prevalent today.

Cleaning up Your Time Capsule Backup

Erasing a Single Computer from a Time Capsule Drive

Many people use the same hard disk to backup multiple Macs.  This is great particularly when the disk is network attached such as a time capsule.  But over time as you replace machines, sometimes your old backup gets left behind and your drive fills up.  It is easy to remove old machines from the time capsule backup done with time machine.

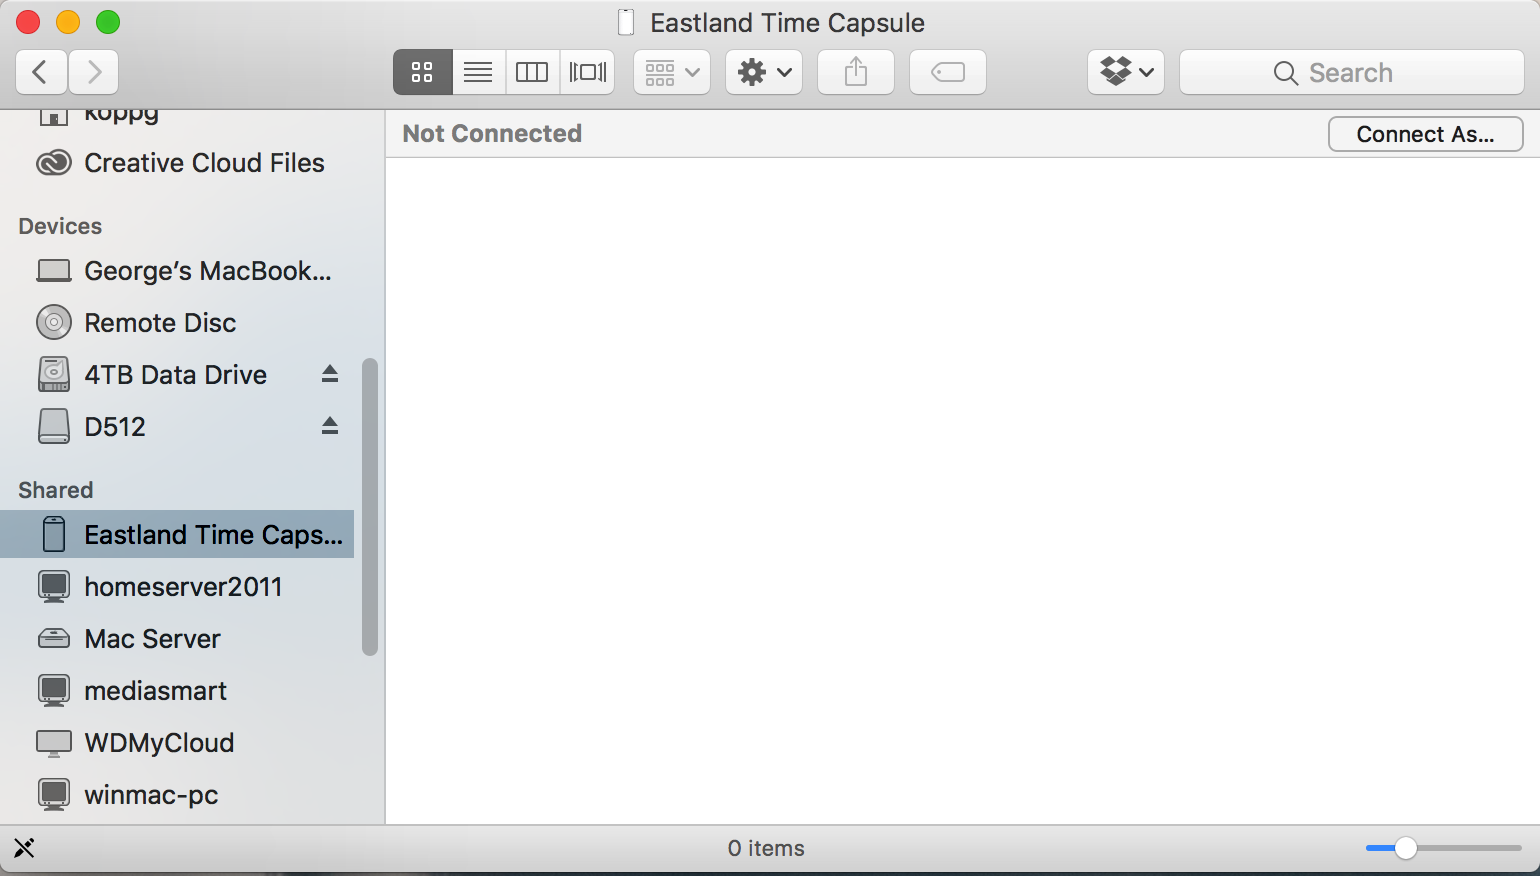
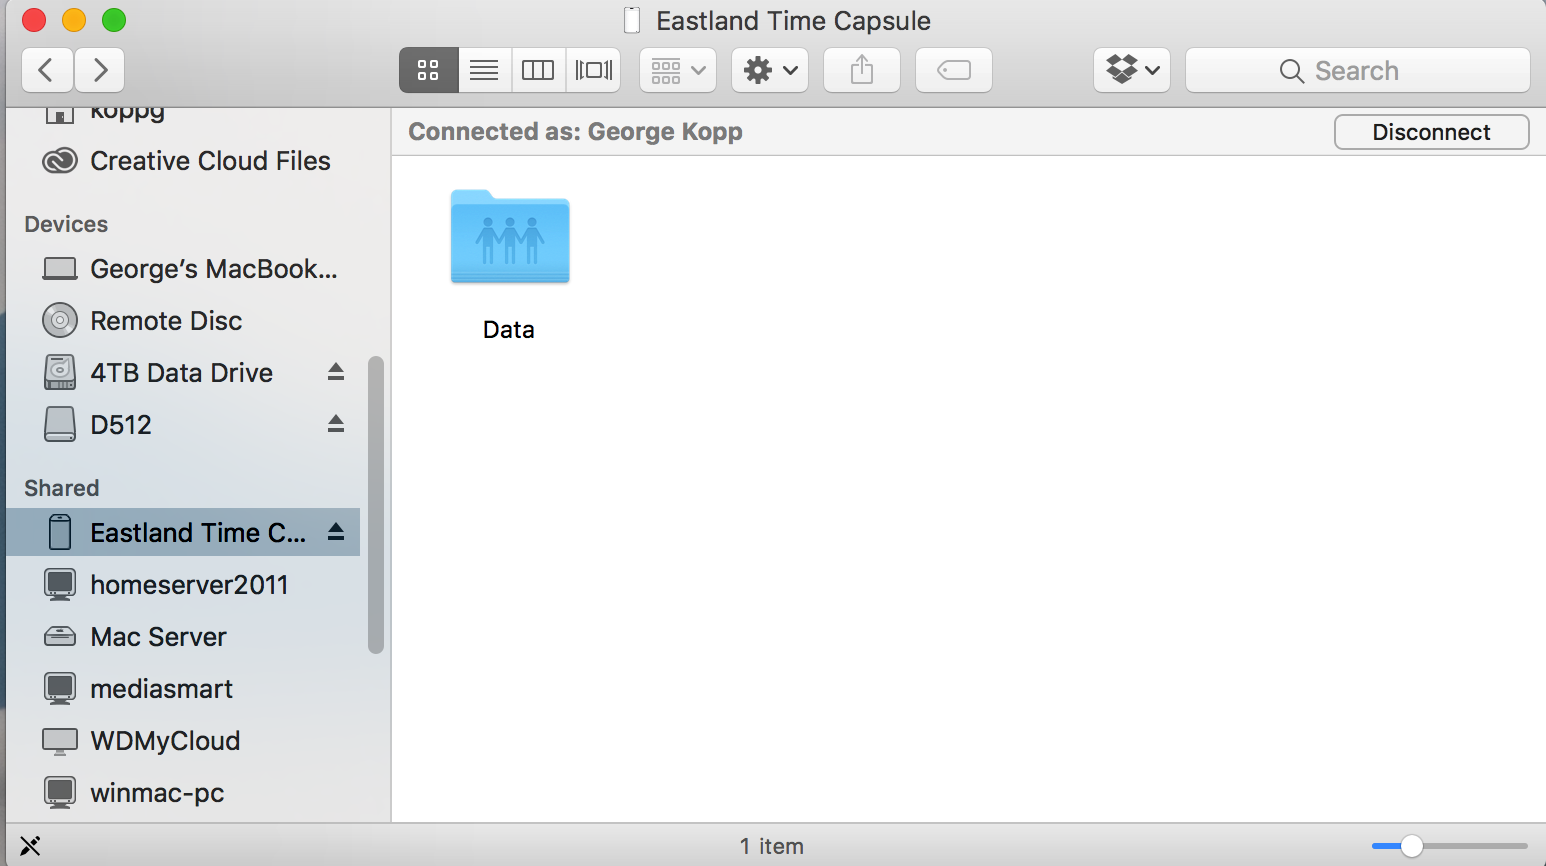
First you need to mount the drive from your time capsule to your computer.  In the finder sidebar, scroll down to Shared Devices and select the time capsule.

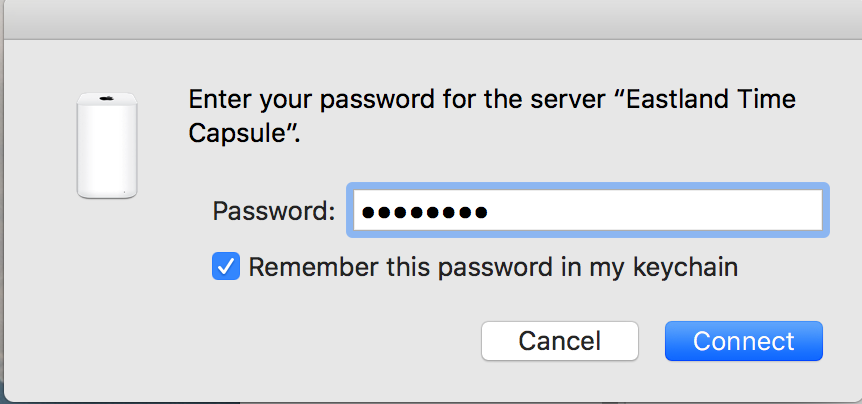
If you have never connected this way to the time capsule, it may ask for a password.

Once connected you should see the Time capsule drive.

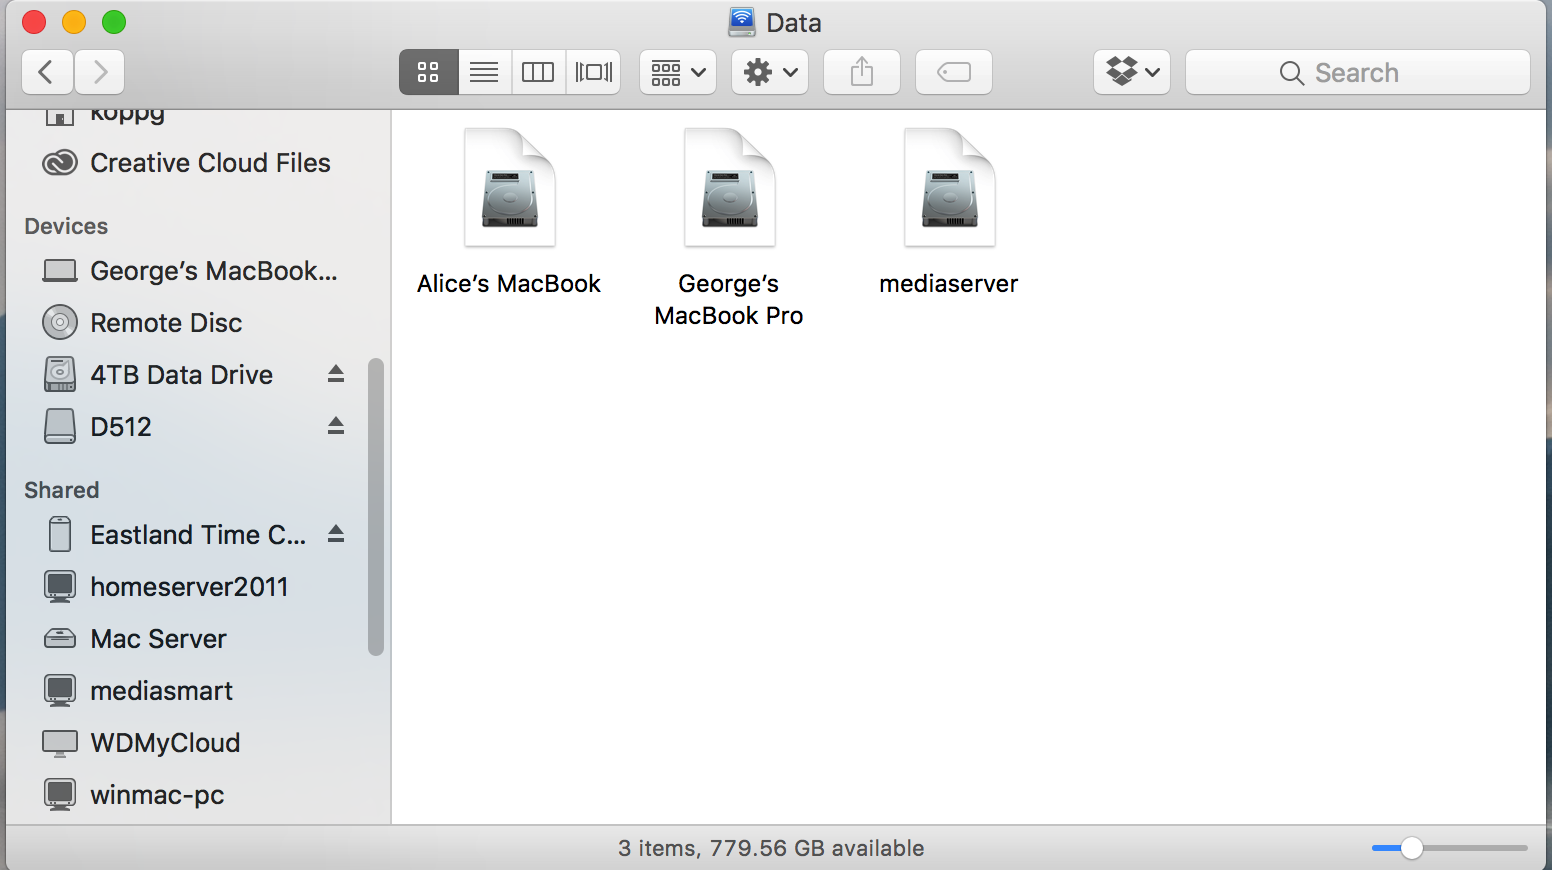
Open the folder you see and you will see individual machine icons listed as drive container (Disk) icons.

Now, you can drag any of these containers to the trash and empty the trash.  This might be a good time to go get a cup of coffee because it often takes quite a while to delete.

You may need to unplug the time capsule and plug it back in to get it to recognize the additional space has been cleaned up,

Erasing the entire Time Capsule Drive

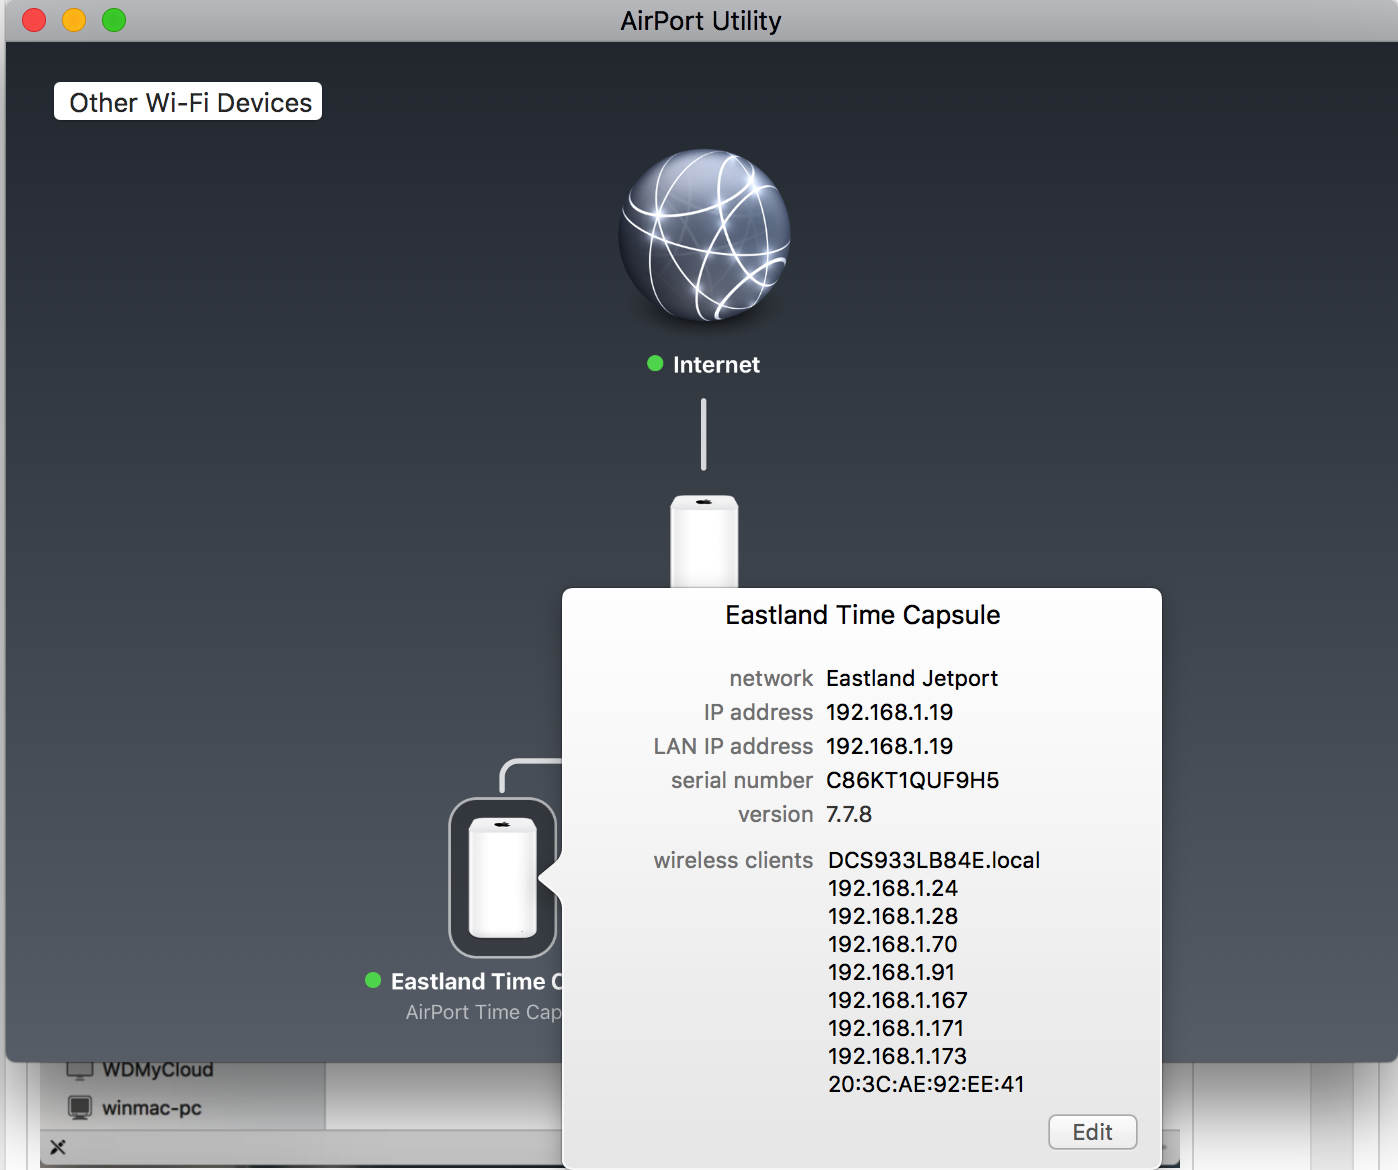
If all else fails you may need to completely erase the time capsule drive.  This will of course delete the backups from all the machines using it and require you to reconfigure the backup for those machines.  Start by opening Airport Utility and selecting the Time Capsule.

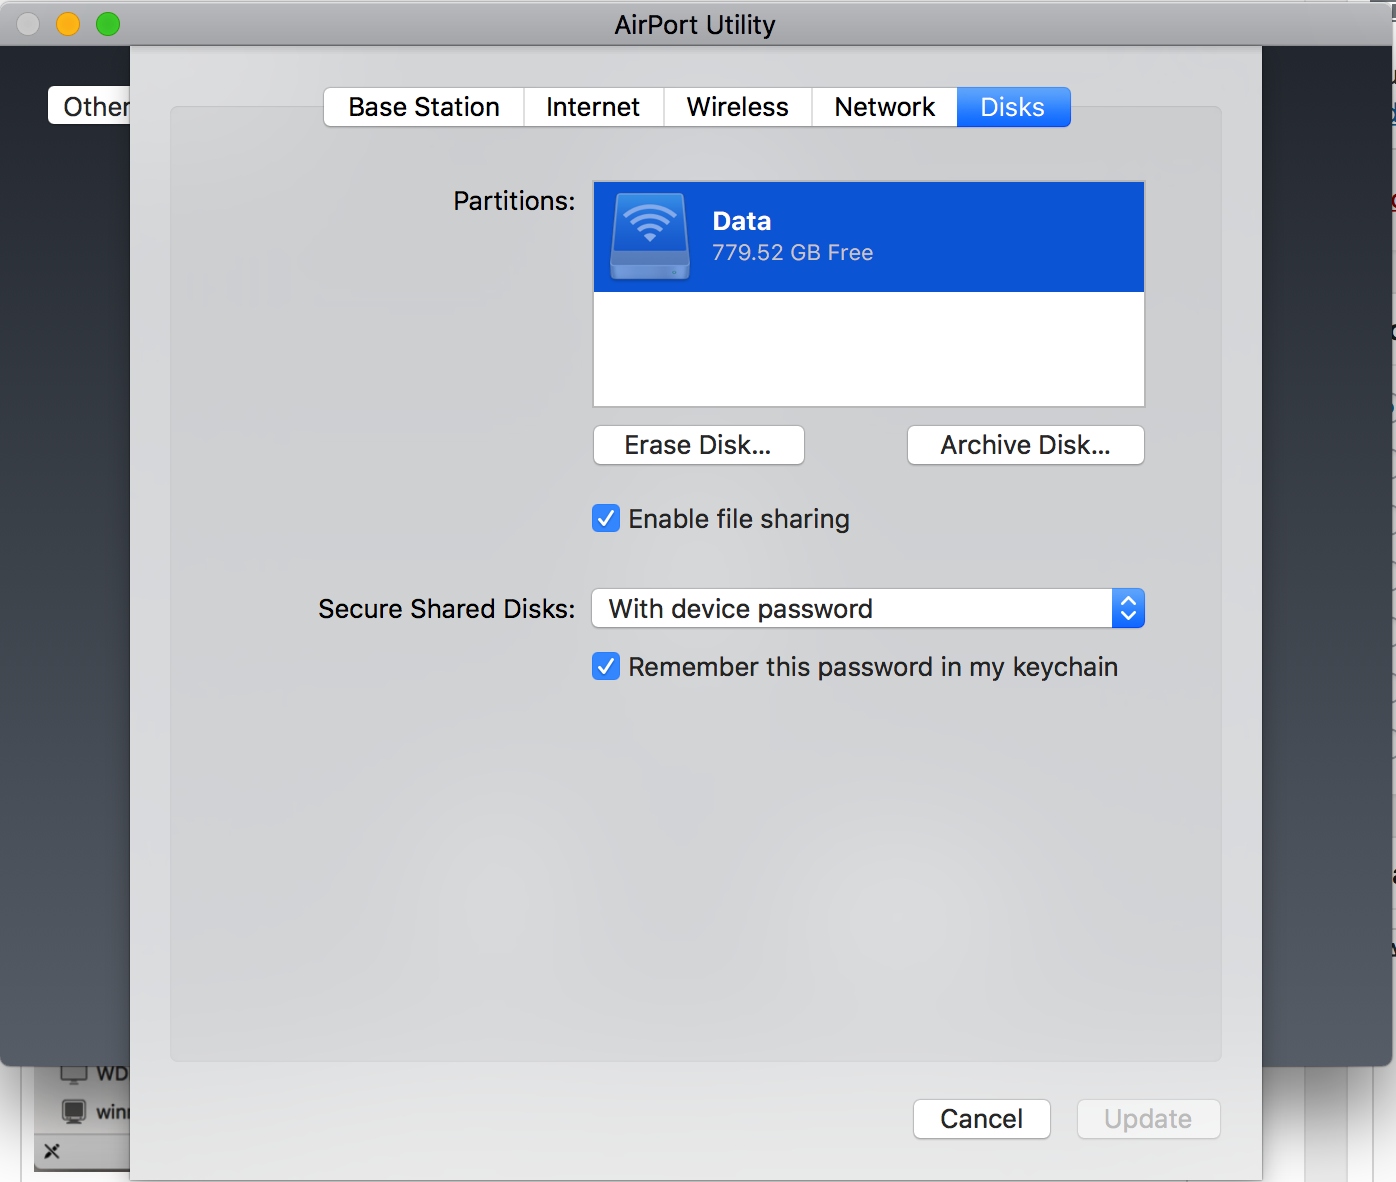
Click Edit and select the Disks tab.

Press Erase and confirm you want to erase the disk.  Now take that coffee break as the disk is being erased.  You can close Airport utility and the Time Capsule will finish on it’s own but will still take some time.

Pruning old backups from your Time Machine Drive

If you want to delete olde backup files from your Time machine drive, take a look at this article.  The first portion tells how to do it with the time machine interface.  The second part might not be advised since it requires using terminal commands.

A USB-C Docking Solution for your Macbook and 13” Macbook Pro

When Apple announced the 2015 Macbook with a single USB-C port, Many potential users were put off by the fact that if you plug the machine again to charge it, you had no other connections that you could use on that MacBook.  This made a machine problematic for many things including plugging in an external hard drive for backup.  Fortunately the battery life of the new MacBook was quite good so that you didn’t need to charge very often but it was difficult to imagine not having the need to plug something in, anything in, while you’re charging the machine.

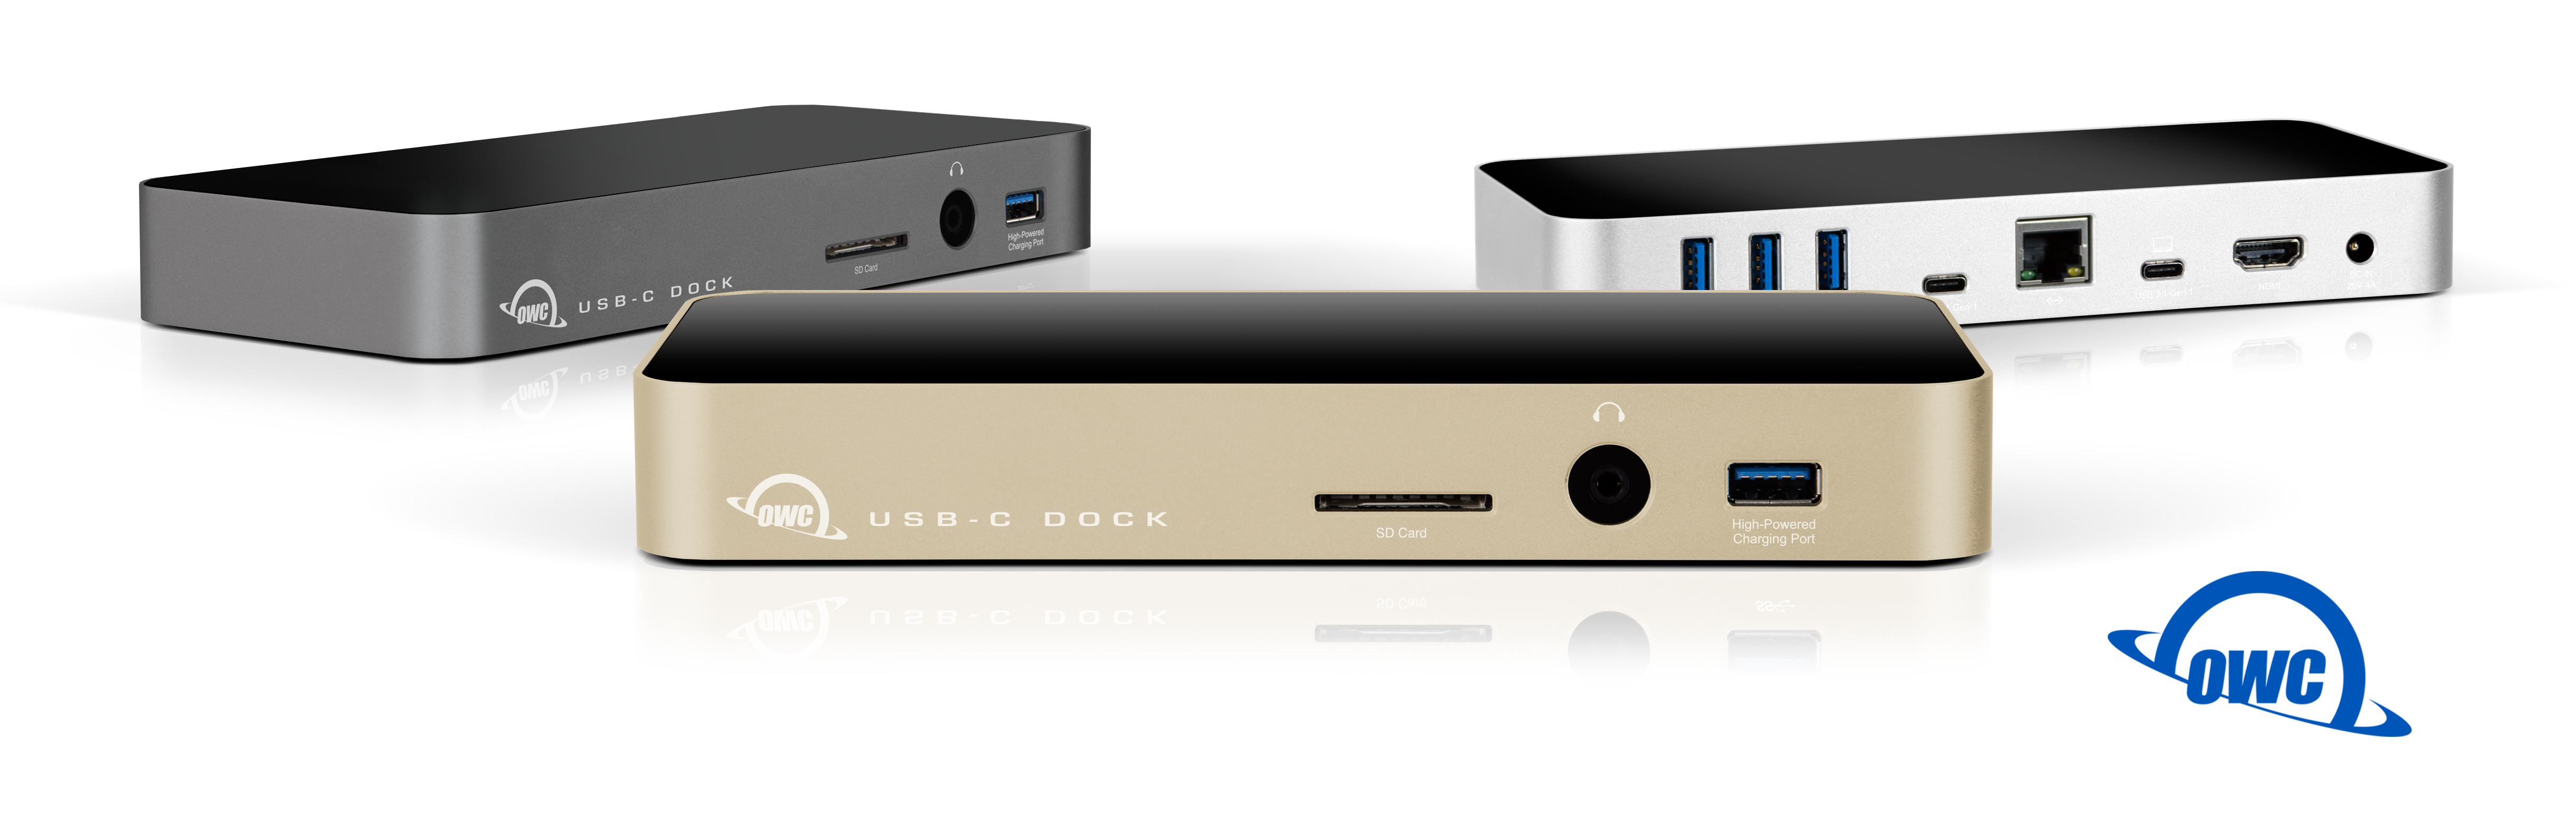
A number of new port extension devices were immediately announced to add additional ports back that Apple removed. One of the first that actually saw the light of day, was from Other World Computing, OWC. OWC’s USB-C Doc was announced right after the new MacBook but didn’t ship for a number of months. When it did ship, users of the new MacBook finally had a port extension device that would allow them to make full use of their new computers.

While it was introduced shortly after the 2015 Macbook, the OWC USB-C Dock is compatible with both the 2015 and 2016 Apple MacBook and 13″ 2016 MacBook Pro  models.  The 2016 15” MacBook Pro is not compatible as per the MacSales website.  I suspect this is due to the higher charging wattage required for the larger screen device.  With a 80w power supply, the dock does not have enough power to charge apples new 15” flagship model.

When paired with one of the compatible machines, the dock adds a plethora of ports for the user to make use of.  These ports include:

  • 5x USB 3.1 Gen 1 ports (including 1x USB Type-C)
  • High-speed Gigabit Ethernet
  • Front-facing SD card reader
  • HDMI with 4K display support
  • Combo audio in/out port
  • 80W of power to charge your computer and devices

The dock is available in all 3 of the colors that the Macbook is available including Silver, Space Gray, Gold, and Rose Gold for a perfect match with your new laptop.  If you have a 13” Macbook Pro, the Silver and Space Gray colors match your unit too.

Ascetics of the Dock
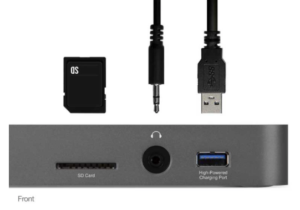
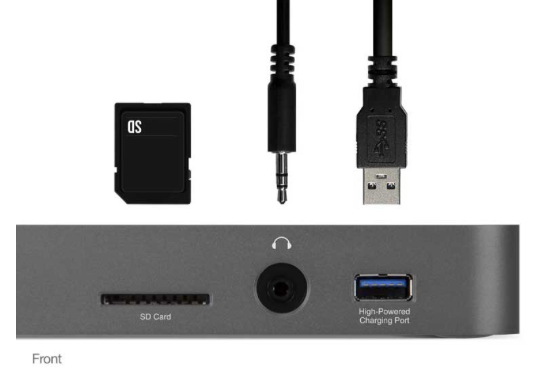
The dock is made of plastic and metal and weighs enough to keep the unit firmly placed on your desk.  A blue LED light shows from the bottom of the device indicating it is powered up and ready.  A green LED is also on the bottom that shows data connection with the laptop has been made.  The front of the doc has the SD card reader, audio port and a USB 3.1 port that remains powered even when the laptop is disconnected.  This port is high power enough to charge an iPhone or iPad.

The back of the dock contains the majority of the ports including the port to connect it to your laptop.  It is important to note that of the 2 USB-C ports on the back, the one with the small computer above it is the port that must be used with the included cable to connect to the computer. The other USB-C port is an active port for plugging in other USB-C devices.
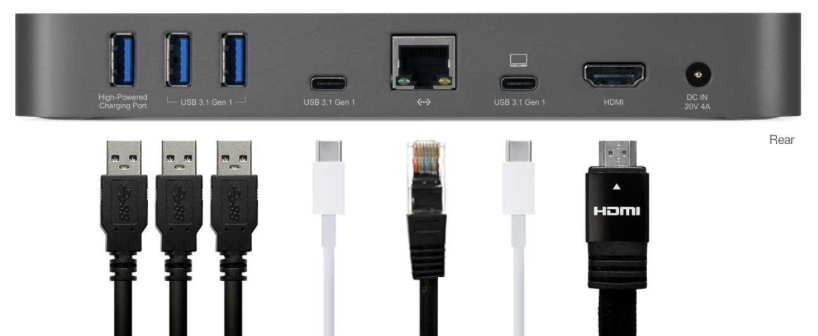
Also on the back of the dock are 3 USB 3.1 ports, with the left most port also being of the higher power type, an 10/100/1000 Ethernet port, a HDMI port capable of driving a 4K display, and a place for the included power adapter to be connected. One item of note is that the use of the Ethernet port required the installation of a driver from OWC that was available on their website but with the release of MacOS Sierra, the driver is no longer necessary.

How Well Does it Work?

In my experience in using the dock with a 2015 Macbook, the dock worked flawlessly.  All of the ports connected fine to the laptop and worked with expected speed.  In fact, I was encouraged by the fact that USB-C seems speedy enough to handle multiple streams of data being copied to devices.  While this was likely not something necessary in the real world where for the most part a single device at a time will be used, it is good to see that for me it worked very well. I did find that if I did not eject some older drives from the Mac before allowing the Mac to sleep, they sometimes did not come back without unplugging them and plugging them back in.  For my use, my laptop is set not to sleep while the power adapter is connected so I do not feel this is a major issue.

From talking with other owners of the dock there may be a problem with some older USB devices plugged into the dock not being recognized.  This may be related to the sleep issue I experienced.  I was unable to reproduce that problem when I did not allow the Macbook to sleep.

I was quite happy with the fact that the dock remained sturdy on my desk and did not move around when the cables were tugged slightly.  Some competing units that are much lighter exhibit this problem.

Even a bonus…

I also used a USB-C to USB 3.1 cable to connect the dock to my 2013 Macbook Pro.  To my suprize I was able to confirm that the USB ports, card reader, audio port, and Ethernet port  worked fine.  I did have some difficulty getting a TV connected by HDMI to connect but for a completely unsupported use of the device, it was very impressive.

Conclusions

OWC has a winner in their USB-C dock for users of Apples smaller laptops.  It works easily and performs very well.  For a Macbook user with only one USB-C port, or a 2016 13” Macbook Pro without touchbar with only 2 Thunderbolt 3 ports, this device adds the expansion that Apple believes users no longer need.  The only recommendations I have are that the USB-C cable proved short for many applications.  In long term use a longer USB-C cable will likely be necessary unless you ar going to position the dock right behind on next to your laptop

OWC provides a 2 year warranty with the dock.

iOS 10 will be a great upgrade for iPhone and iPad users


I have been playing around with the iOS 10 beta on one of my iPads now for a couple of months. As this update has gotten closer to being completed I continue to be pleasantly surprised with both the quality of the software in beta and also the deep feature set of the update. There has been a lot in the press about the new features in iOS 10 and I can say I have tried most of them. The additions Apple is made in this release, while seemingly not major, certainly enhance the ability of all iOS devices.

I installed the beta in the first place to try out apples new home app. Home is an application that allows you to control HomeKit devices from a single common place. The app lets you control lights, thermostats, and all other existing HomeKit devices. I was pleasantly surprised how well it worked after about the second beta.

There are many other nice additions including a major overhaul of messages. Just this morning I saw one of the nice new tricks messages brings to the table. Quite often I text a link to a product one of my clients has asked me to look for for them. It’s really no big deal as they typically click the link and have it open in Safari to see the product on the products website. This morning, I texted a link to a product on Amazon and rather than sending the actual link, messages converted it to show an image of the product, a short description, and a link. While not earth shaking, it is pretty cool.

With the new iPhone release schedule for September, iOS 10 is right around the corner. Apples new process of going through public beta will certainly provide a better product on day one. I’m excited about getting these changes on all my iOS devices, including my phone.

iOS: Updating your carrier settings


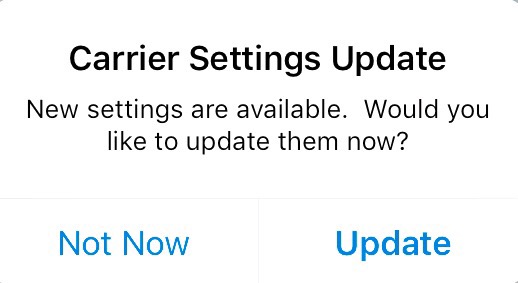
Carrier settings updates are small files that can include updates from Apple and your carrier to carrier-related settings, such as network, calling, cellular data, messaging, personal hotspot, and voicemail settings. You may receive notifications from time to time to install new carrier-settings updates.
If you see the prompt for this update go ahead and accept it. If you do select not now, you can follow these instructions to update your carrier settings:

Make sure your device is connected to the Internet.

Tap Settings > General > About. If an update is available, a prompt will appear.

Note: Occasionally a carrier may release a mandatory update. This type of update will display only an OK button instead of an Update button, to let you know that the update was downloaded and installed.

If you need to know the version of the carrier settings your device has, tap Settings > General > About and look next to “Carrier”.

OS X El Capitan: Changes in the Spaces Functionality

Spaces has changed a bit in El Capitan.  Apple has a great help article that covers how it works in the new operating system version.  Here is what Apple has to say:

If your desktop becomes cluttered with open app windows, you can create additional desktops, called spaces, to organize the windows. When you work in a space, you see only the windows that are in that space.

You use Mission Control to show the Spaces bar, where thumbnails represent your spaces and apps you’re using in full screen or Split View.

The Spaces bar showing a desktop space, apps in full screen and Split View, and the Add button to create a space
Tip:   Make your spaces unique by assigning a different desktop picture to each one. Just assign System Preferences to all desktops (see the instructions below), then change the desktop picture in each space.

Create a space

  1. Enter Mission Control, then click the Add button  in the Spaces bar.

    You can create up to 16 spaces.

  2. When you’re done, click a space in the Spaces bar or a window in Mission Control.

Move between spaces

Do any of the following:

Swipe left or right with three fingers.

Press the Control key and the Right or Left arrow key.

Enter Mission Control, move the pointer to the top edge of the screen to show the Spaces bar, then click a space.

Move an app window from one space to another

Do any of the following:

Drag the window to the edge of the screen. After a moment, the window moves to the next space.

Place the pointer over the window’s title bar. Hold down the trackpad or mouse button, then press the Control key and the Right or Left arrow key.

From the space that has the window you want to move, enter Mission Control. Then drag the window up to the space you want to use.

If you drag the window onto an app in full screen, you can use the apps in Split View.

Assign apps to spaces

If you assign an app (or System Preferences) to a specific space, the app will always open in that space.

  1. Press and hold an app’s icon in the Dock.

    You may have to first open the app from Launchpad to see its icon in the Dock.

  2. From the shortcut menu that appears, choose Options, then one of the following:

    • All Desktops: The app opens in every space.

    • This Desktop: The app opens only in the current space. If you use the app full screen, it appears in its own space.

    • Desktop on Display [number]: The app opens in the current space on a specific display (if more than one display is available).

    • None: The app opens in whichever space you’re using at the time.

By default, when you switch to an app, the desktop automatically switches to a space that has open windows for the app. For example, if you create a new TextEdit document in Desktop 3, but TextEdit windows are already open in Desktop 2, your new document opens in Desktop 2. To change this setting, choose Apple menu > System Preferences, then click Mission Control.

Delete a space

  1. Enter Mission Control, then move the pointer to the top edge of the screen to show the Spaces bar.

  2. Place the pointer over the space you want to delete, then click the delete button that appears.

    If the space contains open windows, they are moved to another space.

You can quickly stop using an app in full screen or Split View by moving the pointer over the thumbnail in the Space bar, then clicking the exit button that appears.

Mac: Starting apps using Spotlight

SpotlightThere are many applications on a Macintosh that I only use once and a while. Rather than find the applications folder and look for that applications icon, I use a better way that allows me to go directly to where I want to go.

If there’s an app I need to use that’s not in my Dock, I start it by hitting Command + Space bar to open the Spotlight search box, then I begin typing its name. After just a few characters Spotlight has usually realised which app it is, and I just hit Return to start that app. Simple, and quick. No mouse required!

In the next release of the operating system, Yosemite, Apple will make this even more prevalent. When you hit this command key combination, the spotlight dialog will pop up in the middle of the screen so it will be easier to see.

How do you know so many answers to tech questions?

Screen Shot 2014-03-06 at 4.14.17 PMMany people ask me how I know so many answers to tech questions.  Part of what I know is how to perform a good Google search.  Here are some tips from the Google Support site on how to do a good Google search.

Tip 1: Keep it simple

No matter what you’re looking for, try to start with a simple search like [where’s the closest airport?]. You can always add a few descriptive words if necessary.

If you’re looking for a place or product in a specific location, add the location. For example, [bakery seattle].

 Tip 2: Search using your voice

Tired of typing? Click the microphone icon in Chrome’s search box to search by voice.

Tip 3: Use web friendly words

Use words that are most likely to appear on websites. For example, instead of saying [my head hurts], say [headache], because that’s the word a medical site would use.

 Tip 4: Don’t worry about the little things

Spelling. Google’s spell checker automatically uses the most common spelling of a given word, whether or not you spell it correctly.

Capitalization. A search for [New York Times] is the same as a search for [new york times].

Punctuation. Most punctuation, like ?!,.%^*()[]\, is ignored when you search.

Tip 5: Find quick answers

For many searches, Google will do the work for you and show an answer to your question on the search results. Some features, like information about sports teams, aren’t available in all regions.

Weather. Search [weather] to see the weather in your location or add a city name after Weatherweather to find weather for a certain place.

Dictionary. Put [define] in front of any word to see its definition.

Calculations. Enter a math equation like [3*9123], or solve complex graphing equations.

Unit conversions. Enter any conversion, like [3 dollars in euros].

Sports. Search for the name of your team to see a schedule, game scores and more.

Quick facts. Search for the name of a celebrity, location, movie, or song to find important information.