Thank you Apple for saving me $400

I watched with great interest Apple’s latest announcements on new iPhones. In the work I do I feel like I need to stay fairly current with new phone technology so I typically plan on replacing my phone every couple of years. It also helps that I have a daughter who still loves to have my leftovers and I’m always happy to help her out.

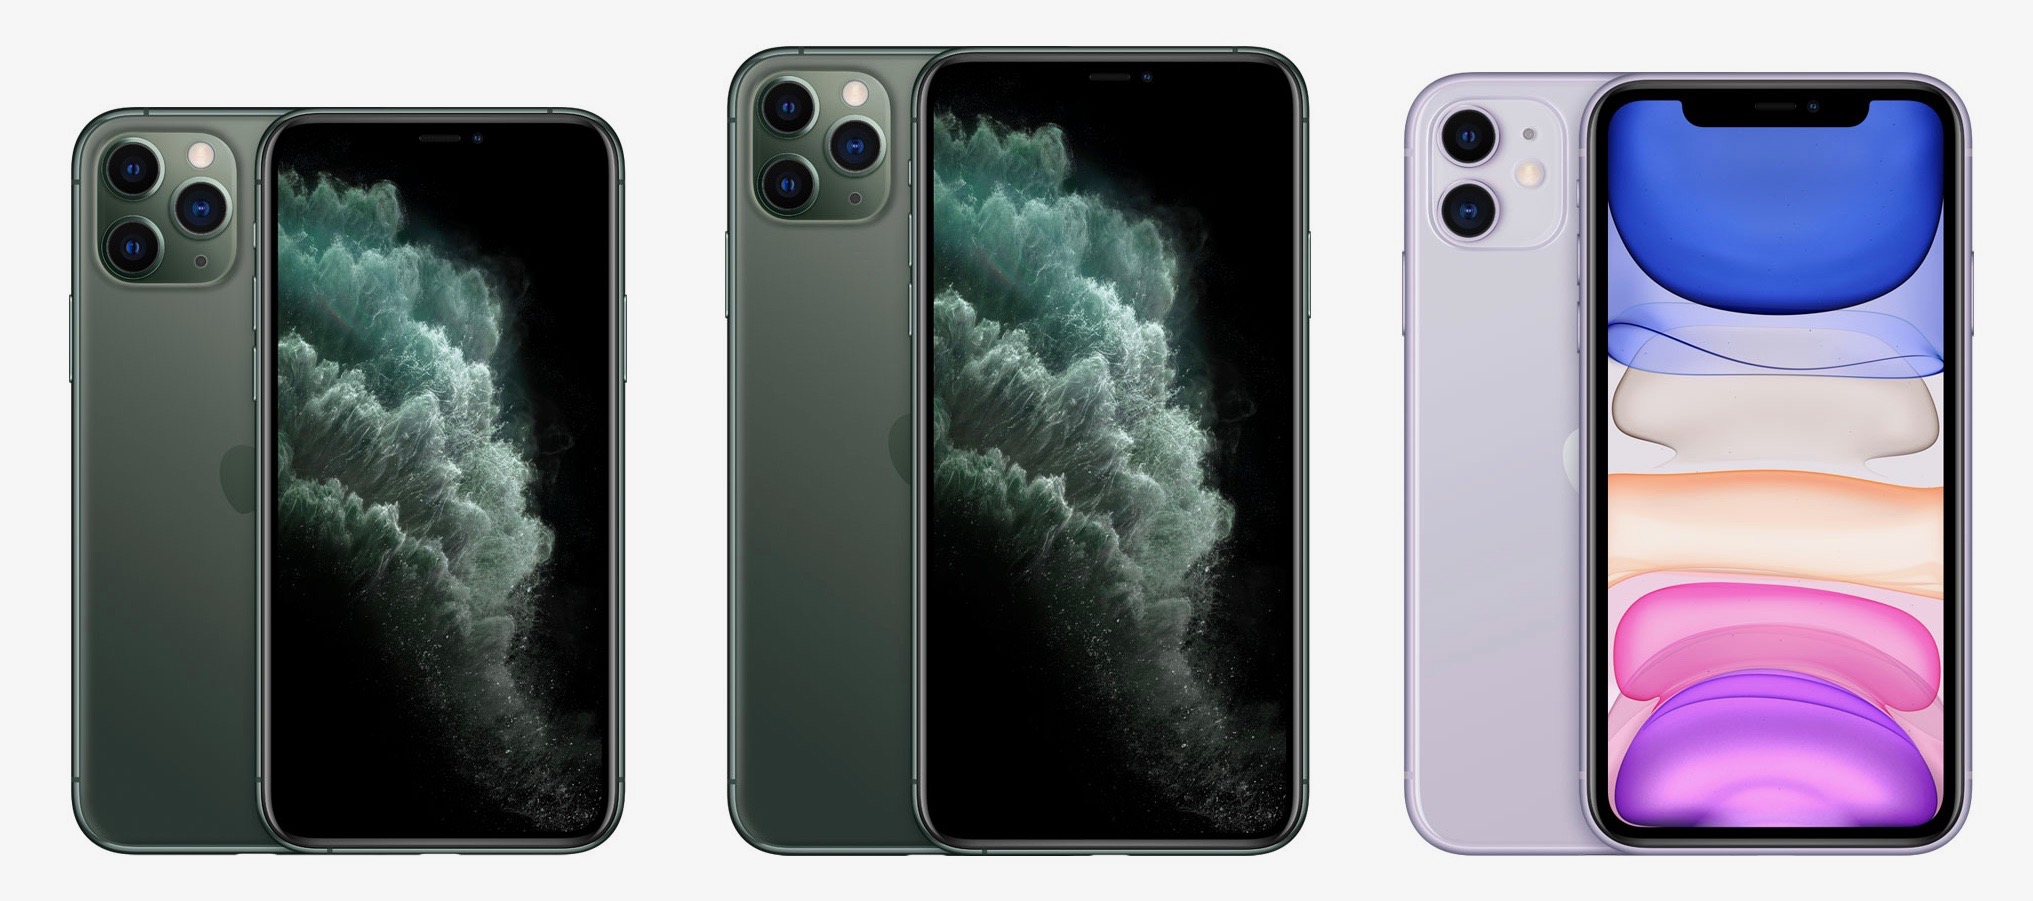
Apples this year announced three new phones. The iPhone 11, the iPhone 11 Pro, and the iPhone 11 Pro max. I am typically one that doesn’t like to carry a really large phone so I typically am not interested in the max version of the phone. Just a few years ago Apple would reduce the technology level in the non-Max version of their phone and that was really in my opinion a poor idea. I’m glad they’ve gotten over that and made both of the pro phones pretty much exactly the same with the exception of the screen size and battery.

Beginning last year, Apple inserted a new phone in the lineup just below the two top-of-the-line phones for people who are a little more cost conscious. Last year‘s phone, the iPhone XR, was a terrific phone that I had the opportunity to set up and make adjustments to over the last year while working with a number of different people. But generally, I have been one that wanted the highest end, top-of-the-line device. Until this year…

If you look at the announcements closely, it’s pretty easy to see Apple inserted a lot of filler material in between the true new features of the devices they were set to announce. This showed both in the phones and in the Apple Watch 5 announcement.  The long discussion of the processor describing the architecture of the cores struck me as filler particularly considering the fact that this type of announcement and presentation is truly intended for the masses who don’t care or know what a processor core is. The filler material at the end talking about the Apple Store also had me wondering if they just had a few extra minutes to kill.

In the end, after further analyzing the new announcements this year it seems to me that was exactly the case. Either some of the flagship features of the new phone design did not make the final cut or perhaps they did not work to Apple’s high standards.  If you look at the new phones, and you make the general assumption that there’s going to be a new faster processor every year, the additions in this year‘s phones seem to be a little thin.

So what’s new in the new iPhone 11 Pro? As I look at the announcement, you can basically say there are three major things but the Pro brings to the table. First off the processor is faster, significantly faster if you believe the pre-delivery reports. That additional performance will definitely allow for better Augmented Reality performance and less general phone lag. The second major thing was of course the camera pack. The addition of a wide angle lens to the standard and telephoto lens the previous version had. This three camera configuration is certainly state of the art and will definitely add the ability for people to take better photographs and more creative photographs. Couple that with the software magic apple can perform and it’s clear the point and shoot stand alone camera is definitely dead.  The third thing that could be considered major is battery life. If your phone is going dead in a normal workday, this phone may be the one for you. Four or five hours better battery life is a big deal and this phone can provide it. There are a number of other minor additional features such as support for new Wi-Fi speed, the addition of Dolby Atmos, and Apples new U1 chip (which they didn’t really talk about use cases) but by and large, that’s pretty much what you see in the new pro phones. And just as a note, those minor features are in the iPhone 11 also.  The case design is basically the same although they may have improved the materials to make the phone a little more impervious to breakage and I have to admit that Jade Green color looks stunning.  But again those are pretty minor things to the average user and not really compelling for the high end user.

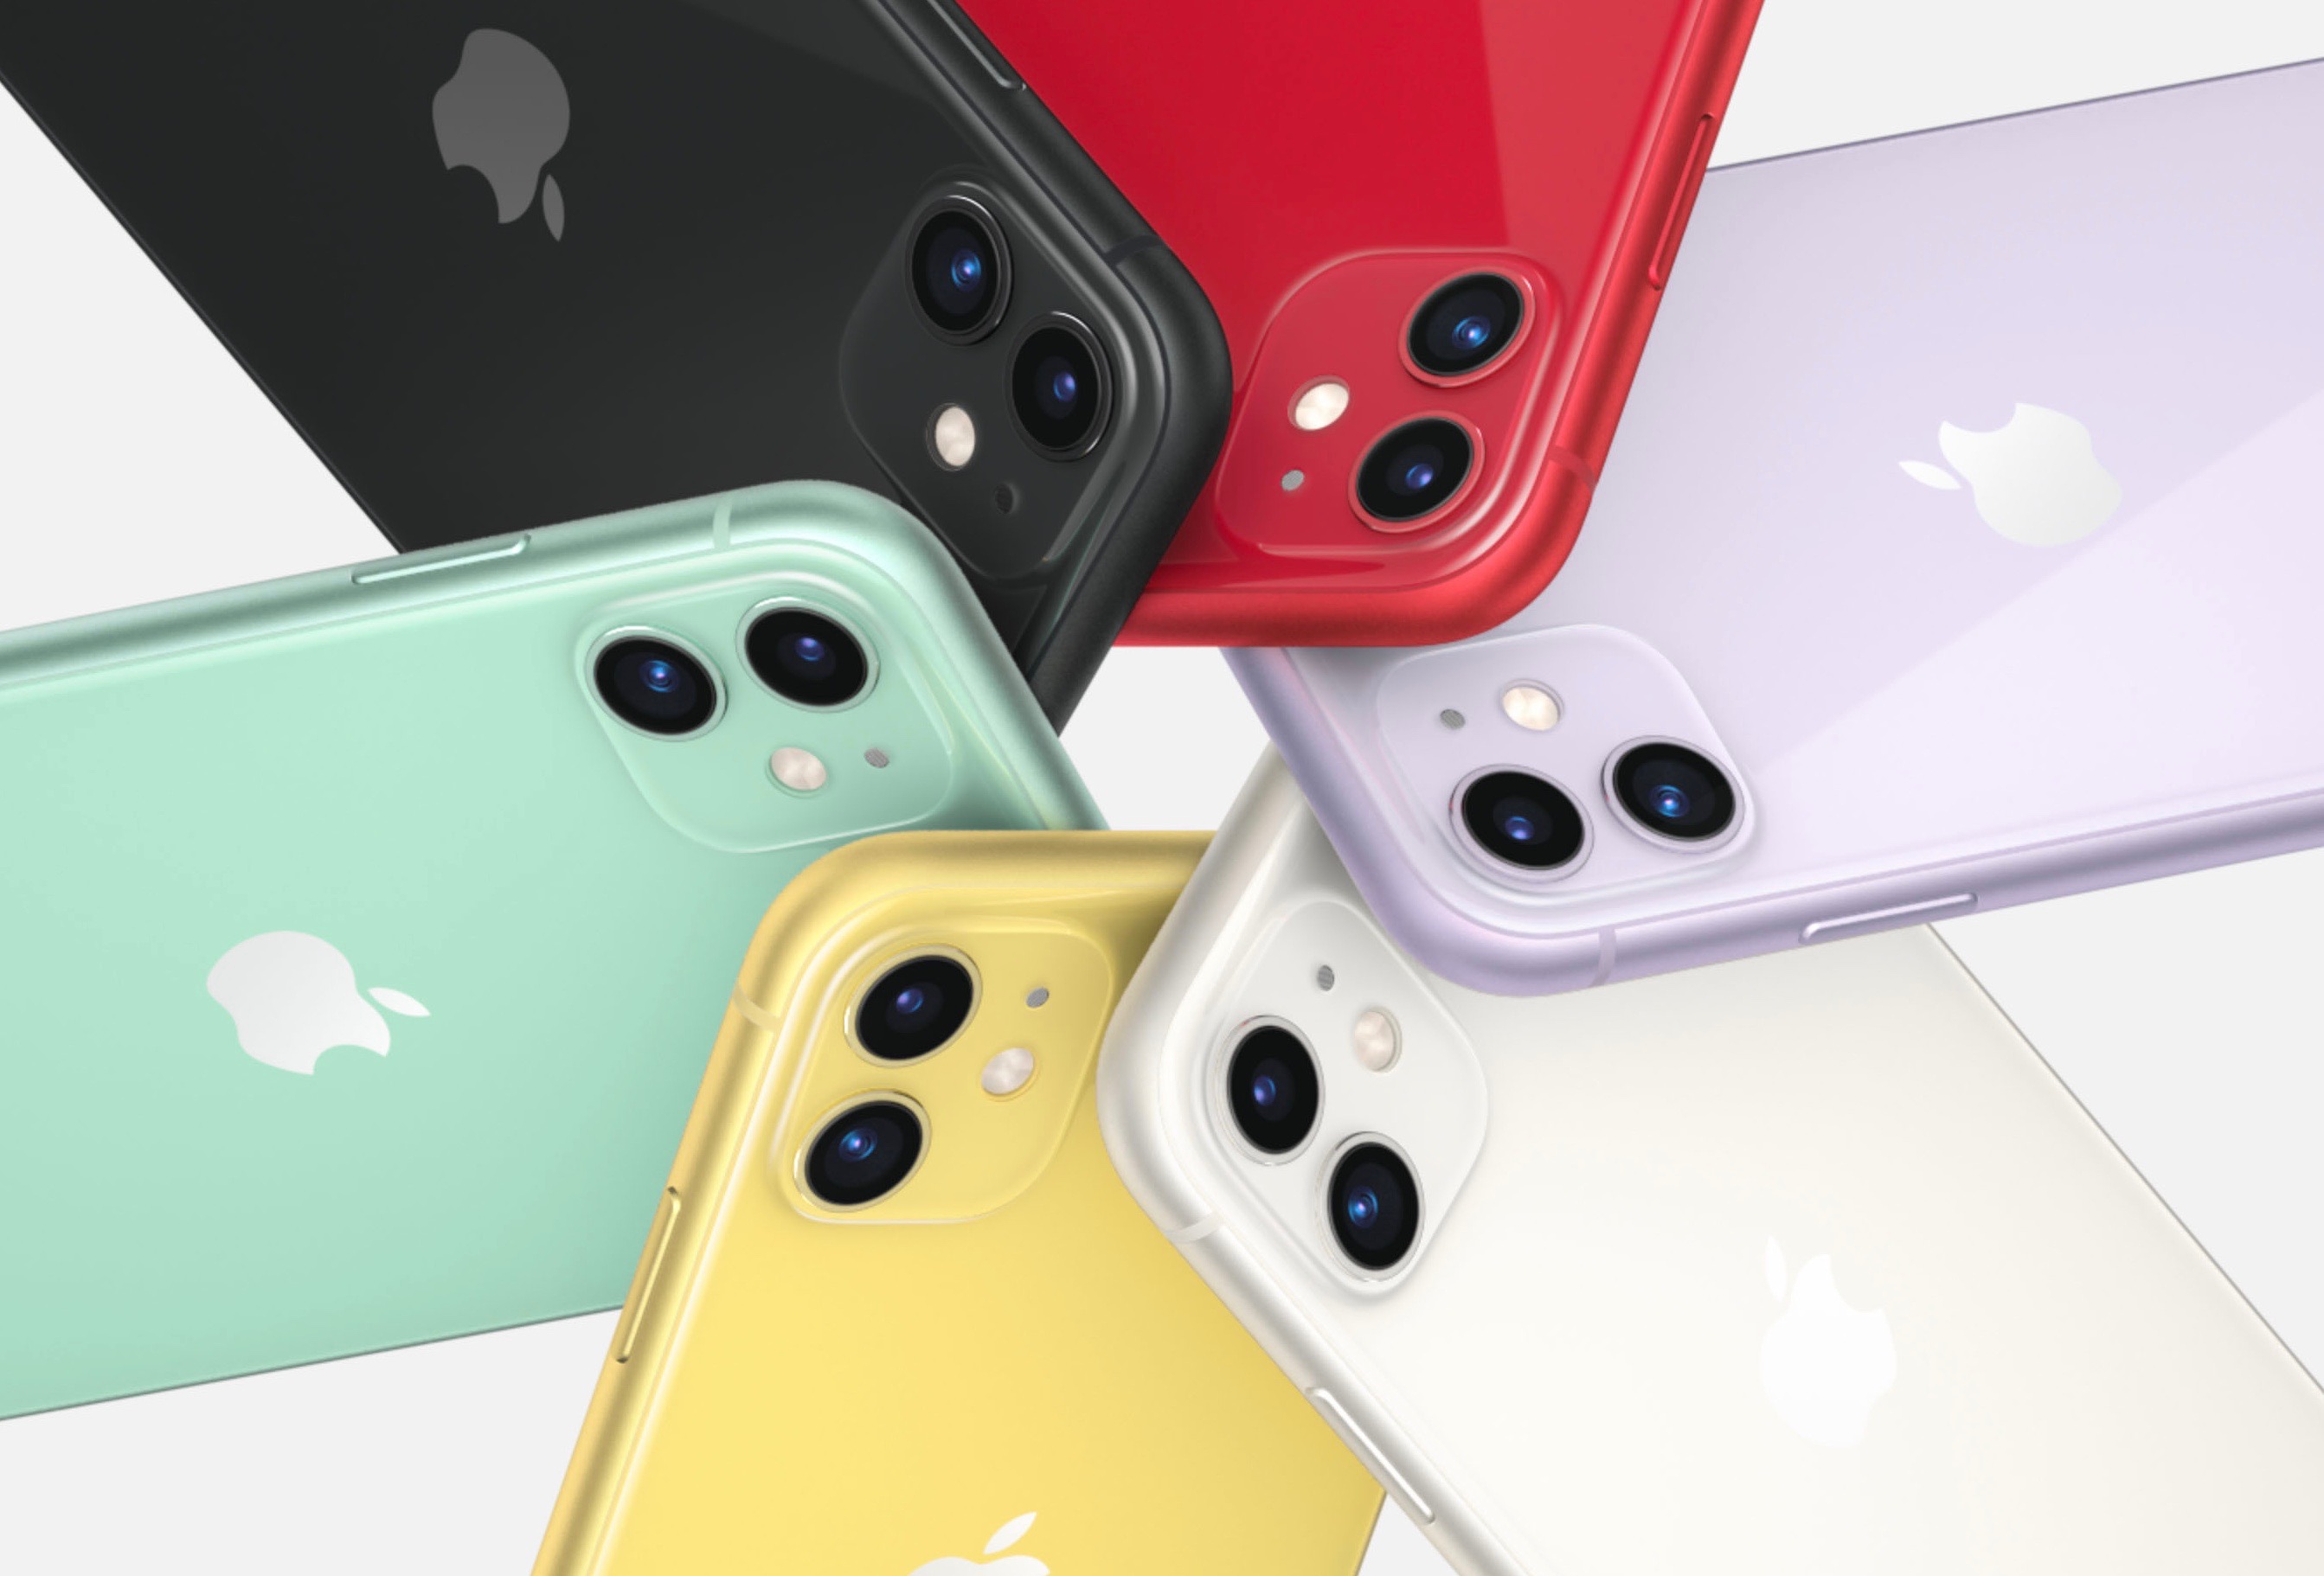
That brings me to the third phone announced that day, the iPhone 11. This phone uses the same processor, has the same Wi-Fi, sound, and chip enhancements, has a one hour battery life extension from last years iPhone XR, and now has two cameras. Apple chose to remove the telephoto camera from the traditional two camera pack and add the wide-angle lens. So this camera has both the standard and wide-angle lens allowing for some of the new features to work from Apple‘s new camera app. The other thing Apple did with this phone was drop the price by $50. That’s pretty amazing considering the tariff situation going on right now. That Apple would actually reduce the price is actually pretty much unheard of. The new iPhone 11 also comes in a number of colors as the iPhone XR did.

So hows a person to choose. Well honestly I’d love to experiment with the new three camera pack in the pro phone but that said, when I look at my standard use case, it just seems to me it’s hard to justify the price of that phone for so little improvement. The pro phones definitely have a better screen, but all of the phones are retina and if you believe Apple’s hype from just a few years ago, beyond retina really doesn’t make a lot of difference. My last phone, and iPhone X, has 256 GB of storage of which I’m using 87 gig. But in the pro phones, you either get 64 gig or 256 gig. Bumping up that storage is $150 additional cost. Now I truly suspect the amount of ram in the phones may be different too. It wouldn’t surprise me to see 4 GB of RAM in the pro phones and only 3 GB of RAM in the iPhone 11 and that will certainly make the speed slightly different, but I don’t believe that’s different enough to cause me to change my analysis.

So here’s my analysis…

iPhone 11 Pro, 256 GB – $1149
(Telephoto camera, better brighter screen, possibly slightly faster)

iPhone 11, 128 GB Dash $749
(Same processor, retina display, white angle camera, and money in my pocket)

Cost difference is $400 for basically an additional camera lens.

So thank you Apple for convincing me that I can spend $400 less on an iPhone this year. The minor improvements, coupled with how similar the iPhone 11 and the iPhone 11 Pro are make me less able to justify that higher cost.

Now my biggest problem is trying to decide which color iPhone 11 I want to get.

Tips on Working with Images in WordPress

I have been blogging off and on for quite a few years.  I was first encouraged to blog by a buddy of mine named Steve Mays. He worked for Learfield communication and was responsible for assisting clients to create blogs of their own mostly related to sports teams.  Steve got me involved in a product called TypePad and over the years I moved on and off of other blogging platforms that are mirror footnotes in blog history. Finally, Steve recommended that I move to WordPress and that seems to have been one of the best recommendations I’ve had in my blogging history. 

I was having coffee with Steve this week and talking about an individual I was working with to begin a new blog. After our talk, Steve wrote up some tips for me on about utilizing the WordPress Media Library.   As I read through the tips I knew I wanted to post them on my blog for others to be able to get the benefit of. Steve graciously allowed me to do so.

WordPress Media Library Tips

The WordPress Media Library is powerful but it takes some thought and discipline to get the most out of it. And the time to start is when you launch the blog. Or before. The following are some things I’ve done right — and wrong — with images (and video) on my blog.

Use a good file naming convention. IMG_0850.jpg is not a good file name. Before uploading, take the time to rename the file and there’s no compelling reason to keep the file name short. In the example below I named the file “exhaust pipe 2apr2019-A” but could have just as easily named it “Land Rover original exhaust pipe brazing April 2, 2019 – A”. The more descriptive the better. And be consistent. Use the same format on all images.

WordPress Media Library

The first field in the WordPress form below is “Alternative Text.” This is what one would see when they hovered their cursor over the image. Especially useful for those with vision problems. The link in the form has more on “alt text.”

Title. By default WordPress uses the file name but you can edit this to title the image as you choose. As far as I know this doesn’t appear anywhere on your blog post.

Caption. I tend not to use captions but this will depend a lot on how you display images in your post. I prefer to describe the image within the body of the post. I just don’t like the way way WP handles captions.

Description. I discovered this useful field relatively recently. I wish I had made better use of it from the first day I moved to WP. Again, as far I have been able to determine, the contents of this field does not appear with the image in the post. I started using this field when I discovered the text is searchable. So if you have 1,000 images in your library and would like to search for all with the phrase “Lake of the Ozarks” in the Description field, make sure you include that phrase. There’s no real tagging feature for images but you can use this field for that. For example, you might include the word *gear* for any photo of equipment; *John and Jane Doe* for each photo of John and Jane; *fall foliage* for… you get the idea.

The trick is to spend some time thinking about this at the very beginning because it’s a pain to go back and do this after you have hundreds of photos and videos. And you’ll be surprised how fast your media library grows. And how often you want to reuse an image you you posted months or years earlier.

Inexpensive Security cameras for the Home

Wyze Cam V2

In the last year or so, the security camera market for your home has exploded.  Where once there were only a couple of options for cameras to choose from, today there are dozens out there and all have their pluses and minuses.  There is a lot to be said for selecting cameras that work inside the infrastructure that you’re already using in your home.  If you have nest products in your homes perhaps the nest cameras are best for you. If you have Ring products in your home maybe ring deserves a second look. The one thing you will find is that selecting one of these big-name infrastructure‘s will definitely cost you. Not only will the cameras be more expensive, but she’ll be forced to live with limitations with each and every set up.

I have tried a number of these different cameras and until recently I have been using a

mixture of D-link and blink cameras.  My DLink cameras have been around for quite a while and I felt like it was probably time to be in looking at other options.  My Blink cameras are only about a-year-old, and are there outdoor cameras. I really love the way they’ve set these up with being battery powered and waterproof. They definitely have a place in my smart home as my outdoor camera variety.

Recently a friend pointed me to some cameras from a company that’s trying to do things a little differently. They are in the process of building their own security infrastructure around their camera models but their big difference is in price. Rather than paying upwards of $200 for a camera, their cameras start at about 25 bucks shipped.  Obviously at that price you’re expecting quite a few limitations, and I would be remiss if I didn’t say there are a few but when it comes to price performance these little cameras are a great option for you to look at. The company I’m referring to is Wyze https://www.wyze.com/ and their Wyzecam products.  

Right now, these cameras come into varieties. The Wyze cam V2 and the Wyze cam Pan.

Wyze Cam Pan

The Wyze cam V2 is their most affordable model coming in at about $26 shipped.  This camera is well featured including night vision and motion detection and comes on an innovative little base that allows you to be able to turn and left the camera to position it exactly the way you want it. Neither of these cameras require a hub because they connect to your wireless network using Wi-Fi. They’re quite easy to activate using the app for your iPhone or android phone. Once activated, you can set them up to send you alerts based upon motion or sound. The cameras have the ability to automatically go into night mode and use the night vision to be able to see in the dark. They can record video to the cloud automatically through the app and also record to an SD card that you can place in the camera. All in all, these cameras have all the features of the $200 models at only $26.

The second model is called the Wyze cam Pan.  This camera is basically the same camera as described above but has the ability to pan left and right and up and down within the app by moving the camera on a rotating basis. Cameras like this from name brands are always very expensive. But this camera comes in at only $36.  It includes all the features of their less expensive model plus the pan feature. 

Wyze App for iOS

Wyze Is also working on adding external motion detection and door sensors to their product. While announced, these have not been released yet but to be quite inexpensive also. At CES this year, they also described a product that will value to have a external hard drive in your house they records all of your video and allows you to use the hard drive as a personal cloud.  If you have an Alexa display, these cameras also work directly with that. You can say “Alexa, show me The living room camera”, and the display shows you live you with that camera.   

Wyze Is quite an innovative company that has made the decision from the beginning to release products at low-cost. If you’re looking for indoor cameras, these definitely deserve a look. At the price they’re charging you can afford to buy one and try it and even if you don’t like it, you don’t have a lot invested.

Multi Camera Event View in Wyze app

iPhone X: Return to the first home screen

Many of us have been using iPhones for a long time. We all know if you’re on a home screen that is not the first page you can simply double tap the home button to return to the first page of your home screens. Unfortunately, without a home button, the iPhone X doesn’t work that way.

I I have always wondered if Apple provided a shortcut on the iPhone X to do that and so I looked it up. It’s amazing I haven’t run across this simple trick before.

On the iPhone X To move from any application back to the home screen all you have to do is quickly swipe up from the bottom of the screen. But if you’re already on one of your home screens, and you again swipe up from the bottom of the screen quickly, it takes you right back to that first page of your home screen just like double tapping the button did in the past.

I probably should’ve looked at trick up sooner.

Look folks, it’s just a scam!

I have heard from a number of people this week that they have gotten calls, mostly on landline phone numbers, from someone reporting to be Apple  telling them that their computer was infected and their accounts with Apple were being discontinued. We’ve seen this happen before and like times before this is just a scam.

The interesting thing this time is those people with caller ID say, this time the Number calling is a local area code. Scammers these days are making it harder and harder to screen your calls.

Let me make a pretty bold statement. Apple, Microsoft, and Google will not call you on your phone to tell you you have a computer problem. They just don’t do that! Anytime you get a call to tell you there’s something wrong with your computer it is someone trying to scam money from you. You can count on this. Ignore those phone calls, Hang up the phone, or cuss the collar out if that makes you feel better but do not allow anyone to connect to your computer remotely unless you know who you’re talking to.

Likewise, if a screen pops up on your computer while your web browsing and tells you your machine is infected and you need to call a phone number, it is a scam. Again, someone is trying to get you to call them and allow them to infect your computer. Sometimes these pop-up screens are hard to get rid of, and often times require you to force quit your browser, but they are not real.

Even secure devices like iPads, iPhones, or chromebooks, are susceptible to this same type scam. These people are using a webpage pop up, many times coming from an ad on that webpage, to make you believe there’s a problem when there really isn’t.

All of these efforts, are called social engineering. Computers have become so secure that it’s very difficult for a nefarious person to get access to your computer on their own. It is much easier to do something that convinces you to infect your self. That’s what they’re trying to do. Don’t let them be successful.

If you are troubleshooting a problem, and you call Apple  or Dell for assistance, sometimes they will ask to connect your computer to look at what’s going on. The big difference here is you initiated the call to Them. It was at your choice and not as a result of some pop up message on your screen or a phone call coming into your home. In this case, it’s likely all right to allow them to connect but if you’re not sure you are much better off consulting with someone who can assist you locally rather than taking the risk.

And so it goes…

Which iPad is for me?

In the past couple weeks I’ve probably had four or five different folks asked me which iPad they should get. Apple provides a number of choices in iPads but a major part of the decision is based upon the size of the screen. The first thing I usually tell people to consider is the screen size. 

Originally, the iPad was a 9.7 inch device.  Apple has continued that size in its major consumer market device the six generation iPad. For most people that size is perfect. It’s larger than a phone but not so large that it’s hard to carry around with you.  But if 9.7 is not for you, Apple has other choices. 

The iPad mini with a 7.9 inch display is still available. I often caution people but the iPad mini has not been updated in quite a while so it’s performance is not the best. It also only comes in a 128 GB configuration. There are plenty of uses for devices that size, particularly in Home control. This iPad can be popular with women who want to be able to carry their iPad in their purse. 

If you’re interested in a larger screen size, you need to look to the iPad Pro models. iPad pros are available in 10.5 inch displays and in 12.9 inch displays. One interesting thing is that the 10.5 inch model is really not much larger than the 9.7 inch six generation. So size for carrying really doesn’t make much difference there. The largest iPad Pro is a mammoth. The display is it as large as many computer displays so an iPad of that size is sometimes a little hard to carry around.

Once you get an idea of what size screen you’re interested in the next thing to look at is the features of the device. Memory is one of the major things that differentiates cost in many of the iPads. A minimal amount of memory is 32 GB and that’s what Apple provides and it’s entry-level devices. The next step these days tends to be 128 GB and typically adds about $100 to the cost.  You can’t even get 256 GB in an iPad Pro if you have the need. For most people, 32 GB is plenty.  If you are a content creator or take a lot of pictures with your iPad, you probably should consider a larger size. But basically when looking at Apple’s lineup, the entry-level devices in each model typically provide a enough memory for the average user.

In addition to screen size differences, the iPad Pro models also provide extra functionality. They have the ability to add apples keyboard, which by the way doesn’t require batteries or Bluetooth pairing.  Until recently, the ability use an Apple Pencil with the iPad was one of the features the pro had that you could not get in a standard iPad. But Apple recently introduced it six generation that has Apple Pencil support so that’s really not a consideration any longer.

The iPad Pro models also have better displays. The displays are not just higher resolution. They also definitely have better color tone and less reflectivity. An iPad Pro Is significantly more expensive than the six generation iPad. While there are people who need this additional functionality and can make great use the device,  the average user is probably not in that category.

There also performance differences between the iPad Pro and six generation model but in my opinion these are pretty minor. Functionality within the operating system is just about the same between the two devices. Both of these devices are very fast. Unless you’re looking for the absolute top-of-the-line performance, I don’t think that performance differences make much of a difference in your choice.

For more information about the differences between these iPads, check out Apple‘s website to see a feature by feature comparison.

I typically use a 10.5” iPad Pro. With the advent of the six generation iPad the differentiation between the iPad Pro in the iPad is much less, at least for now. That being said, my recommendation is that most people seriously consider an entry-level six generation iPad for $329. 

The new six generation iPad is a great blend between performance, size, and functionality. Fortunately for all of us, because Apple is trying to get this device used in the education market, Apple has priced it at a reasonable cost.

But Apple never stops.  You can count on Apple revising the iPad Pro soon to better differentiate it from the sixth generation model.

If you’re really not sure about the differences between the devices, head out to a Best Buy where you can see them both side-by-side. But now that you know a little bit more about the differences, don’t let the Best Buy salesman upsell you to an iPad Pro if you really don’t need it.

Local Apple user group hosts Q&A at May Meeting

Mark your Calendars!  appleJAC users group in Jefferson City is hosting a Question and Answer meeting at 7pm on May 1st at Immaculate Conception Church, Kennedy Hall.  This is a golden opportunity to get your nagging questions answered on Macintosh, iPhone, iPad, or anything Apple related.  This group, that meets monthly, has a wealth of knowledge relating to all things Apple.  It it was made by Apple, or connects to an apple device, we will do our best to answer you question.

Feel free to bring you computer, phone or tablet along and get those questions you have answered.  Since many people will have questions, you will likely learn about many things you were afraid to ask about. You can ask questions from the floor or write them down and submit them.  There are no dumb questions!

You don’t have to be a member to attend so mark May 1 on your callender and plan to learn more about your Mac, iPhone to iPad..

For more information on appleJAC or the upcoming meeting, check out their website.

Getting Ready for iOS 11!

With Apple already in beta testing iOS 11, it’s always good to go back through the list of things that you need to do to prepare before updating your phone with a major operating system update. If you follow these simple steps, the odds of your update going well are greatly increased. Over the years Apple has made installing new updates pretty simple. When the update is ready it will show you on the device by showing you a small red number on top of General icon in the Settings application.  But many times if you go into system updates and check for an update it will show you it’s available before the icon shows. If you’re in a hurry to update, you might give this a try.

1.) Check to see if your device is iOS 11 capable

The iOS 11 update is officially coming to the iPhone 5s and later, all iPad Air and iPad Pro models, iPad 5th generation, iPad mini 2 and later and iPod touch 6th generation. This means popular devices like the iPhone 5 and iPad 4 are staying put on iOS 10.  If Apple releases any new devices, iOS 11 will be standard on them.

2.) Make sure you have enough space for the update

iOS 10 required as much as 2GB of space and while its unknown how much its successor will require, you can be sure its going to be similarly large amount. Apple will prompt you before downloading if you do not have enough space, so either way you will either have to get rid of some unnecessary apps, photos, music/TV shows/movies or other data you might not need right on your device .  One place that I see space often used on iOS device is in the camera roll. If you sync your photos over to your computer and delete them from your phone that will free up that space. You can always put photos back on the phone using iTunes at the time of sync.  In previous releases, Apple has offloaded applications to automatically free up space but it is always a good idea to do the cleanup yourself, just to be sure.

You can check how much space you have by going into settings and then general.  Select about and then it will tell you in the list how much free space you have on your device. iOS updates often have additional applications updated too. Apple generally updates many of their apps at the time of the system update so you’ll need additional space for those. Don’t cut your space to close.

3.) Is your device running iOS 10.x.x?

You’ll likely be able to update from any version of iOS 10 version and quite likely any version of iOS 9.  If your device is running a version older than iOS 9, you may have to update that far first and then move to iOS 11.  We will have to wait and see to be sure.

4.) Do you have the latest version of your apps?

If you don’t want to lose your app or its data, make sure they are up to date. This will also ensure you get the most out your apps in iOS 11, as they will have been tinkered with for iOS 11 integration. Just check for updates, and apply all updated applications that you find prior to the operating system install.  Apple usually announces the release date of a new iOS version about a week before it is available.  That is a great time to update your apps.

5.) Back up your device!

This is the most important step you need to take before updating. While everything is done to ensure the transition to iOS 11 goes smoothly, major updates can go awry. To back up, simply follow these steps:

  • Connect your iPhone or iPad into your Mac or PC and open iTunes.
  • Select your device under Source and select “Summary.”
  • Under “Backups” select “This Computer” and then “Back Up Now.”

I also recommend encrypt in your back up. If you encrypt your back up, and give it a password that you have to enter when you restore it, all of your passwords that you stored on your device will remain. This keeps you from having to go back in and reenter passwords in applications, or mail, before you can use the new OS.

So here is my final bit of advise…..

For most general users, it is often good to wait a about a week after the new OS is available to make sure there are no issues with it.

That’s about it. You’re ready to go. Enjoy the new OS. All the new features will be great fun to play with.

Posted in iOS

Application Specific Passwords for your iCloud Account

App-specific passwords allow you to sign in to your account securely when you use apps that don’t natively support two-step verification or two-factor authentication. There has been quite a bit of conjecture on the internet that very soon, any non Apple application that access iCloud data, like Microsoft Outlook, and specifically Windows machines accessing iCloud information will be required to use an application specific password.

Before creating app-specific passwords, two-factor authentication must be enabled for your Apple ID. As of iOS 10.3 and later, two-factor authentication is automatically setup for new Apple ID accounts. iOS 10.3 also auto-prompts existing accounts to upgrade. This makes sense as apple has been pushing people to use two-factor authentication now in many ways.

To make an app-specific password, do the following:

  1. Sign in to your Apple ID account page at https://appleid.apple.com
  2. In the Security section, click Generate Password below App-Specific Passwords.

  3. Fill in a name for the password you are creating so you can remove it if you desire later
  4. A dialog will come up and show you the password that was generated

  5. After you generate your app-specific password, enter or paste it into the password field of the app as you would normally.

You can have up to 25 active app-specific passwords at any given time. If you need to, you can revoke passwords individually or all at once.

If you want to revoke one of these application specific passwords, in the security section of your applied management page, click on edit.  Then under App specific passwords, click View History.  You will be shown a list of all the application specific passwords you have used.  Click on the one you want to remove and click to remove it.

Get used to this because tighter security is coming to an iCloud account near you very soon.

Saving a PDF from your iPhone or iPad and storing it to Cloud Storage

In the current release of iOS it’s easy to print to an airprint enabled printer by simply selecting the print command, choosing your printer, and telling it to print.  But what if you don’t have an airprint enabled printer or you just would rather save the file to a PDF?


It’s actually pretty simple to create the PDF from the print routine in iOS want you know the secret. First deal with your document the way you would if you were going to print it. Bring it up on the screen and select the print command, Once the print command is running, simply use two fingers to pinch outwardly from the center of the print preview that showing on the screen. This will launch preview and bring the document you had selected into it.

From there you can select the share command, the little square with the up arrow, and save it to iCloud Drive, Dropbox, or even Google Drive. The file gets saved as a PDF of the document you started with. This gives you the ability to create and store to your cloud-based storage, a PDF from any document you can bring onto the iOS screen of your iPhone or iPad .
Give it a try. Actually might come in handy one day.

Posted in iOS