 That’s the bounce back message your friends may see if you fill up your server based email box. Just because you download your messages you cannot be sure that they are being removed from the server by default.
There are two types of email server systems in common use today. These systems are referred to as: POP and IMAP.
IMAP (Internet Message Access Protocol)
IMAP is a protocol by which you can read email. IMAP allows you to view your email from more than one place. E.g. from your desktop computer at work and from your laptop at home and from abroad and from your mobile device – multiple locations.
IMAP keeps the messages on the server until it is told to delete them. In a typical IMAP implementation, all the messages you see on your mail program are located on the server. With IMAP you have a service provider imposed storage limit called a quota. If you run out of space on the server you will not be able to download new emails into your account!
POP (Post Office Protocol)
POP is better if you have no need to check your email in multiple locations. If you only ever check your email on one computer at, then POP is fine for this purpose. In most cases, when you bring the email message down to your computer, it removes it from the server. But this is a setting and some people, in a hope to save everything they ever get in email, just in case, set it to not remove messages. In these cases you can also see the same message when you run out of space.
Which one is better?
One big problem here is that not all service providers provide both types of email access to choose from. Most services that are intended for use on phones, tablets, or computers, may only offer IMAP. Examples of IMAP providers are: Gmail, iCloud, Outlook.com, Yahoo, and AOL. In the over al scheme of things, IMAP is a much more modern protocol because it, having a centralized storage database for mail, allows you to delete a message from one place and have it deleted from all your computers or phones attached to this mailbox.
But not every provider provides IMAP. Many Internet service providers will only give you access by POP. These are typically companies more interested in providing internet service than mail. An examples of this is Mediacom, a local internet service provider where I live. These companies don’t want to provide IMAP because while it is much better for the consumer, it requires more server infrastructure to store these messages on their end.
How do I deal with “Mailbox quota exceeded”?
This depends on the type of account you use.
For a POP account, you need to be sure your mail client is set to delete messages from the server. Most mail clients are very similar in setting this up. You need to go to the account settings and look for a checkbox that says something like” Remove from server after:” and provides some choices such as one day and one month. One Month is usually a reasonable setting. With this turned on there is often a “Remove now” button that will remove all server mail older than the one month setting you chose. But don’t worry, with a POP account, if the messages are on your computer, even though you delete it from the server, it will stay on your computer.
For an IMAP account, it’s not quite as straight forward. Since the messages on the server match those on your computer, the only ways to clean this up are to either delete messages, move them to a local folder, or increase your quota.
Deleting messages is simple but requires quite a bit of time since you need to make decisions on what is good to keep and what is not. Be sure to empty the trash in mail to clear them out after marking them as trash. Moving them to a local folder requires you to create a folder within your mail client and select messages from your inbox to copy to this local folder. This then stores this mail on your computer and removes it from the server. If the domain is something that you host of have control of, you can often go into the service providers cpanel (control panel) and increase the mail quota. This is a little different for all providers so you might want to read their instructions before trying to do it.
The most important thing to keep in mind is to not be a hoarder. Clean up your email and don’t let many thousand messages accumulate just because you don’t have time to go through them. Setup up a junk filter and have these messages deleted immediately.
[stextbox id=”info” caption=”Setting Mac Mail to delete messages on a POP account”]
 In Mail, do the following:
Go to the Mail menu and select Preferences
Click on the Accounts icon and select the Advanced tab
Click the checkbox on for “Remove copy from server” and select “On Month” in the dropdown box below the setting
Now press Remove Now
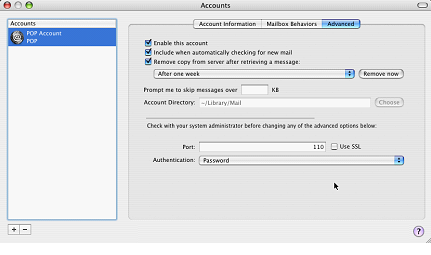
[/stextbox]

 Many people ask me how I know so many answers to tech questions. Part of what I know is how to perform a good Google search. Here are some tips from the Google Support site on how to do a good Google search.
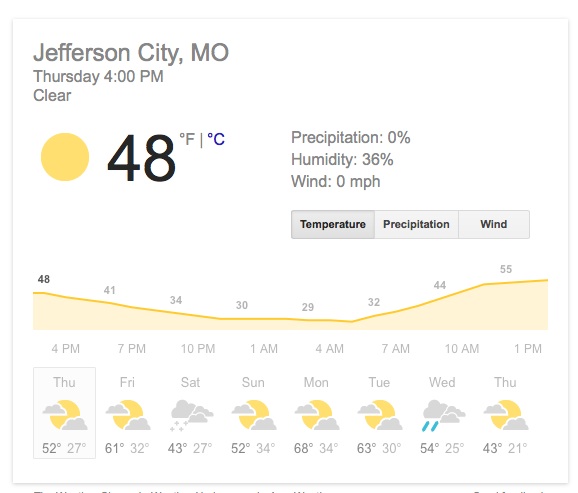 weather to find weather for a certain place.


 In Mail, click the Junk E-mail folder in the