At least once a year I like to give my opinion on what type of a computer someone should be looking for if they’re in the market to purchase a new machine. Many times, there are so many computers on the marketplace that it’s hard to make a decision based upon the functionality you’ll need to use. Basically I break these into two categories, a minimum performance machine and a high-performance machine. If you are a high-performance user, you already know that. If you’re not sure, a minimum performance device is probably where you need to be working.
Often times in the big box stores you find machines that have some of the specifications but not all of them. Big box machines are typically built, particularly on the PC side, with a price in mind. Often times, the machine has specifications that don’t meet current use specs. This also shows up on many Internet sites. Be sure to look into the specifications you’re selecting for the machine that you’re looking to purchase.
In my opinion, brands do matter. Seeing many machines with problems, I can say that Macintosh computers are generally the most trouble free and will maintain good performance for a longer period.
But some people need Windows for specific applications. When it comes to Windows computers, my experience says that I would look for these brands (in order):
- Dell
- HP
- Lenovo
All three of these vendors maintain good support websites and make updating hardware drivers easier. That doesn’t mean much when the machine is new but as it ages, it means everything.
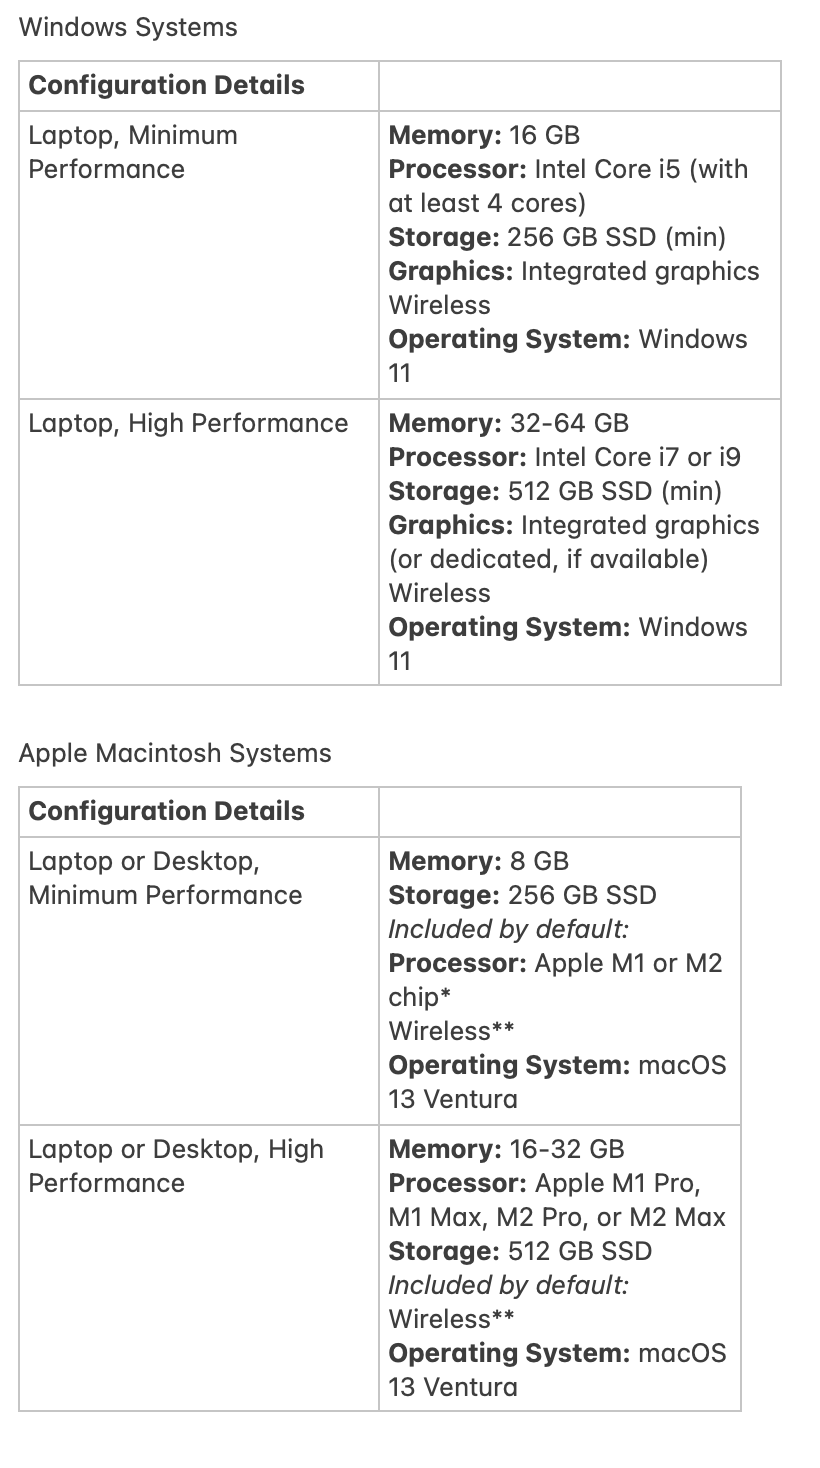
Windows Systems
Laptop, Minimum Performance
Memory: 16 GB
Processor: Intel Core i5 (with at least 4 cores)
Storage: 256 GB SSD minimum
Graphics: Integrated graphics
Networking: wireless
Operating System: Windows 11
Laptop, Higher Performance
Memory: 32-64 GB
Processor: Intel Core i7 or i9
Storage: 512 GB SSD minimum
Graphics: Integrated graphics or dedicated if available
Networking: wireless
Operating System: Windows 11
Foe Macintosh Systems, a MacBook Air is the correct machine for entry to mid stream users today. For more professional uses and MacBook Pro is great. If you want a desktop the new M3 iMac is great and either the Mac mini or Mac Studio on the higher end make great sense. Avoid the Mac Pro desktop. It’s price vs performance is low for nearly all users.
Macintosh Systems
Laptop, Minimum Performance
Memory: 8 GB
Processor: Apple M2 or M3
Storage: 256 GB SSD minimum
Graphics: Integrated graphics
Networking: wireless
Operating System: MacOS 14
Laptop, Higher Performance
Memory: 16-32 GB
Processor: Intel Core M2 Pro, M2 Max, or M3 series
Storage: 512 GB SSD minimum
Graphics: Integrated graphics or dedicated if available
Networking: wireless
Operating System: MacOS 14